Configure Custom File Zone for Firebolt
- 3 Minutes to read
- Print
- DarkLight
- PDF
Configure Custom File Zone for Firebolt
- 3 Minutes to read
- Print
- DarkLight
- PDF
Article summary
Did you find this summary helpful?
Thank you for your feedback!
Setting up a Custom File Zone in Rivery is an optional feature, with the default option relying on the Managed File Zone provided by the platform, which requires no setup.
The main advantage of setting up a Custom File Zone is the ability for organizations to ensure that data is stored within their own file zones, as opposed to being stored in Rivery's Managed File Zone. This also enables organizations to use the Custom File Zone as a data lake, where raw data can be stored before it is loaded into a Target cloud data warehouse. Furthermore, organizations have the ability to define their own retention policies for data stored in the Custom File Zone. Rivery's Managed File Zone (default) retains data for a period of 48 hours.
Before you use this guide, please make sure you’ve signed up for AWS and you have a console admin user. If you don’t have one of these prerequisites, you can start here.
Create an S3 Bucket
Firebolt needs the data to be loaded to an S3 bucket to serve as the basis for an external table for further ingestion.
Note: You can find the up to date documentation of S3 operations and getting started here .
So, let's create an S3 bucket for Rivery:
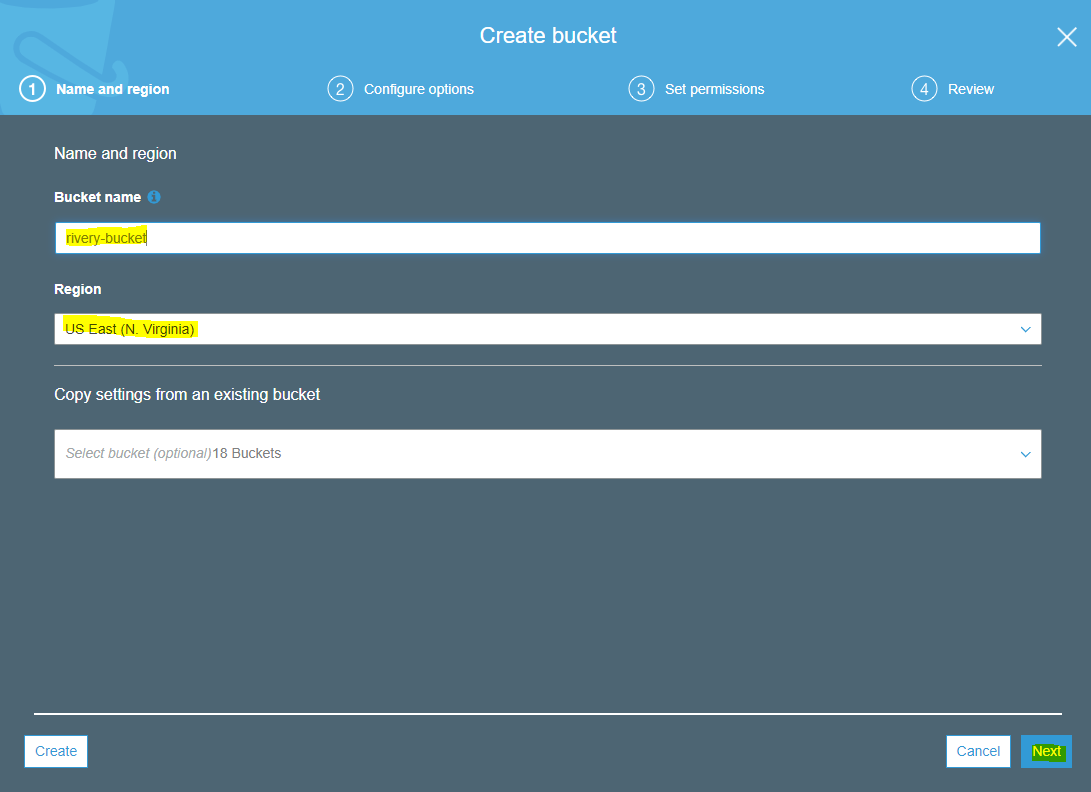
Go to S3 Management in AWS Console .
Click on Create Bucket
Give the bucket a name, and choose the same region your firebolt database will be on. Use the S3 wizard defaults by reviewing and following the wizard screen, and click on Create Bucket .
Create an AWS User for Rivery
Rivery uses Amazon S3 bucket to upload your source data into it and then pull that data to your target. Therefore, there is a need to create a user in Amazon Platform Console, that will have the relevant bucket.
So, first of all - let’s create a user for Rivery and we'll give it permission to manage and read the File Zone bucket.
How do we do that?
Sign into AWS Console
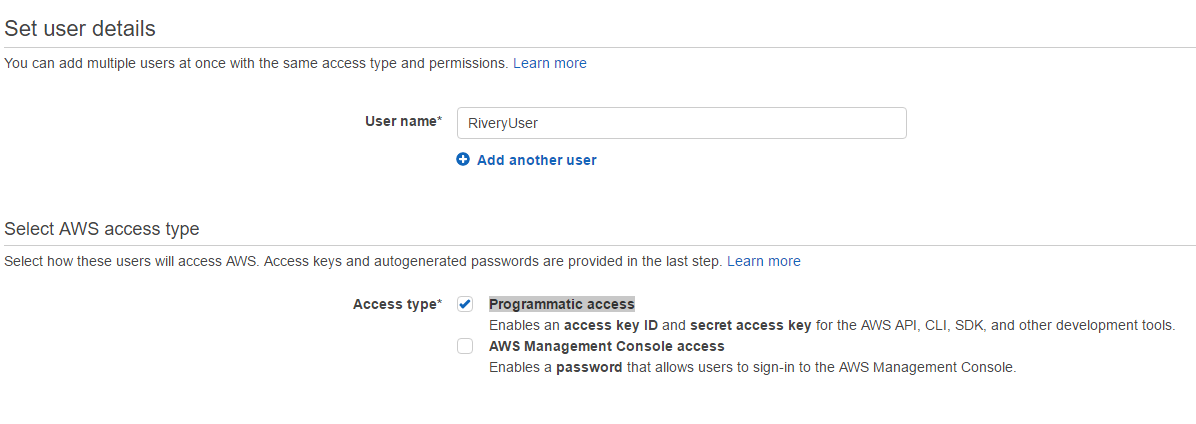
Go to IAM in AWS Console -> Users - > Add User
In the wizard, set your username (i.e: RiveryUser), and check the Access type to Programmatic access. Click Next .
In the Set Permissions screen, choose Attach Policies Directly.
In order to create new permission for the user, click on Attach Existing Policy Directly and then on Create Policy. A new tab with AWS policy generator should be opened.

In the policy generator screen opened, click on JSON tab.

Paste the permissions configuration below to the blank text box that opens and press Review Policy. Please don’t forget to replace the bold areas with your current settings, as you set before.
Replace the <RiveryFileZoneBucket> with the S3 bucket name you've just created.
  {
 "Version":"2012-10-17",
 "Statement":[
   {
    "Sid":"RiveryManageFZBucket",
    "Effect":"Allow",
    "Action":[
    "s3:GetBucketCORS",
    "s3:ListBucket",
    "s3:GetBucketLocation"
     ],
    "Resource":"arn:aws:s3:::<RiveryFileZoneBucket>"
   },
   {
    "Sid":"RiveryManageFZObjects",
    "Effect":"Allow",
    "Action":[
      "s3:ReplicateObject",
      "s3:PutObject",
      "s3:GetObjectAcl",
      "s3:GetObject",
      "s3:ListObjects*",
      "s3:PutObjectVersionAcl",
      "s3:PutObjectAcl",
      "s3:ListMultipartUploadParts"],
    "Resource":"arn:aws:s3:::<RiveryFileZoneBucket>/*"
  },
  {
     "Sid":"RiveryHeadBucketsAndGetLists",
     "Effect":"Allow",
     "Action":"s3:ListAllMyBuckets",
     "Resource":"*"
  }
 ]
}
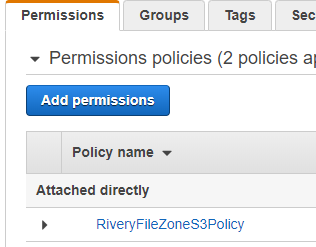
Name your policy (i.e. RiveryFileZoneS3Policy ) and click on Create Policy.
Go back to your browser tab of the user creation (it should be opened already), Refresh the policies list using the button in the right, search and Mark the policy just created, and click on Next: Tags.
End the process by clicking on Next: Review and then on Create User.
In the Complete section, you will get the user’s AWS credentials (aws_access_key_id, aws_secret_access_key) and the user's ARN .
Save the credentials in a safe place!
You will need all of them afterward, in Rivery .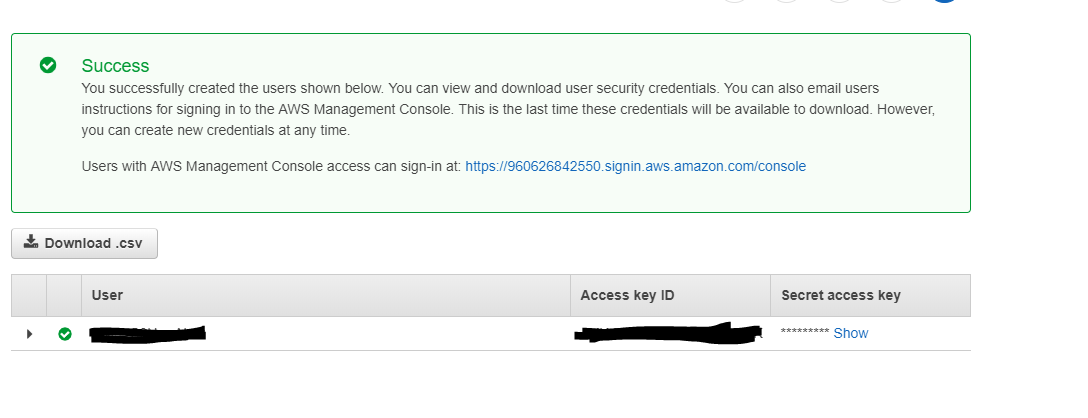
Now, the User should have permissions to manage and read the FZ bucket created for Rivery. Please make sure the policy you've created attached to the user created.
Configure custom File Zone for Firebolt in Rivery
Now, let's configure the bucket we've just created as a Custom File Zone in Rivery.
Open your Firebolt Connection, by going to Connections->Create New Connection, and choose Firebolt.
In the connection, check the Custom File Zone
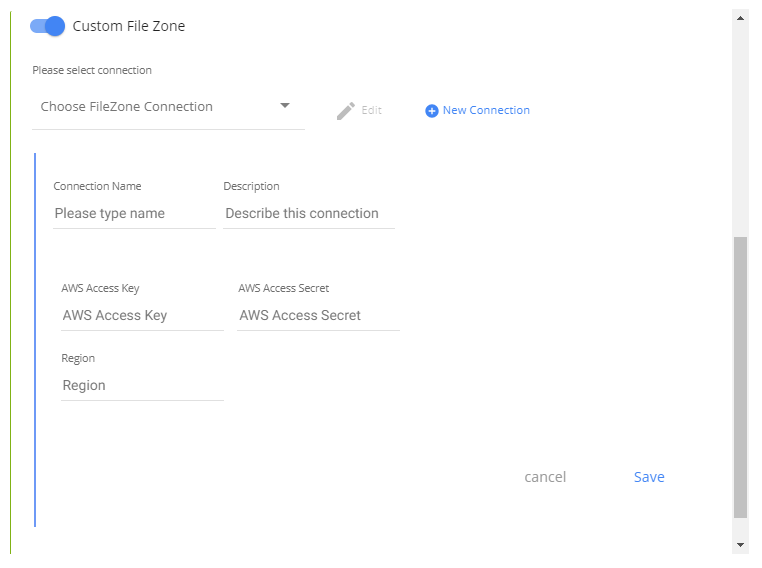
If you have already an S3 connection, you can set it here as a Custom File Zone connection or you can create a new connection.
In the form, set your Aws Access Key and Aws Access Secret Key, and Region Key .
Name your S3 File Zone Connection and Save.
Now you can test your connection .
After saving, Choose your default bucket for your File Zone area. Use the bucket you've created in above:
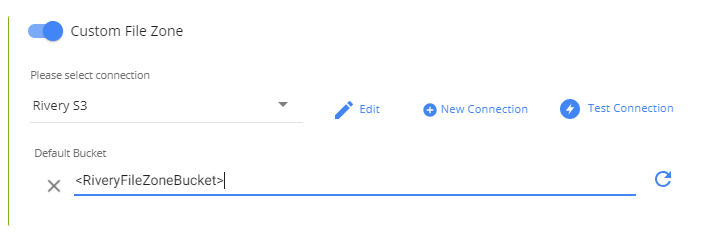
Save the Fireblot connection.
Was this article helpful?