Rest API Custom Connection
- 3 Minutes to read
- Print
- DarkLight
- PDF
Rest API Custom Connection
- 3 Minutes to read
- Print
- DarkLight
- PDF
Article summary
Did you find this summary helpful?
Thank you for your feedback!
Introduction
In Rivery, a custom connection is a flexible connection that can be used in Action Rivers. It is called "custom" because it allows for the configuration of various parameters based on the requirements of each Action River. As not all REST APIs are created equal, the custom connection provides the flexibility to accommodate different details needed for each Action River.
Custom connections can be utilized in REST Actions, Multi-Actions, or Data Source to Target Rivers that use REST Actions as a Source. However, it's important to note that custom connections are not mandatory, and the connection option can be left empty in each of the mentioned River types.
Benefits of Using Custom Connections
The custom connection serves as a collection of variables, offering 2 major advantages:
Encryption of Values: Custom connections provide the option to encrypt values, making it useful for handling sensitive information such as passwords and tokens.
Connection-Level Variables: Unlike variables set in a specific Action River, custom connections store parameters as variables at the connection level. These variables can only be used in Rivers that use the connection. This feature enables the reuse of the same connection in multiple Action Rivers, eliminating the need to set parameters individually for each River.
Therefore, custom connections are particularly valuable when there is a requirement to use the same connection in multiple Action Rivers and when sensitive information needs to be securely managed within the connection.
Establishing a New Custom Connection
To create a new custom connection in Rivery, follow these steps:
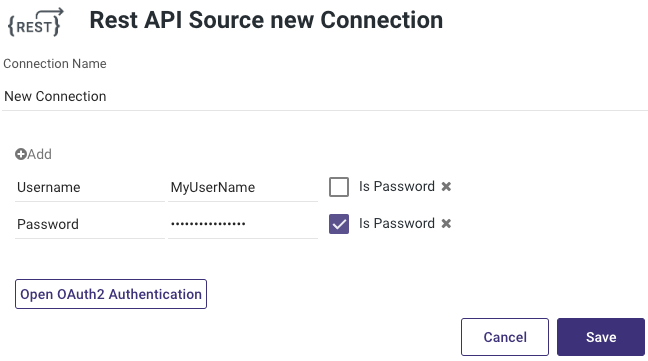
- Add a Connection Name to provide a descriptive name for the connection.
- In the Key input, enter the name of the connection parameter, and in the Value input, provide the corresponding value.
- If a connection parameter contains sensitive information, such as passwords, select the "Is Password" checkbox to hide its value.
- Add as many connection parameters as required. All of these keys will then be available as variables in any REST River, including Action Rivers, Multi-Actions, and REST Data Source to Target.
- Click the "Save" button to complete the process.
Using a Custom Connection in an Action River
To use a custom connection in an Action River, follow these steps:
- Select the desired type of Action River.
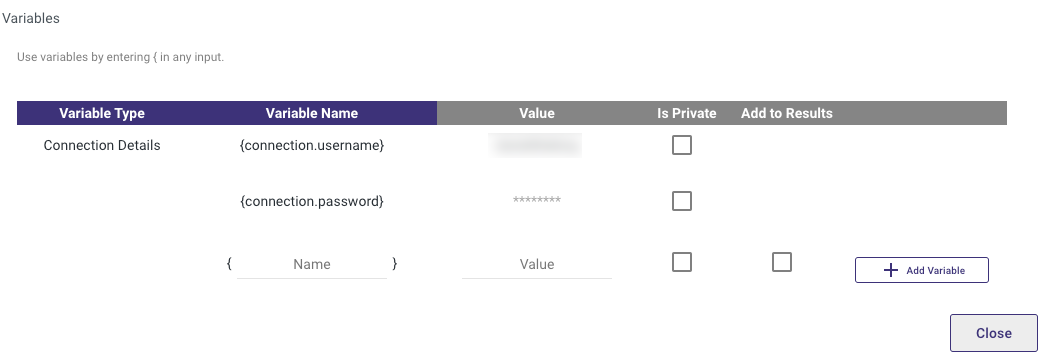
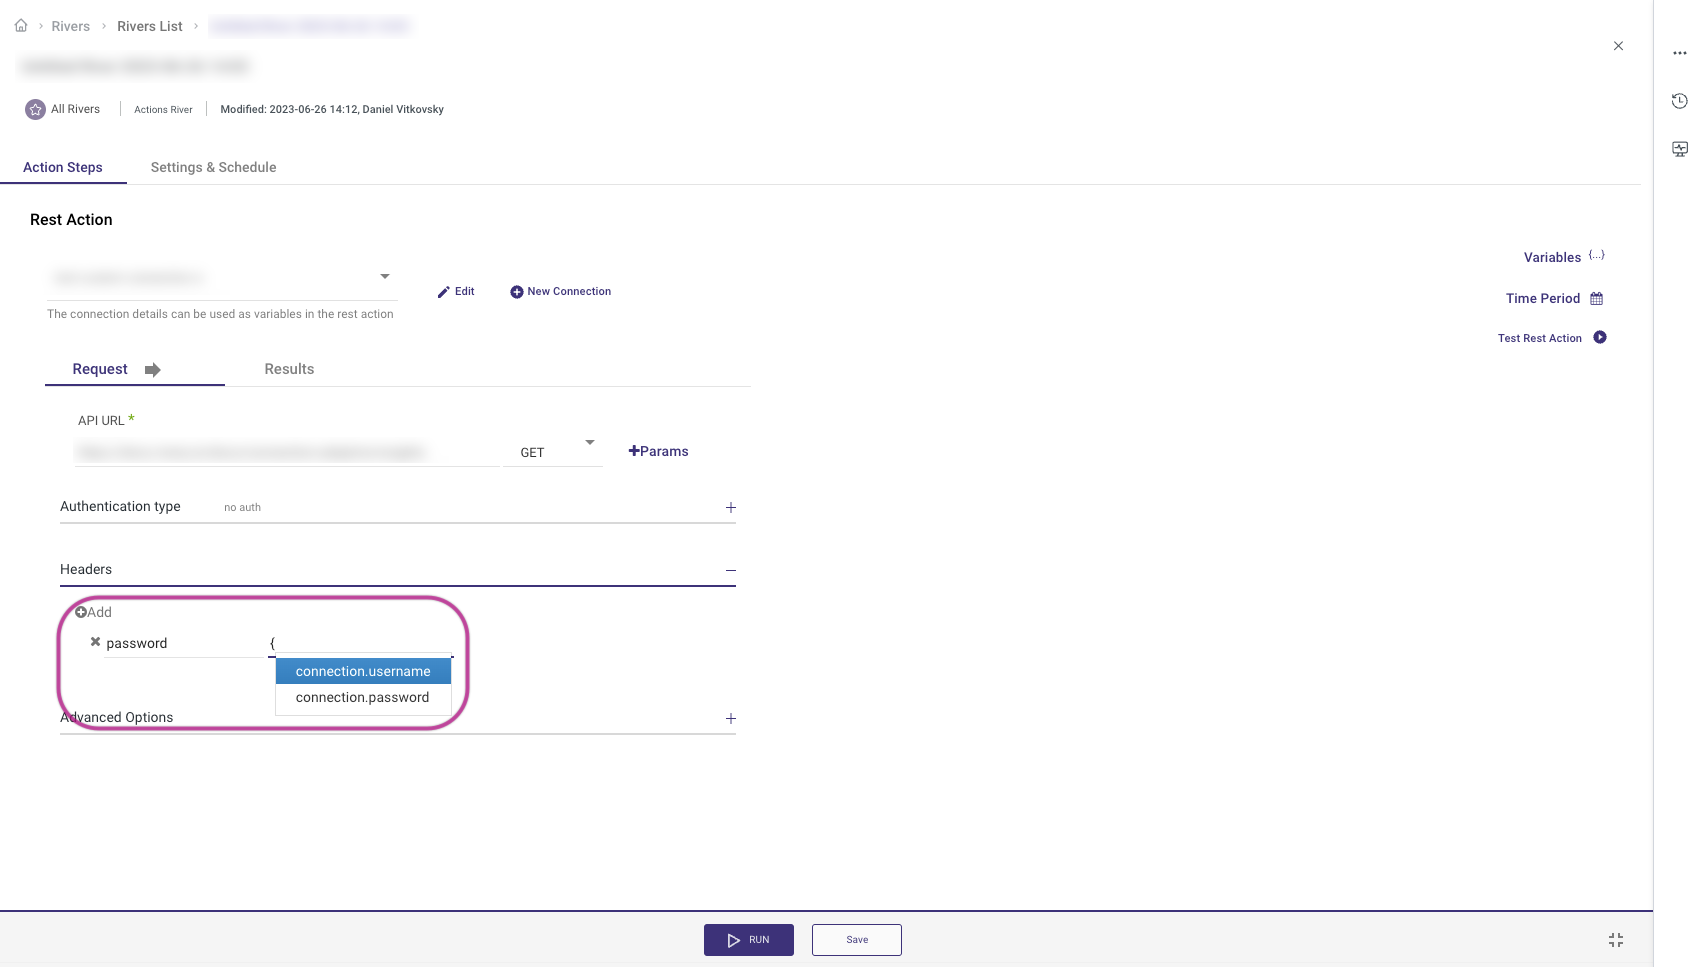
- Use the curly brackets {} to reference the details of the custom connection in any valid input field.
For example, if a connection parameter is named connectionParam, it can be accessed within an action by typing "{connectionParam}" in the appropriate input field.
Furthermore, connection variables should be used with the prefix "connection" in any input requiring connection details, such as headers or the body of the request.
OAuth2 Authentication
Rivery also supports OAuth2.0 connections to REST APIs. To submit an OAuth2.0 request, follow these steps:
- Important: Add Rivery's callback URL, https://console.rivery.io/api/oauthcallback/custom, to the settings of the app you are authenticating.
- Click on the "Open OAuth2 Authentication" button.
- Fill out the form with the required elements, which can typically be found in the API's developer documentation. The elements include:
- Authentication URL: The URL provided by the API to initiate an authentication request.
- Access Token URL: The URL provided by the API to request an access token.
- Client ID: The public identifier for the app.
- Client Secret: Passphrase to authorize the app.
- Scopes - Choose the required scopes from the available options.
- If the form is filled in correctly, a popup will appear, prompting authentication to the API.
- Log in to the service to receive an access token and refresh token.
- Any details received from OAuth2 authentication will be automatically added.
- You have the option to add other parameters in the "Additional Options" section.
- Click the "Submit OAuth2" button to complete the process.
Here's an example of an OAuth2 Microsoft connection:

Please Note:
- The curly brackets contain custom connection parameters that are being referenced.
- To see another example, you can refer to our community page, which demonstrates the step-by-step process of setting up Zoho CRM OAuth2.
Limitation
The maximum response size is 100 MB. An error will be presented whenever a user tries to retrieve a file larger than 100 MB in a single response.
Was this article helpful?