Adobe Analytics Connection
- 3 Minutes to read
- Print
- DarkLight
- PDF
Adobe Analytics Connection
- 3 Minutes to read
- Print
- DarkLight
- PDF
Article summary
Did you find this summary helpful?
Thank you for your feedback!
Introduction
This article will walk you through the process of setting up and creating an Adobe Analytics connection in Rivery.
Prerequisites
To establish the integration in the Adobe Analytics Console, you must have System Admin or Developer rights for your organization.
There are 2 authentication types available:
- JWT (JSON Web Token)
- OAuth 2.0
Determine which authentication type prerequisites are necessary and include them in the Rivery connection form:
JWT (JSON Web Token) Prerequisites
Service Account Integration
A Service Account Integration is needed to call Adobe services.
The following steps will walk you through the process of setting up a Service Account Integration.
Subscribe to an Adobe Service
Create a new integration in Adobe Console.
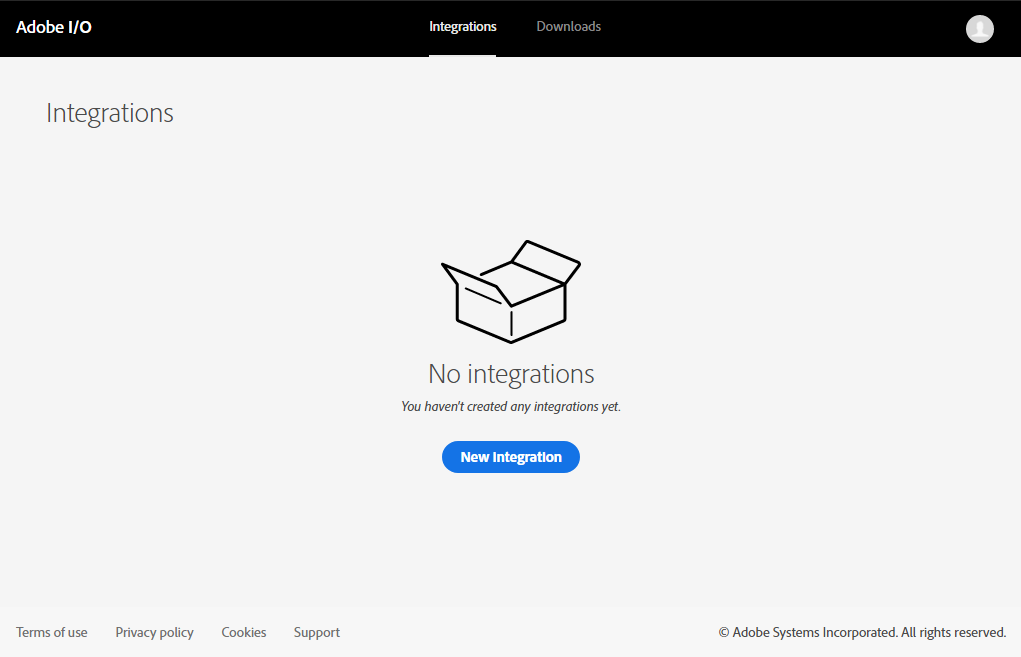
Choose to access an API.
Under Experience Cloud , select Adobe Analytics , and then select Service Account integration as the integration type. Click on Continue at the bottom right.
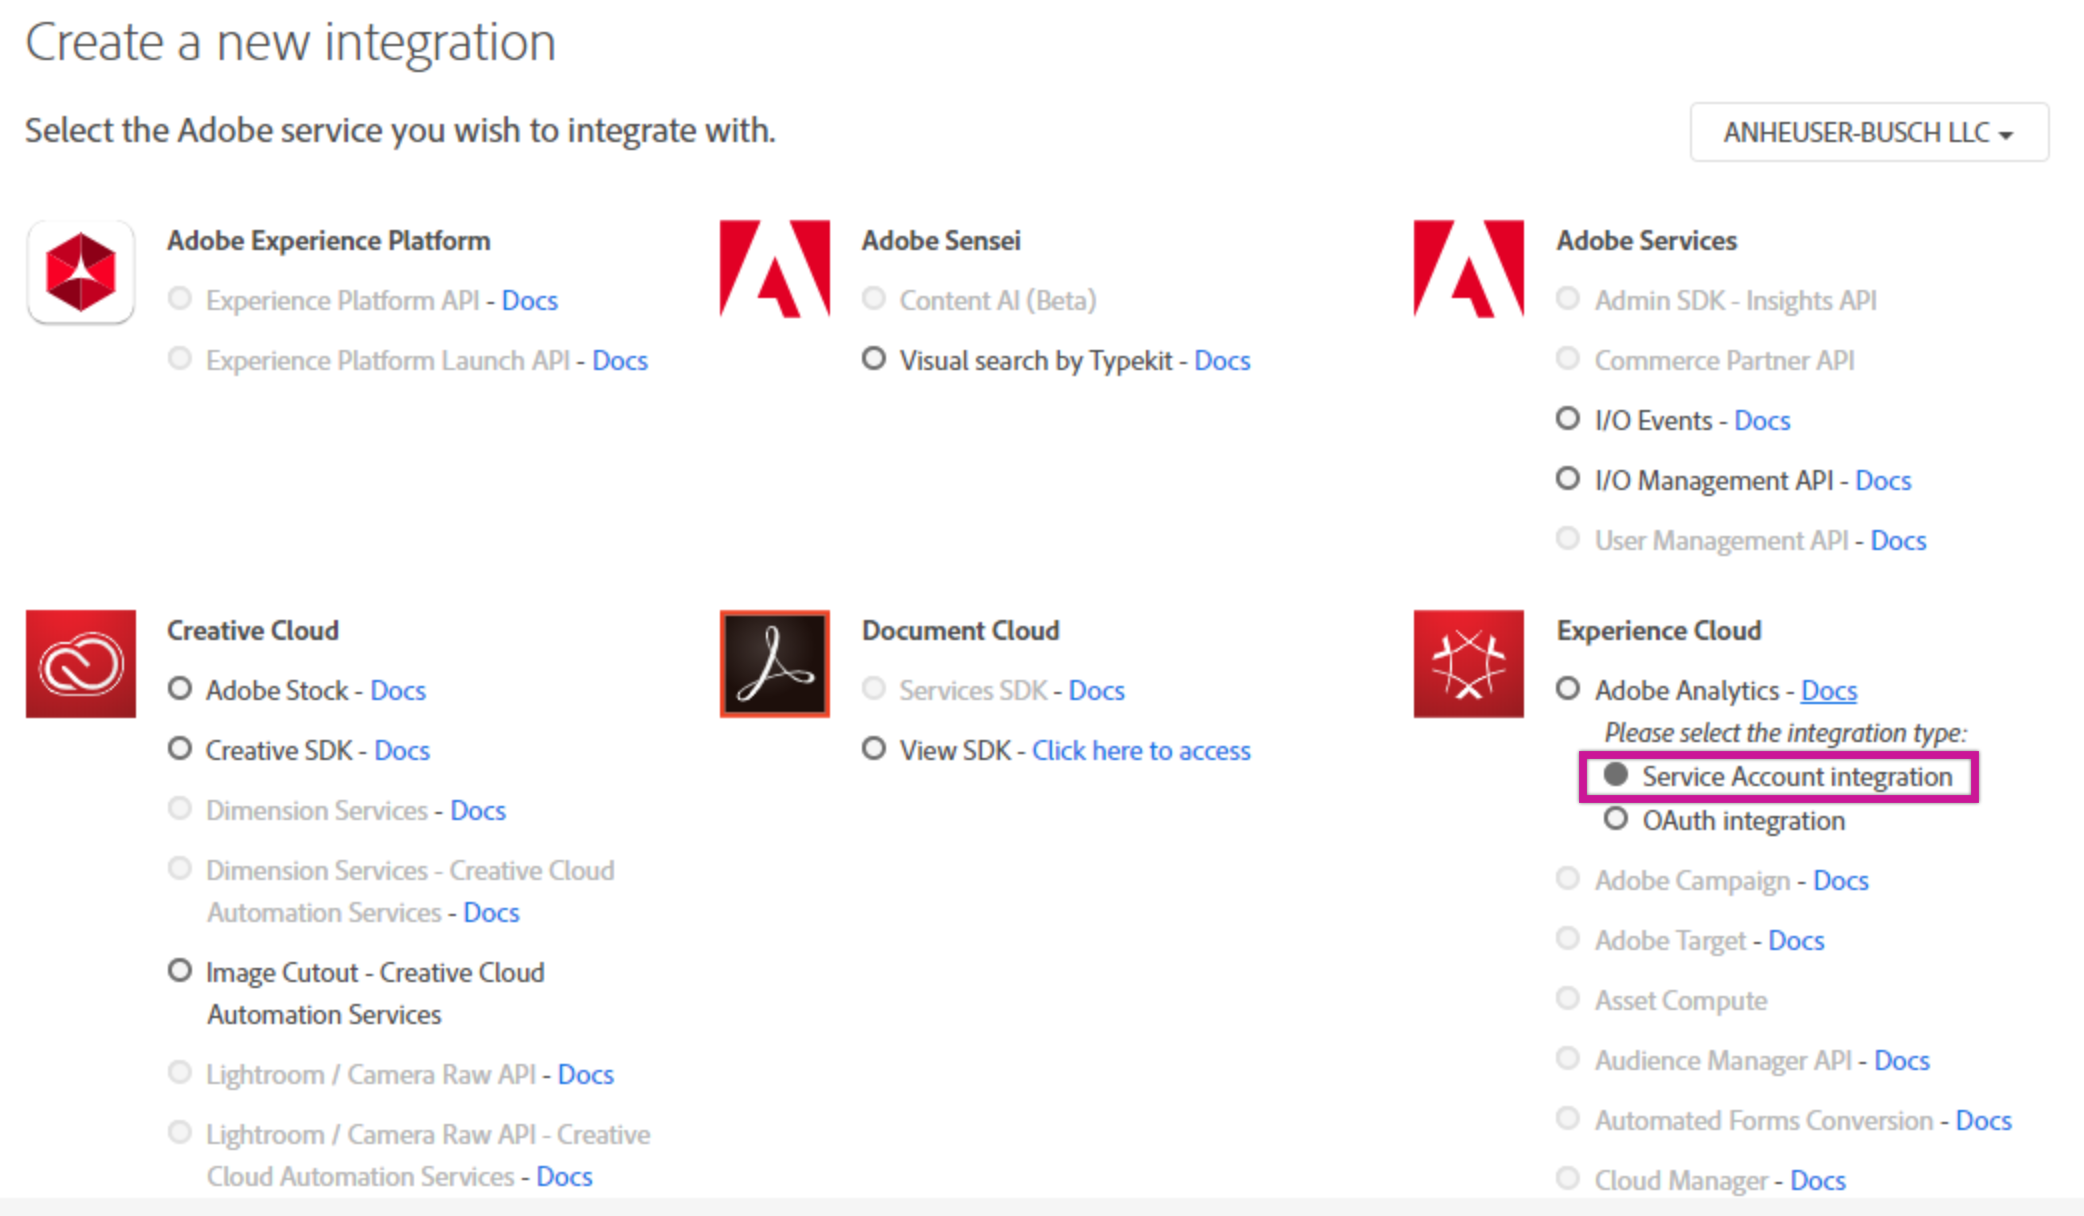
Name and describe your integration (this can be anything you choose).
- Name and Describe your integration (can be anything of your choosing)
Create a Public Key Certificate
The following steps will show you how to create a private key and a public certificate. Make sure you store these securely.
You will need to upload the Public Key to Adobe Integration and the Private Key in the Rivery Connection.
Windows :
Download an OpenSSL client to generate public certificates; for example, you can try the OpenSSL Windows client .
Extract the folder and copy it to the C:/libs/ location.
Open a command line window and execute the following commands:
set OPENSSL_CONF=C:/libs/openssl-1.1.1-win64-mingw/openssl.cnfcd C:/libs/openssl-1.1.1-win64-mingw/openssl req -x509 -sha256 -nodes -days 365 -newkey rsa:2048 -keyout private.key -out certificate_pub.crt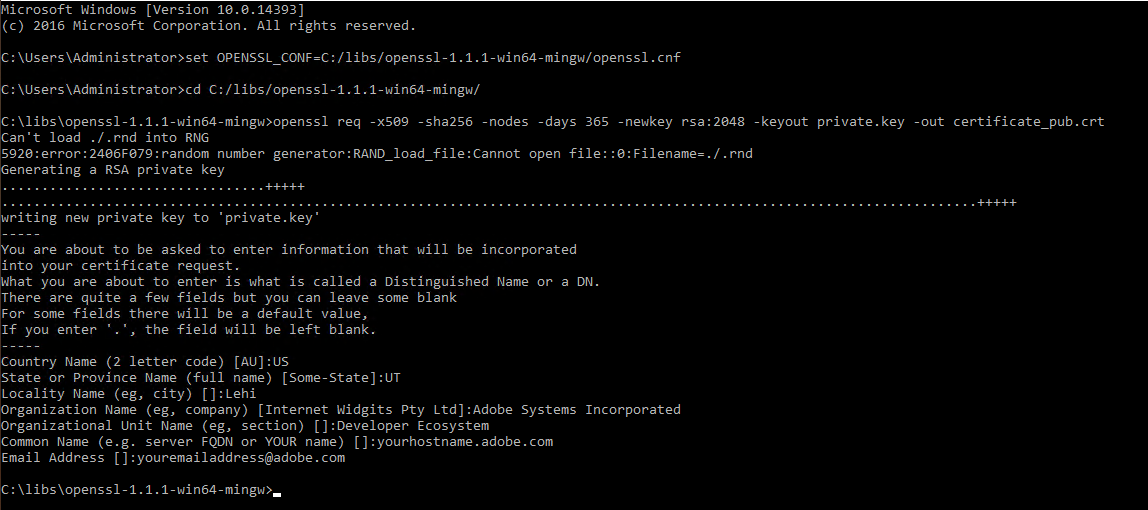
MacOS and Linux :
* Open a terminal and execute the following command:
openssl req -x509 -sha256 -nodes -days 365 -newkey rsa:2048 -keyout private.key -out certificate_pub.crt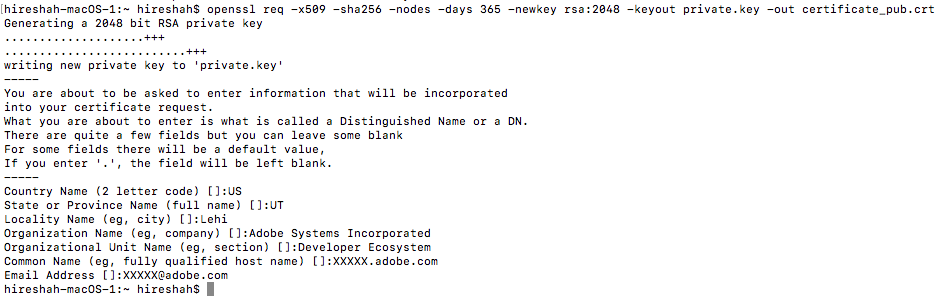
Configure an API Key Integration
Upload the public certificate you created (certificate_pub.crt) as a part of creating the integration.
Select one or more product profiles for Adobe Analytics
Click on Create Integration. Your integration should now be created with the appropriate public certificate and claims.
Click on Continue to Integration details
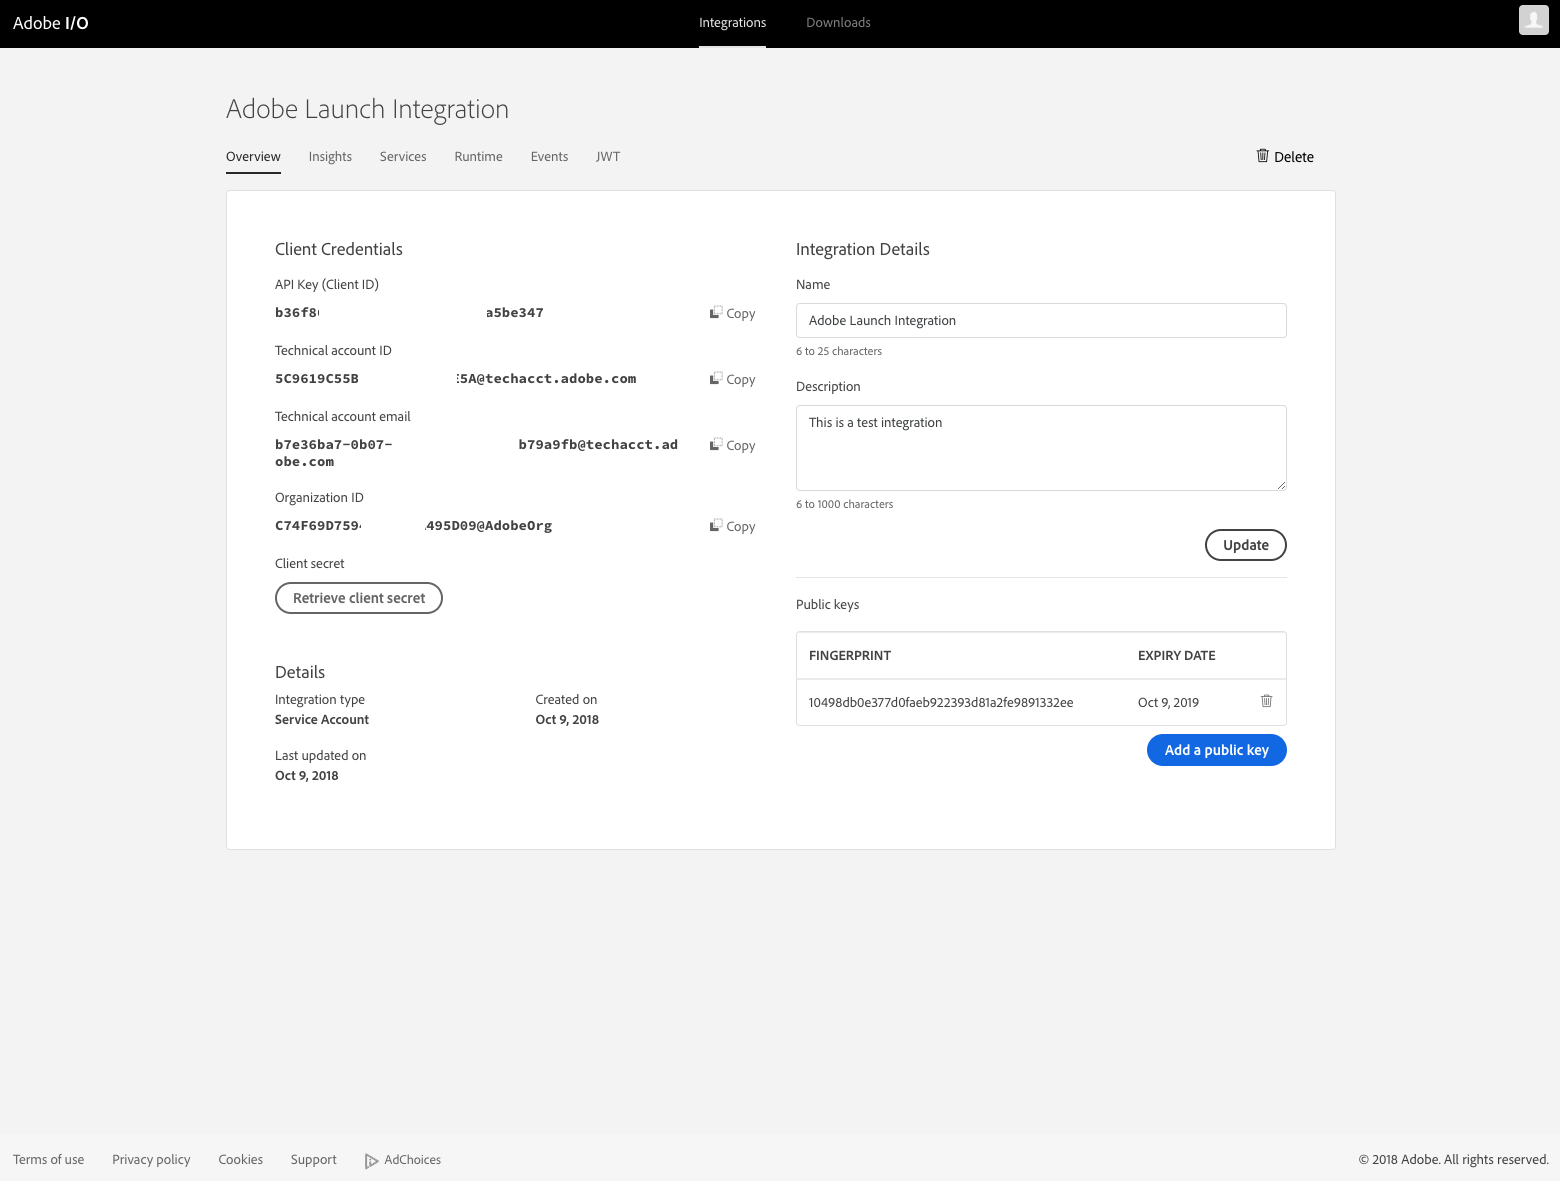
Company ID
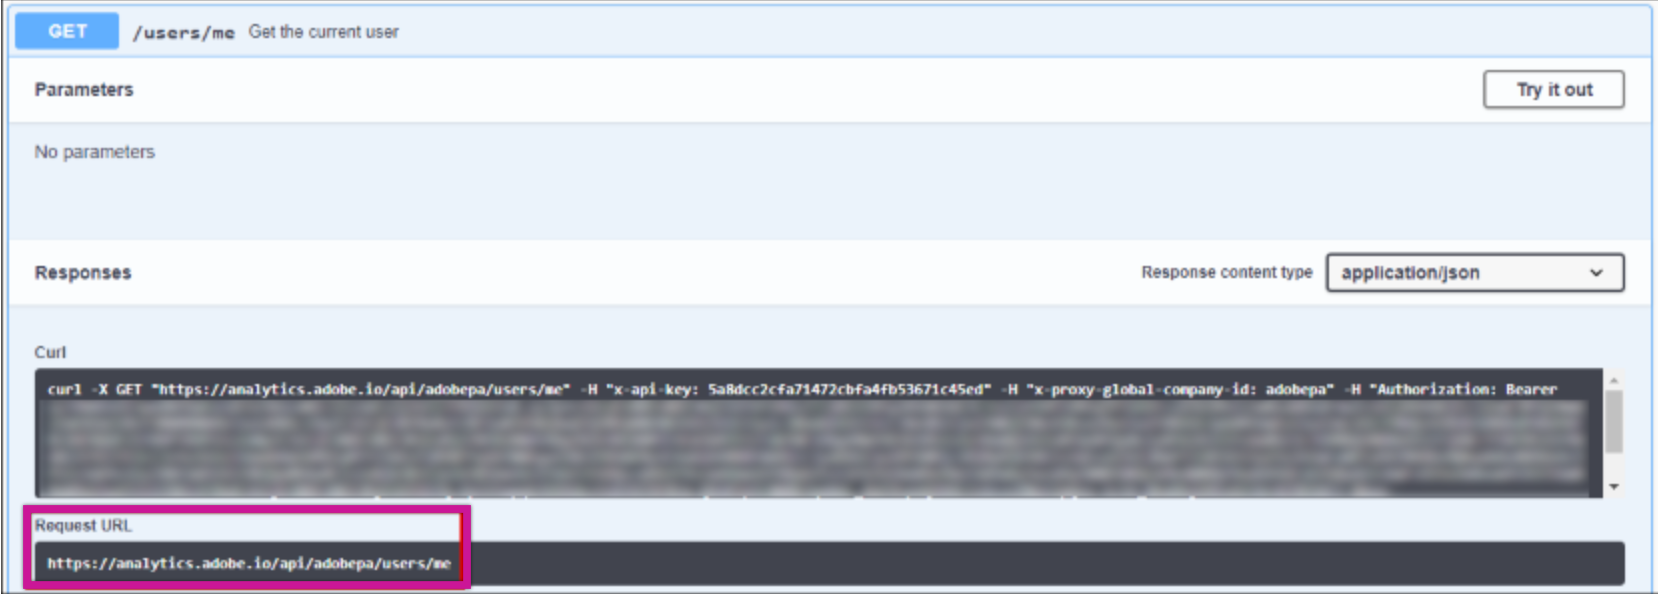
If you do not know your Global Company ID, you can find it in the request URL for the users/me endpoint on the Swagger UI. After logging into the Swagger UI, expand the users endpoint and then click the GET users/me button. Click the Try it out and Execute buttons.
Note your Global Company ID shown in the Request URL immediately preceding the users/me endpoint.
OAuth 2.0 Prerequisites
- Log in to Adobe Developer Console
- Select the project for which you need to configure the Adobe Analytics API.
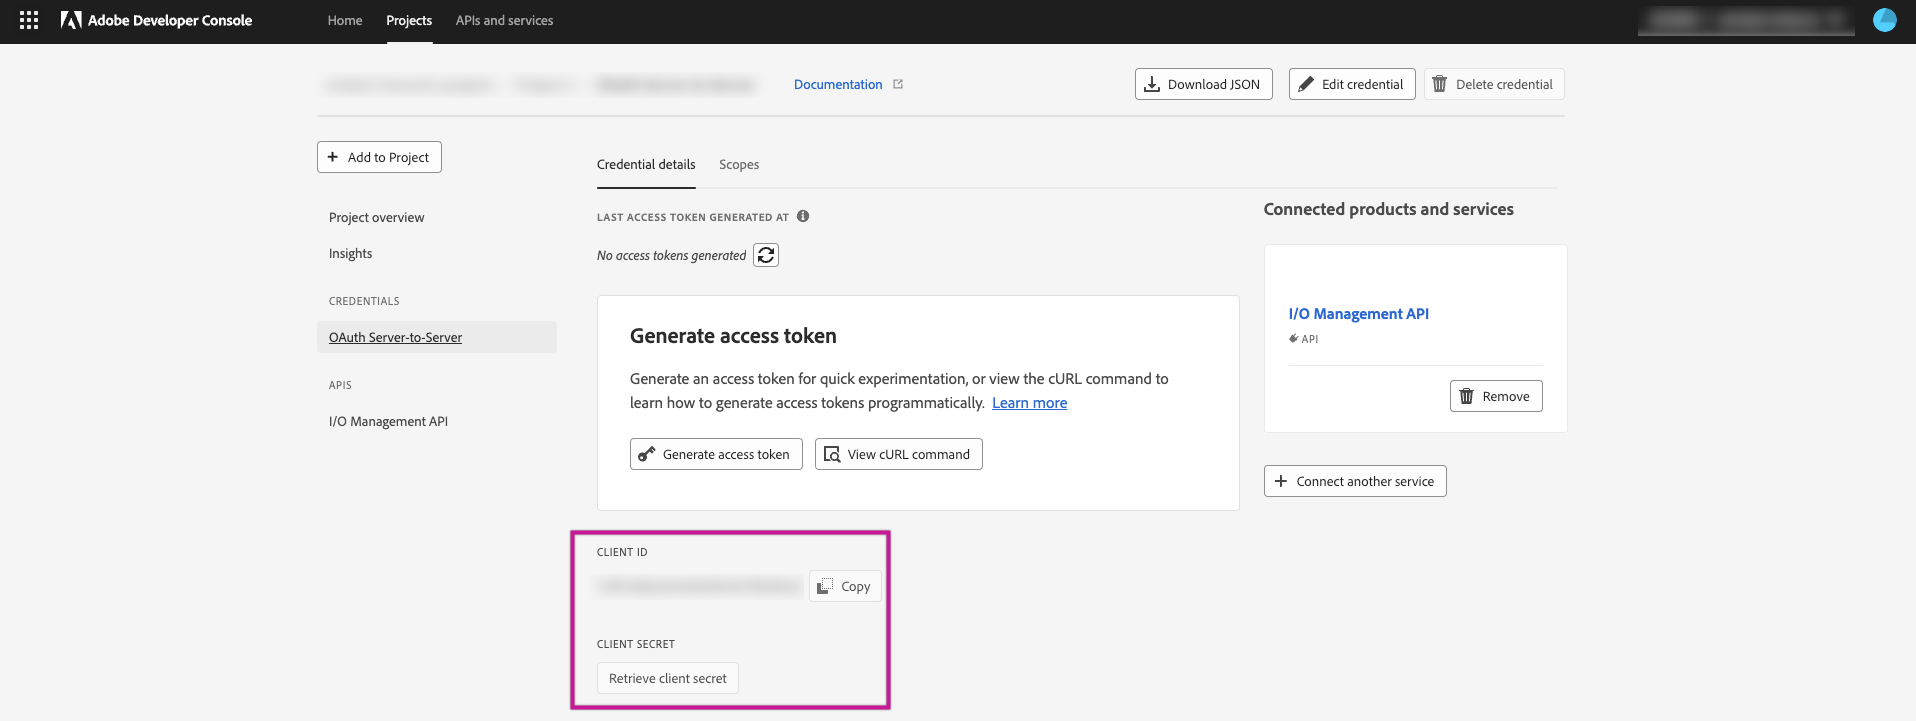
Ensure that your project has the Adobe Analytics API enabled. If not, you will need to add it to your project. - Within your project, go to the API configuration page.
- The API Key (Client ID) is generated automatically during the project setup. It will be visible on this page.
Please Note: This key is essential for API authentication. - On the same API configuration page, you will find the Client Secret.
This secret is also generated automatically and is required for secure API access. - Navigate to the Admin section within Adobe Analytics or the Adobe Admin Console to locate your Company ID or locate it in the request URL.
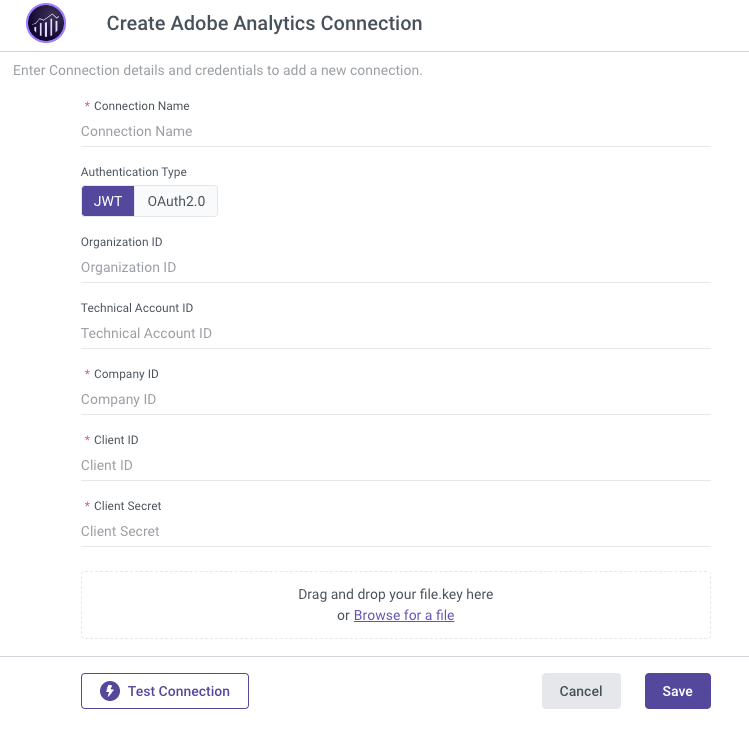
Establishing an Adobe Analytics Connection in Rivery
- Fill in the Connection's Name.
- Choose Authentication Type.
- JWT(JSON Web Token):
- Please enter the Organization ID, Technical Account ID, Company ID, Client ID (API Key), and Client Secret that you established in the preceding steps. You can locate all of these details in the Service Account Integration section.
- upload the Private.key file that you generated. Remember that this file must be in the key file format.
- JWT(JSON Web Token):
- OAuth 2.0:
Please enter the Company ID, Client ID (API Key), and Client Secret that you established in the preceding steps.
- Click on "Save" in order to save the connection in your Rivery account.
- Click on "Test connection". If the test is successful, you are prepared to begin working with Adobe Analytics.
Was this article helpful?