- 1 Minute to read
- Print
- DarkLight
- PDF
Airtable Connection
- 1 Minute to read
- Print
- DarkLight
- PDF
Starting February 1st, 2024, Airtable will deprecate the use of API keys. Airtable is transitioning to a new and improved authentication system using OAuth2, enhancing security and user experience. While we'll continue to support our current API Key system until February 1st, 2024, we encourage you to make the switch to OAuth2 as soon as possible.
Introduction
Airtable combines the simplicity of spreadsheet interfaces with the robust functionality of a database. It's widely used for project management, inventory tracking, event planning, and more, offering a flexible and user-friendly approach to data organization and collaboration.
This guide will outline the steps involved in integrating Airtable with Rivery.
Prerequisite
Obtaining Your Base ID
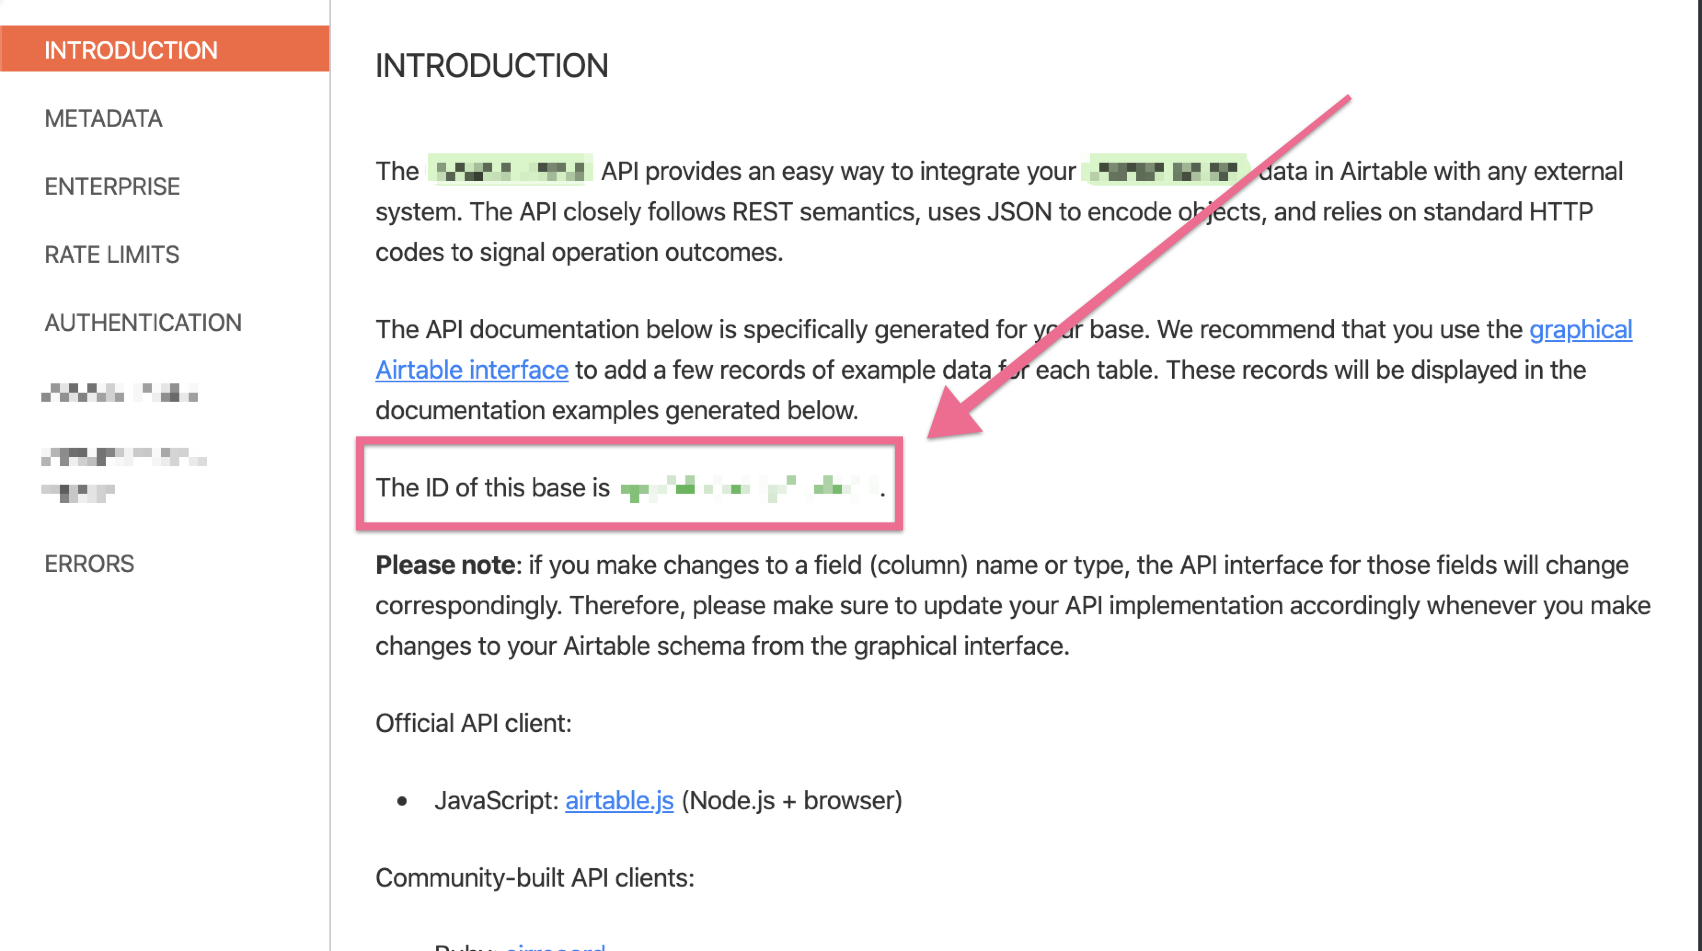
- Go to https://airtable.com/api.
- Sign in with your email and password.
- Select your desired Base to view its specific API documentation.
- Find your Base ID in the Introduction section.

Alternate Method for Finding Base ID:
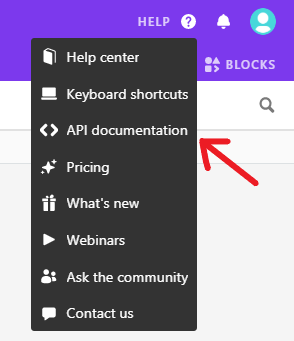
Go to your Base's interface page.
Click on the HELP (?) button at the top right (near your Account menu).
From the menu, select <>API documentation:
The Base ID is essential for connecting to a specific Base. Each River can only connect to one Base.
Establishing a Connection
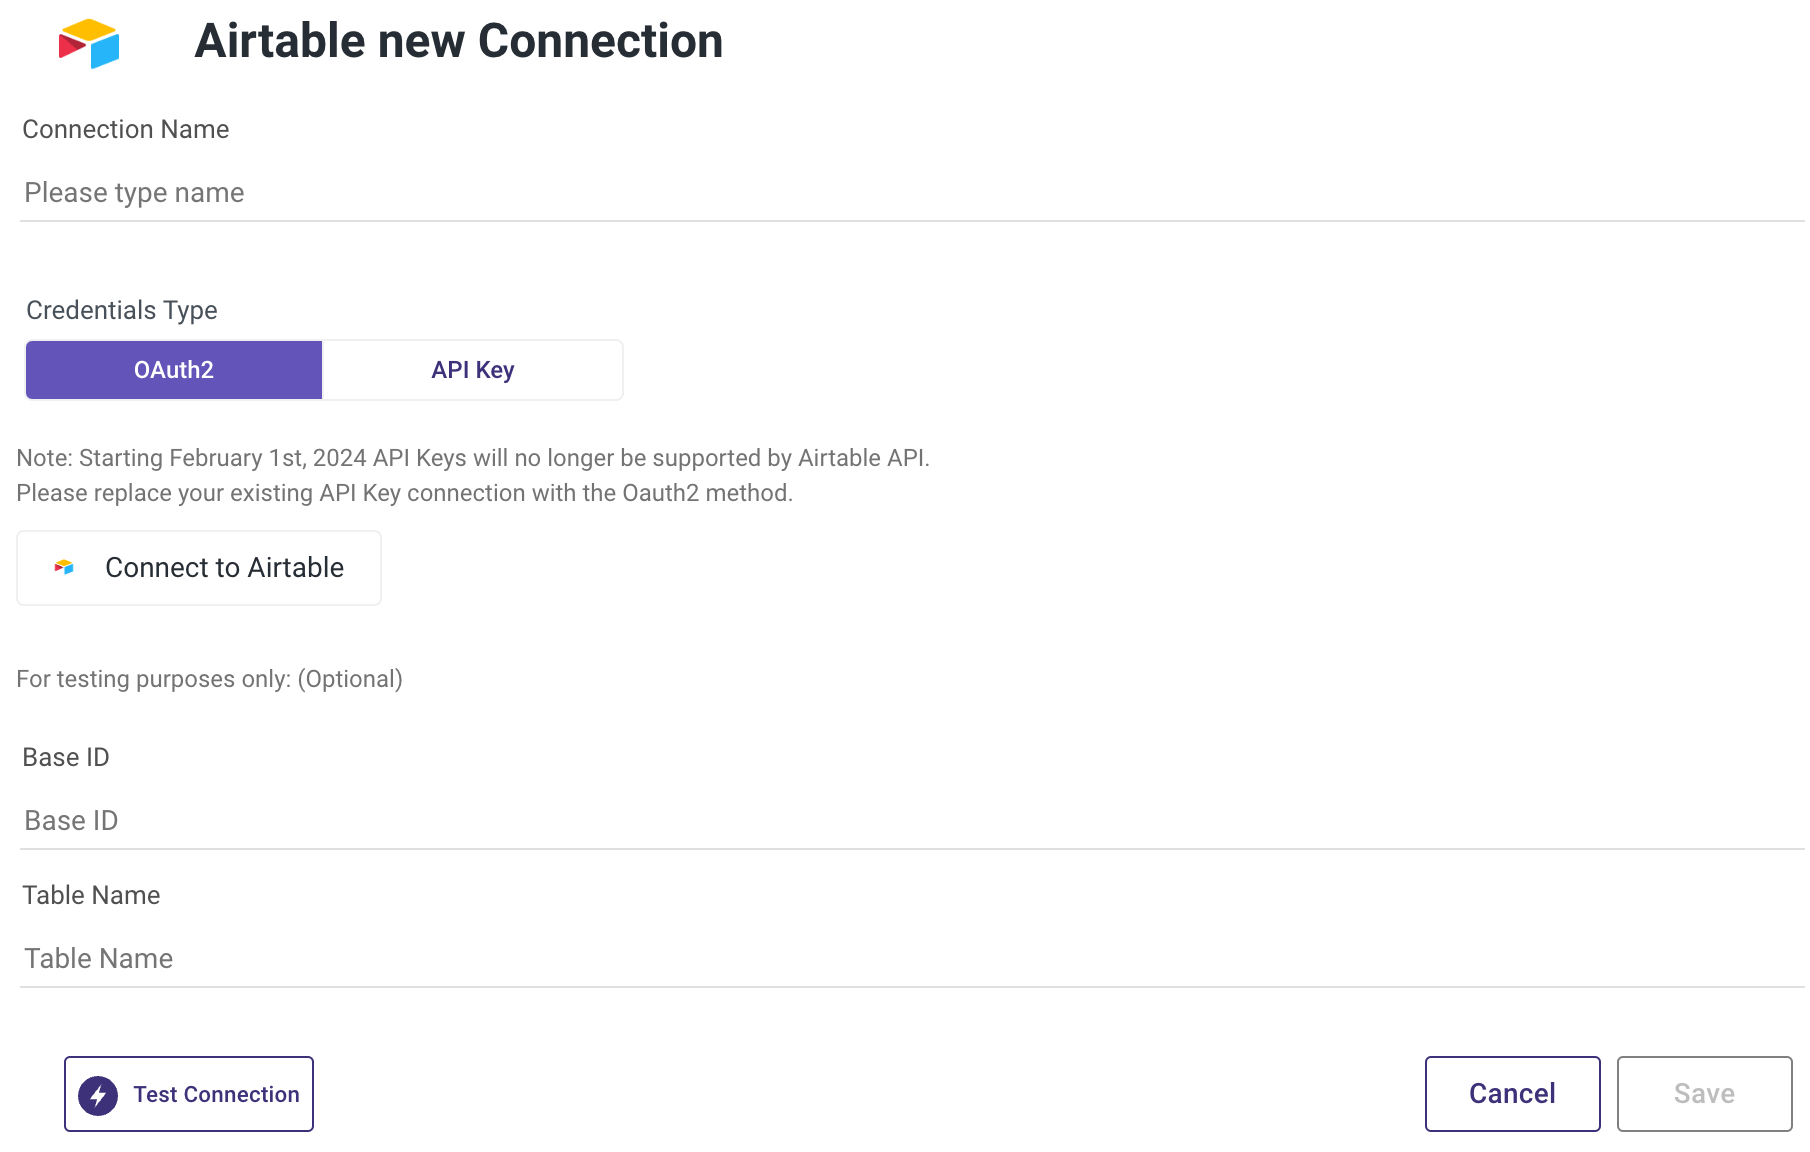
Fill in the Connection's Name.
Choose Credentials Type.
- OAuth2:
- Click Connect to Airtable.
- Enter Your Email or choose from the available connection options.
- API Key:
- Input API Key (scheduled for deprecation).
- OAuth2:
Optionally, you can verify the connection by entering a Base ID and a Table name from that Base, followed by clicking the Test Connection button.


