Amazon Redshift as a Target Connection
- 5 Minutes to read
- Print
- DarkLight
- PDF
Amazon Redshift as a Target Connection
- 5 Minutes to read
- Print
- DarkLight
- PDF
Article summary
Did you find this summary helpful?
Thank you for your feedback!
Introduction
This document describes the process of integrating Amazon Redshift as a target within Rivery. By integrating Amazon Redshift with Rivery, users can easily extract their data from various sources, transform it as needed, and load it into Amazon Redshift for further analysis or operational use.
Prerequisites
Before using this guide, ensure the following prerequisites are met:
AWS Superuser Account:
Make sure you have signed up for AWS as a Superuser.
AWS Permissions:
Create a Redshift Cluster
- If you don't already have a Redshift cluste, you can create one by following these instructions.
- Once your cluster is created, you need to authorize access to the cluster.
Create Your User and Schema within the Redshift Database
In the Cluster creation wizard in AWS, you must define the database where Rivery will upload data. Follow these steps:
- Connect to your Redshift cluster using the credentials set during cluster creation, using your preferred SQL management tool (e.g., Aginity, SQL Workbench/J or DBeaver).
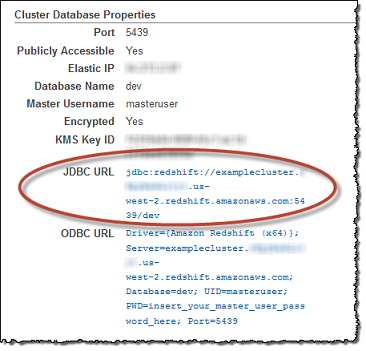
Make sure the Redshift cluster is externally accessible. Obtain the host address from the Redshift cluster details.
- Create the user and schema by running the following SQL commands (replace "Rivery User" and "schema name" with your desired names):
CREATE USER <Rivery User> with password '<myPwd>' CREATEUSER; CREATE SCHEMA IF NOT EXISTS <schema name> authorization <Rivery User>; - Grant the necessary permissions to the user by running the following commands:
GRANT SELECT on ALL TABLES IN SCHEMA <schema name> TO <Rivery User>;
GRANT EXECUTE on ALL FUNCTIONS IN SCHEMA <schema name> TO <Rivery User>;
GRANT USAGE on SCHEMA <schema name> TO <Rivery_User>
Replace "Rivery User" with the user previously created and "schema name" with the schema you grant Rivery permission to utilize. Repeat this process for every schema you wish for Rivery to access and utilize data.
Please Note:
Rivery conducts a review of the Access Control Lists (ACLs) to ensure that these permissions are replicated across all tables. The current Grant permissions found within the raw ACLs are structured as shown below:
rivery=arwdRxtDPA/rivery,group test_group=arwdxtD/rivery,user1_name=wx/rivery,user1_name=x/rivery
In this context, the string "arwdRxtDPA" denotes the permissions granted to the Rivery user. Each character within this string corresponds to a specific action, with 'a' representing INSERT, 'r' representing SELECT, 'w' representing UPDATE, and 'd' representing DELETE.
Rivery interprets this string, generates grant statements, and subsequently executes them individually on the respective tables.
Whitelist Our IPs
To whitelist Rivery's IPs, follow these steps:
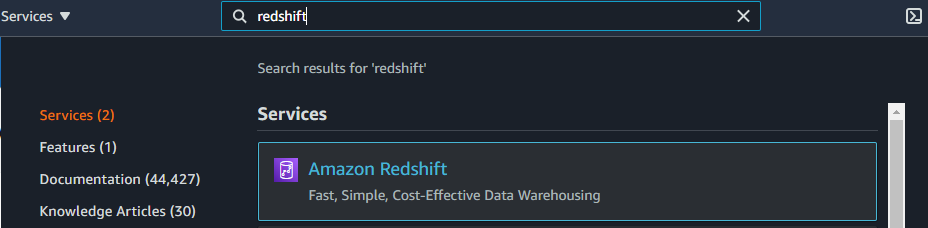
- Log in to your AWS account and search for the "Amazon Redshift" service in the AWS Console.
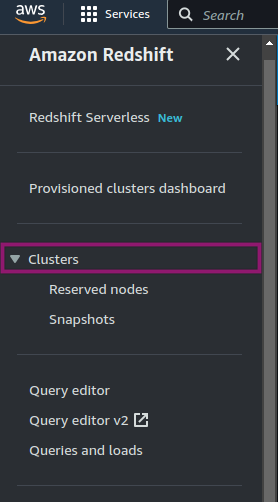
- Access the "clusters" section in the left sidebar.
- Select the cluster you've created.
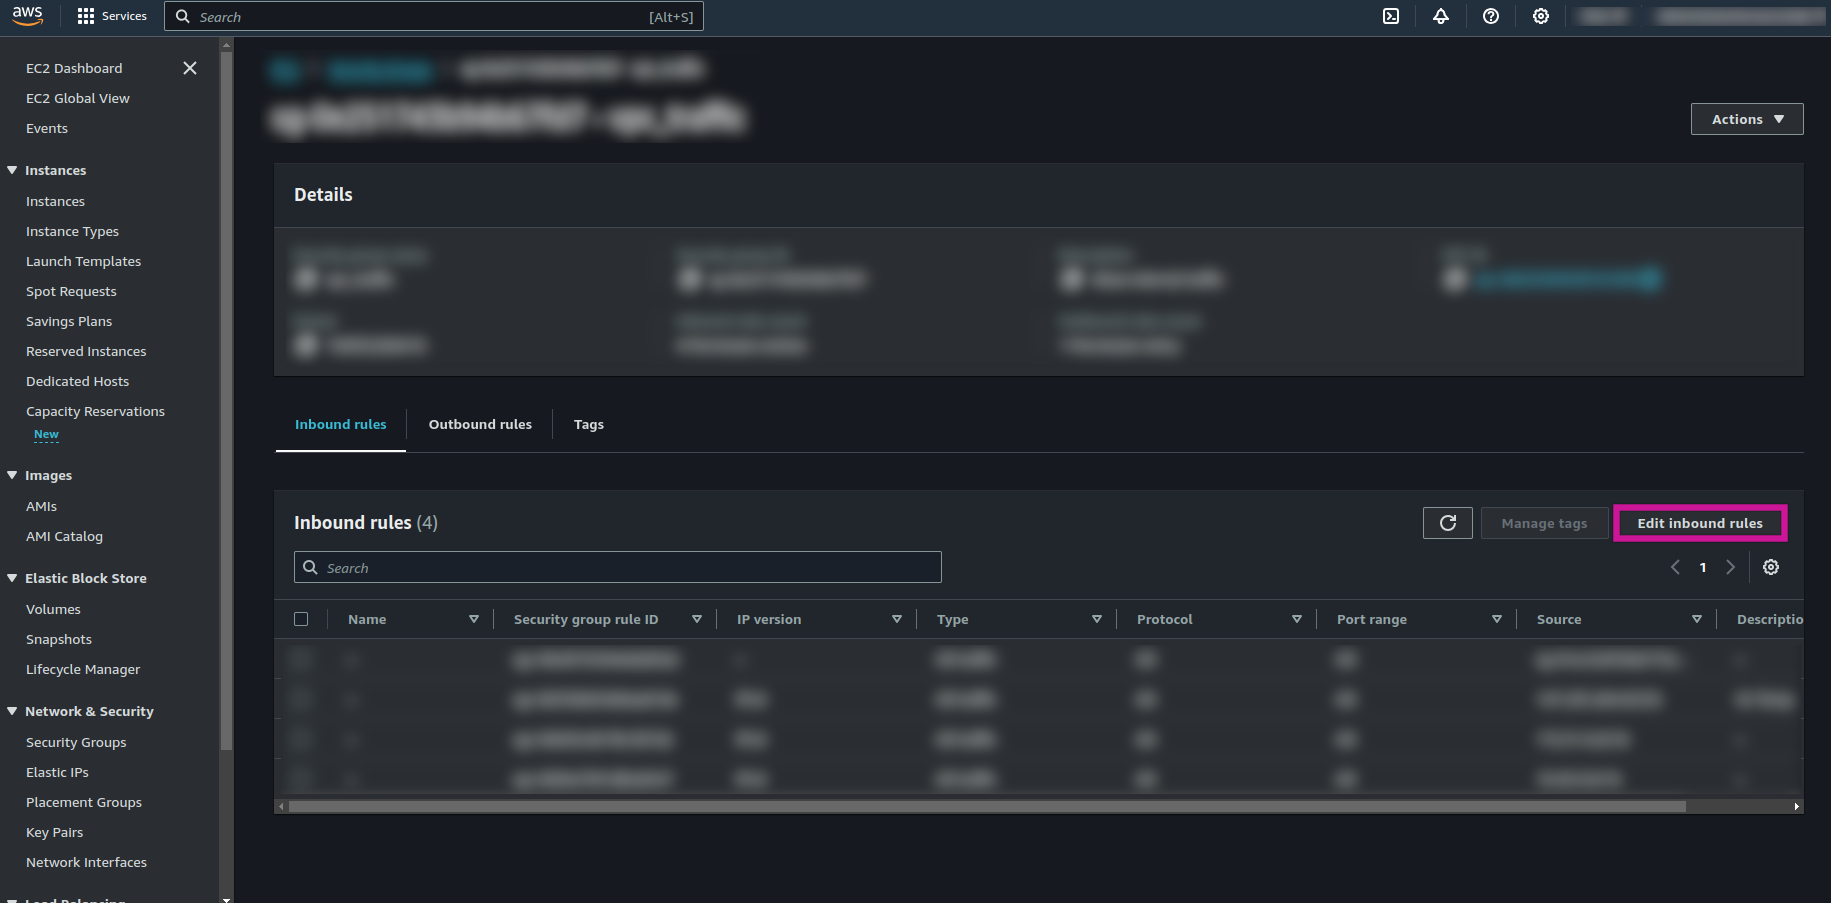
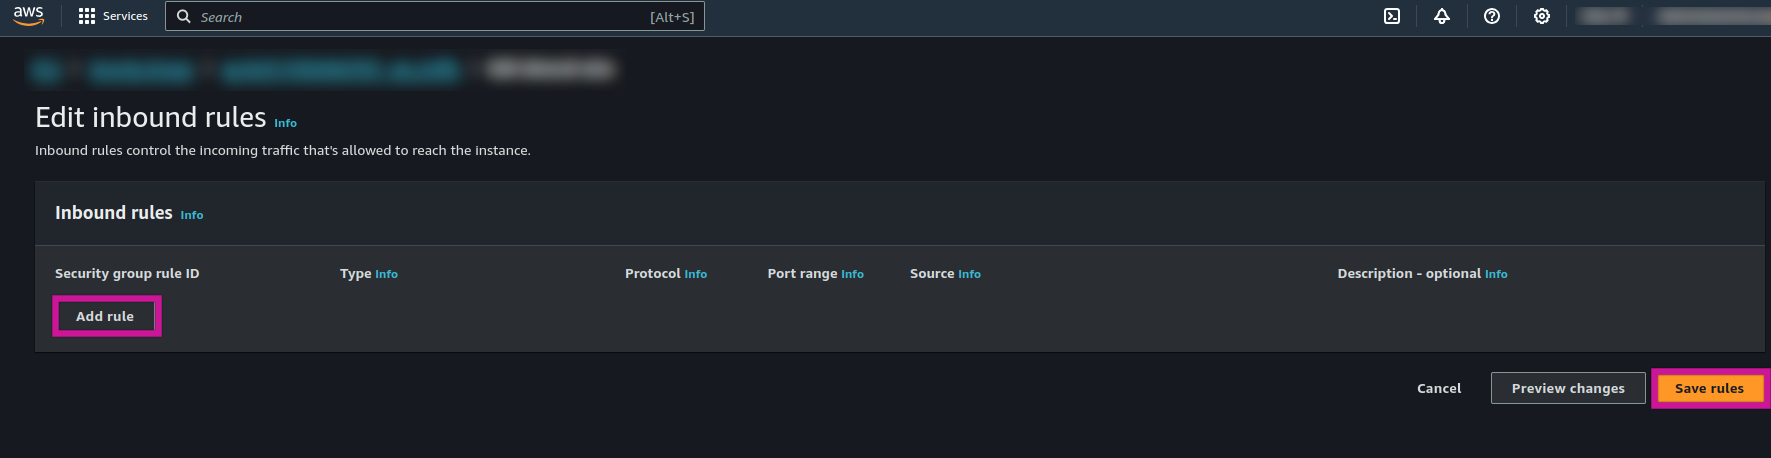
- Navigate to the "properties" tab and look for "VPC security group" under "Network and security settings." Click on the Security Group ID.
- In the "Inbound rules" tab, click "Edit inbound rules."
- Add a rule of type "Redshift" and specify the required source IP addresses as outlined in the documentation.
- Save the rules to whitelist the specified IPs.
Amazon Redshift Serverless
Rivery supports Amazon Redshift Serverless, enabling users to seamlessly load and transform data into this fully managed data warehouse. This integration empowers users with robust analytics capabilities and optimized workflows without the need to manage infrastructure.
Key Features of Amazon Redshift Serverless Integration
1. Serverless Architecture
- Eliminate the need for managing clusters by leveraging Amazon Redshift Serverless.
- Automatically scale based on workload while maintaining cost control through maximum RPU (Redshift Processing Unit) limits.
2. Encryption
- Ensure data security with always-on encryption powered by AWS Key Management Service (KMS).
3. Data Sharing
- Leverage Redshift's data-sharing capabilities to seamlessly integrate workflows across both serverless and provisioned environments.
4. Data API Support
- Simplify connection management using the Amazon Redshift Data API, ideal for serverless setups or when preferring IAM-based authentication over traditional credentials.
5. Flexible Connectivity
- Configure your connections with supported port ranges (e.g., 5431–5455, 8191–8215) for greater flexibility.
Configuring Amazon Redshift Serverless in Rivery
Follow these steps to set up Amazon Redshift Serverless as a target for your Rivery pipelines:
Step 1: Prepare Your Amazon Redshift Serverless Workgroup
Set Up Workgroup and Namespace
- Log in to the AWS Management Console.
- Navigate to Amazon Redshift Serverless.
- Create or verify your Workgroup and Namespace configurations.
- Note the Workgroup Endpoint and Port (default: 5439, or within the ranges 5431–5455 or 8191–8215).
Configure Security Settings
- Ensure that your VPC security groups or public access settings allow connections from Rivery's IP range or your network.
- Grant access to the necessary databases and schemas within your namespace.
Enable Data API (Optional but Recommended)
- Enable the Amazon Redshift Data API for simplified connection management.
- The Data API is especially beneficial for serverless configurations and for using IAM-based authentication.
Step 2: Prepare IAM Roles or Database Credentials
Option 1: IAM Authentication
- Attach an IAM role to your Redshift Serverless workgroup with policies such as
AmazonRedshiftDataFullAccess. - Provide the AWS Access Key and Secret Key for authentication in Rivery.
Option 2: Database User Credentials
- Create a database user with write permissions to the target schema.
Step 3: Set Up Redshift Serverless as a Target in Rivery
- Log in to Rivery and navigate to the Connections section.
- Create a New Target Connection by selecting Amazon Redshift as the target type.
- Fill in the following details:
- Connection Name: Provide a unique name for the connection.
- Workgroup Endpoint (Host): Enter the endpoint of your Redshift Serverless workgroup.
- Port: Specify the port configured for your workgroup.
- Database: Enter the database name within the namespace.
- Authentication: Enter the Username and Password of the database user.
- Test the Connection to ensure Rivery can successfully connect to your Amazon Redshift Serverless instance.
Step 4: Configure Your River
- Select the Target: Choose the newly created Redshift Serverless connection as the target for your River.
- Define Target Schema and Table:
- Specify the schema and table in the database where data will be written.
- Rivery automatically creates tables if they do not already exist based on your River configuration.
For further details, refer to the Amazon Redshift Serverless Guide.
Rivery's Redshift Connection
You can connect to Redshift using one of two methods:
- Login Credentials
- SSH Tunnel
Login Credentials
- Whitelist our IPs.
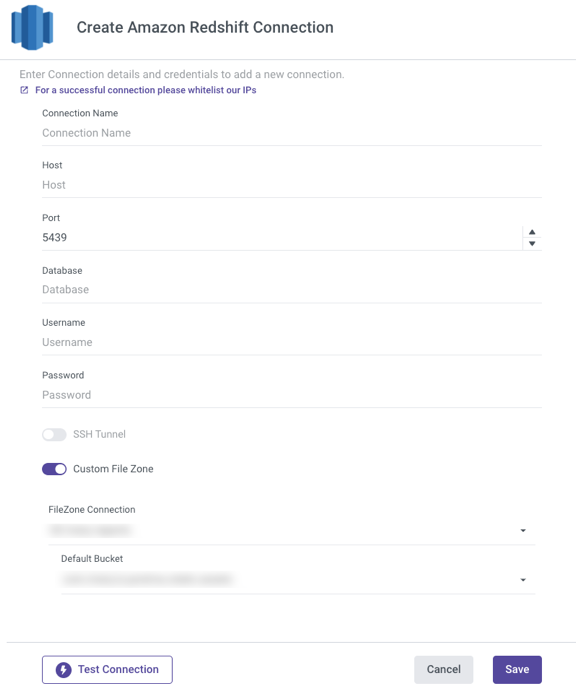
- Choose your Connection Name.
- Enter Host.
- Fill in the Port Number.
- Enter your Username and Password
- Use the Test Connection function to see if your connection is up to the task.
If the connection succeeded, you can now use this connection in Rivery.
SSH Tunnel (Optional)
To connect via SSH Tunnel, follow our step-by-step tutorial.
Please Note:
When using an SSH tunnel, the SSH port should be left empty or set to the default port of 22.
Custom File Zone (Optional)
Rivery allows you to create a custom FileZone to manage your data in your own S3 service. Your data will be stored in your S3 bucket.
To use a custom File Zone, follow the guidelines listed below:
Toggle the Custom File Zone to true.
By clicking on FileZone Connection, you can select the previously configured Amazon S3 Connection.
Choose a Default Bucket from the drop-down list.
Use the Test Connection function to see if your connection is up to the task.
If the connection was successful, click Save.
Was this article helpful?