BigQuery as a Source Connection
- 5 Minutes to read
- Print
- DarkLight
- PDF
BigQuery as a Source Connection
- 5 Minutes to read
- Print
- DarkLight
- PDF
Article summary
Did you find this summary helpful?
Thank you for your feedback!
Introduction
This document outlines the procedures for establishing a connection between BigQuery and Rivery.
Prerequisites
To establish a connection between Google BigQuery and Rivery, several prerequisites must be met. Ensure you have a BigQuery account with the necessary permissions and follow the steps outlined below.
Account and Permissions Requirements
There are 2 options for connection configuration:
- Default service account and bucket provided by Rivery
- Custom service account and bucket.
| Connection Configuration Options | Role Assignment | Permission Grant for Service Account Level |
|---|---|---|
| Default service account and bucket | You need a BigQuery account with the ability to grant both "Job User" and "Data Viewer" roles, which are crucial for data retrieval and processing. | N/A |
| Custom service account and bucket | You must have a BigQuery account that can assign "Job User" and "Data Viewer" roles for data handling. Additionally, assign the Storage Admin role to the specified Custom File Zone to enable access and add Service account buckets to the connection list. | Provide the "storage.buckets.list" Permission at the project level by linking it to a Role containing this permission and assigning it to the service account. |
Default Service Account and Bucket Configuration
- Enable Necessary APIs:
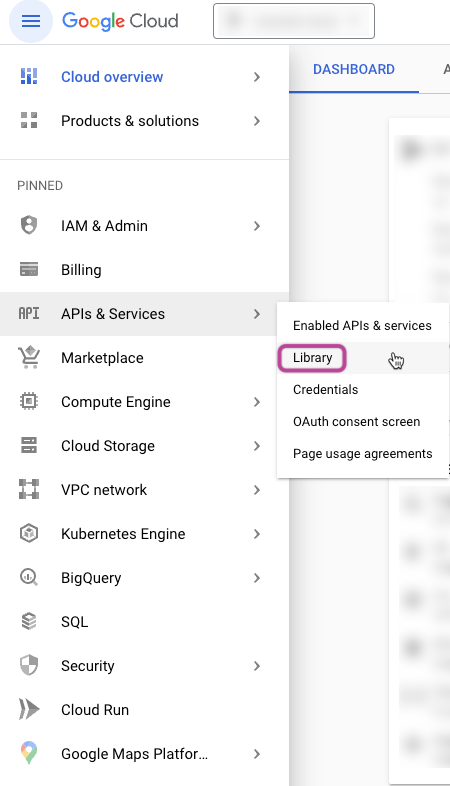
Navigate to the Google Cloud Console and access the "APIs & Services" section.
Click on "Library."
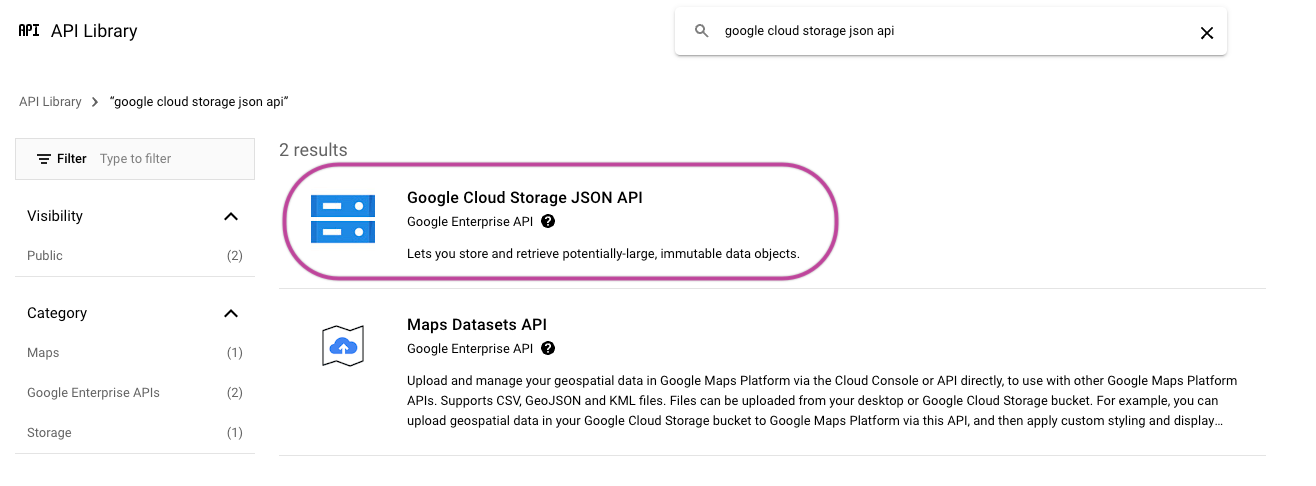
Look up "Google Cloud Storage JSON API" and enable it.
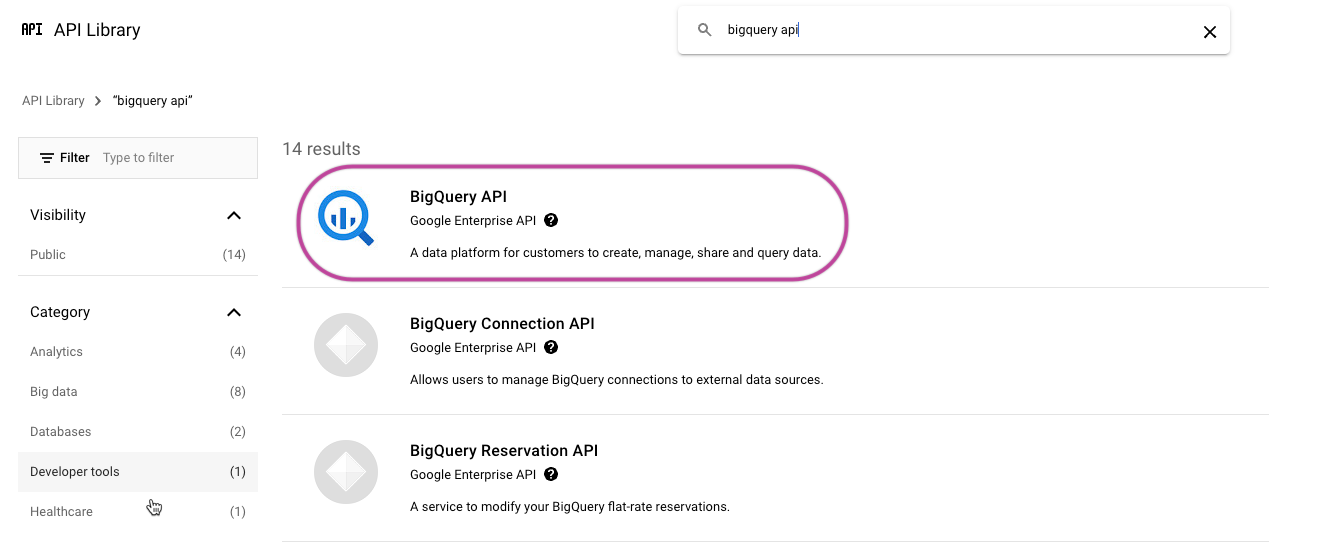
Find the "BigQuery API" and enable it.
- Grant Permissions:
Rivery automatically generates a dedicated service account and Google Cloud Storage (GCS) account folder. This service account only has access to the created folder.
To grant permissions, sign in to the Google Cloud Platform Console and ensure you are in the desired project.
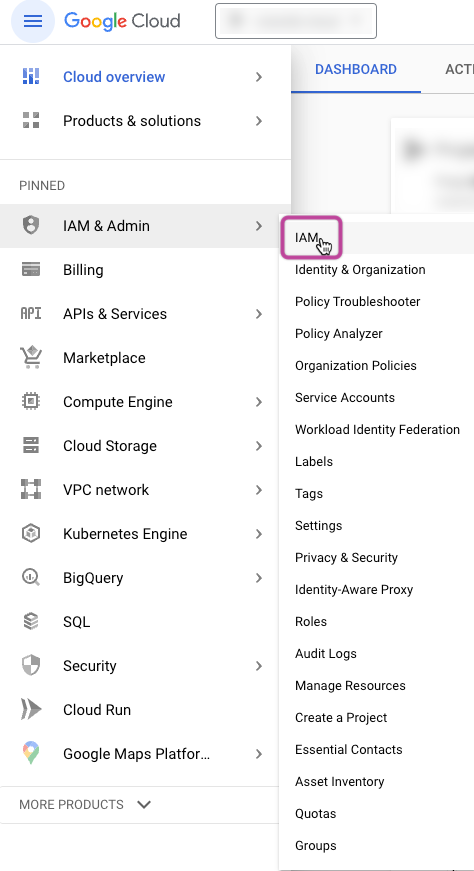
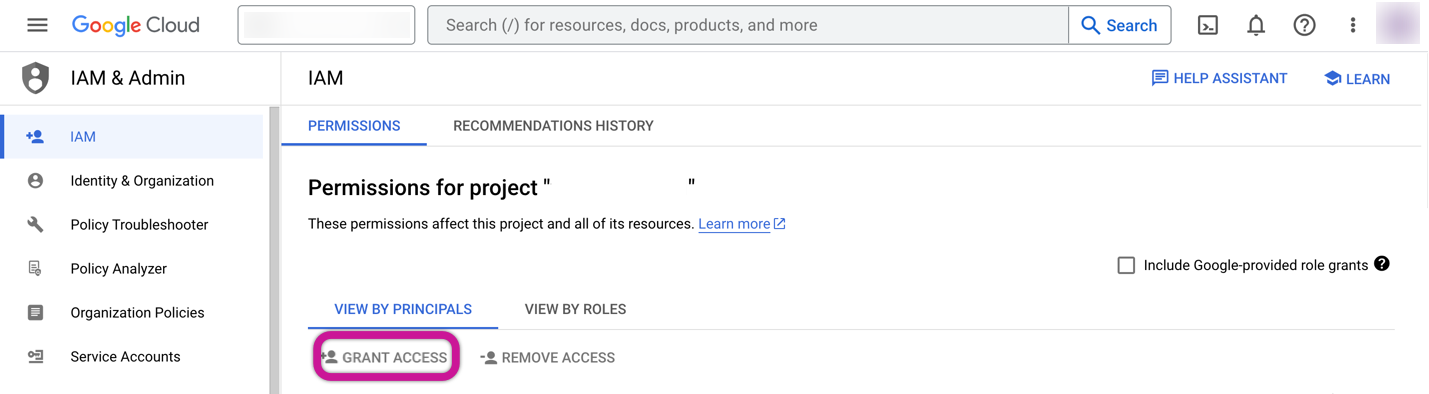
Go to "IAM & Admin" and then click "IAM".
Click on "+GRANT ACCESS" under the "VIEW BY PRINCIPALS" section.
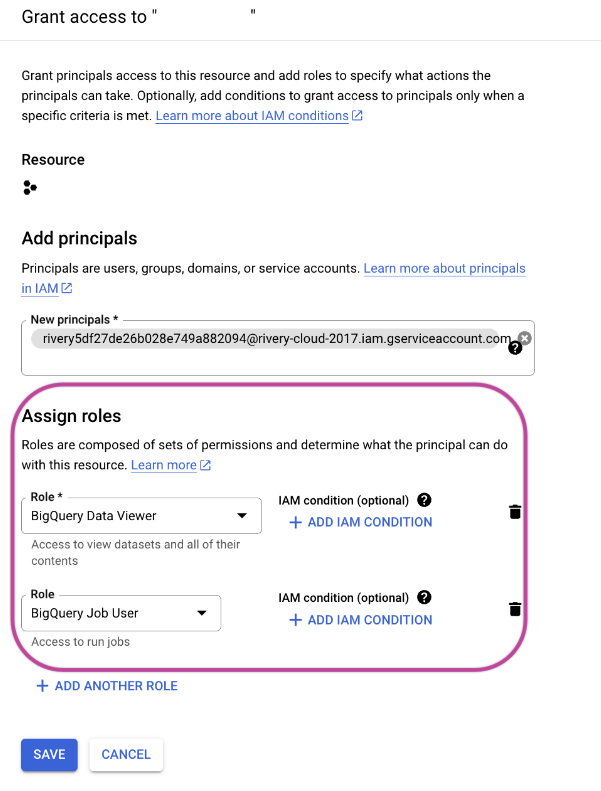
Add the Rivery service account under the "New Principals" section.
Assign the "BigQuery Data Viewer" and "BigQuery Job User" roles and save the settings.
- Configure BigQuery Source Connection in Rivery:
Log in to Rivery.
Create a new connection for your BigQuery instance:
- Go to "Connections."
- Select "New Connection."
- Choose "Google BigQuery (Source)" from the source list.
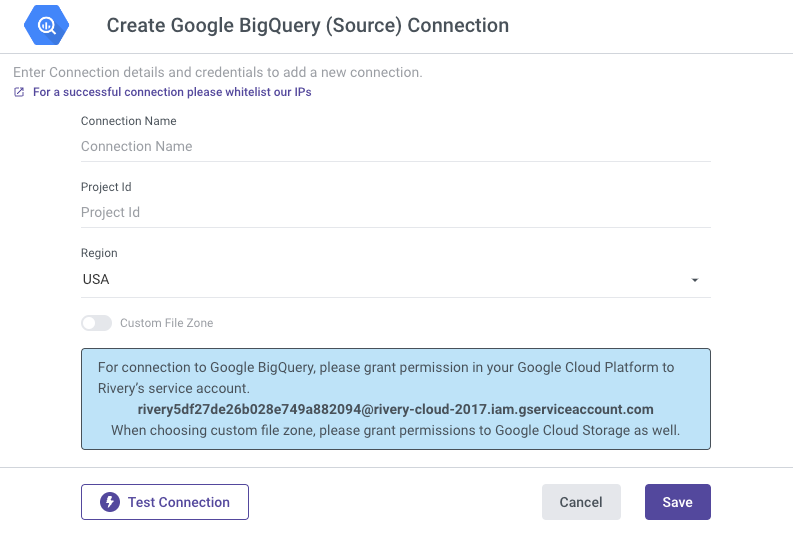
- Enter your Google Platform Service Account credentials:
- Connection Name
- Project ID (found in the Google Cloud Platform Home section)
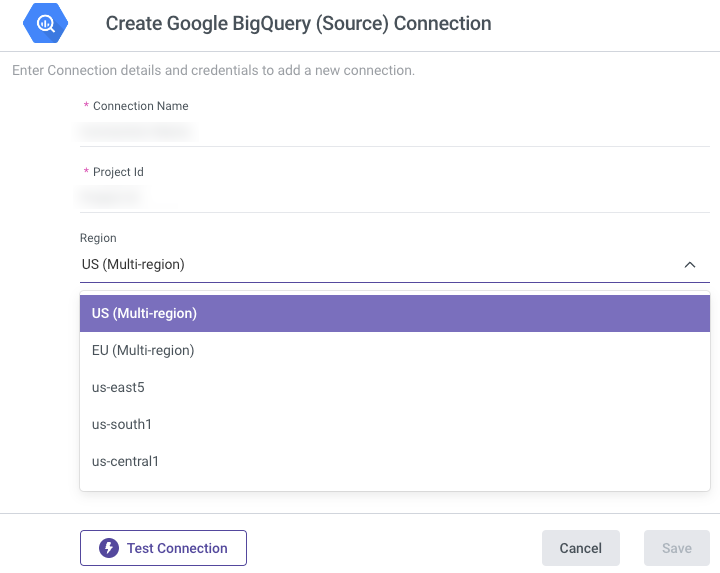
- Region: Select your dataset's region. Rivery exports data to a default bucket in the same region.
Test the connection and save the settings.
Custom Service Account and Bucket Configuration
Please Note:
Rivery transfers your data to a Google Cloud Storage bucket. In order to reach the applicable storage bucket and BigQuery project, it's necessary to initially establish a user within the Google Cloud Platform Console. This user should have permissions to access the relevant bucket and BigQuery project.
- Enable Necessary APIs:
- Follow the same steps as above to enable the "Google Cloud Storage JSON API" and "BigQuery API."
- Create a Google Cloud Service Account:
Please Note:
The Custom Service account has the option to utilize either an already established service account or one that is freshly created. If you wish to create a new service account within the Google Cloud Platform, it's important to confirm that your user possesses the "ServiceAccountAdmin" role. Then, proceed by adhering to these instructions:
Sign in to the Google Cloud Platform Console.
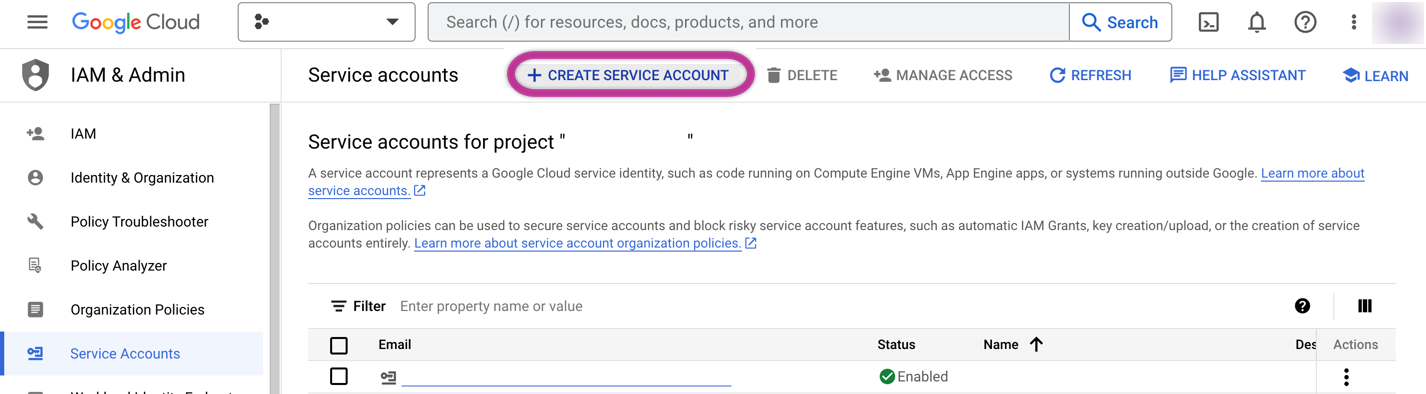
Go to "IAM & Admin" and then "Service accounts" and click "+CREATE SERVICE ACCOUNT".
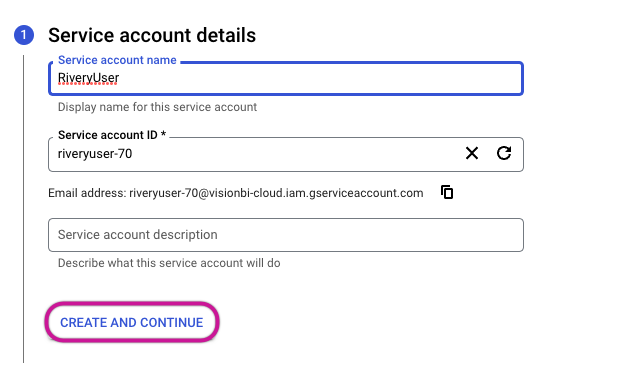
In the Service Account Creation Wizard:
- Specify the Service Account name (e.g., RiveryUser).
- Click "CREATE AND CONTINUE".
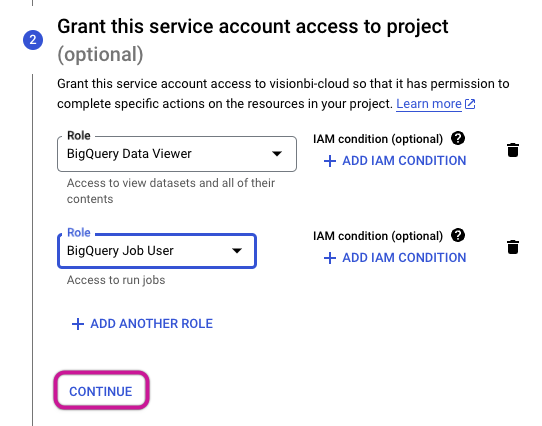
- Provide the service account with project access by selecting the BigQuery Data Viewer and BigQuery Job User roles. Afterward, proceed by clicking on CONTINUE.
- You have the option to grant users access to this service account. To finalize the process, simply click the DONE button.
- Upon completion of the creation process, the service account will be displayed within the Google Cloud console.

Provide Access for the Service Account:
Grant the 'storage.buckets.list' Permission at the project level by associating it with a Role that includes this specific permission and assigning it to the service account.
Please Note:
This permission is essential for retrieving Service account buckets and adding them to the connection list.Create a Google Cloud Storage Bucket:
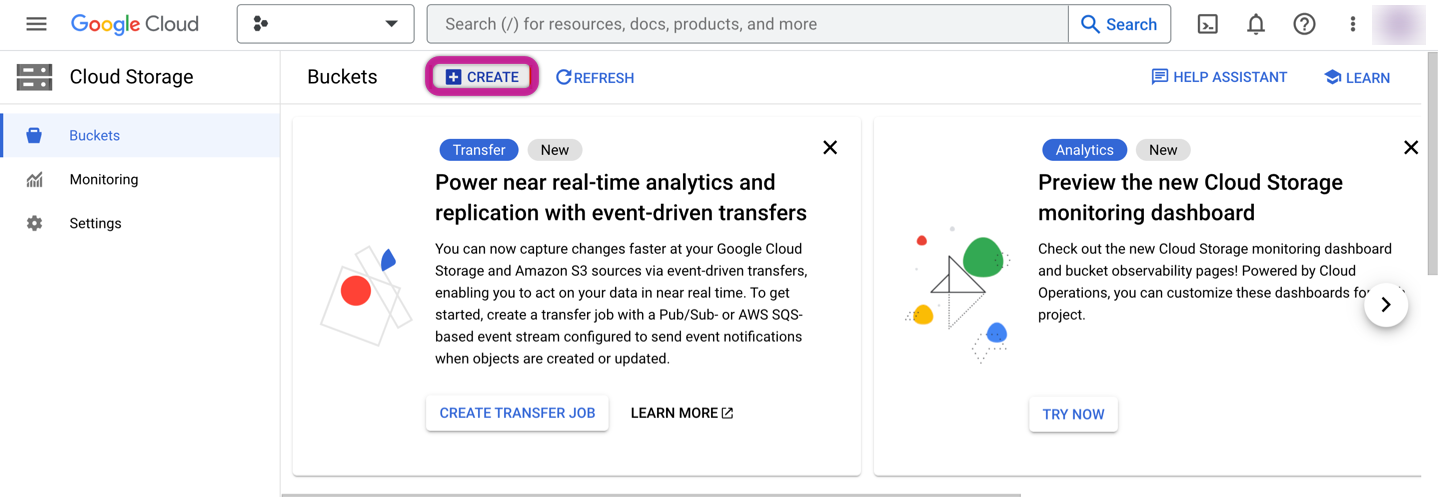
Sign in to the Google Cloud Platform Console.
Go to "Cloud Storage" and then "Buckets" and click "+CREATE".
In the Bucket Creation Wizard:
- Set Bucket Name (e.g., project_name_rivery_file_zone).
- Choose a Region for the bucket.
- Select a storage class.
- Configure the object access for your Bucket as Uniform, and make sure to select the option "Enforce public access prevention on this bucket."
- Click "CREATE".
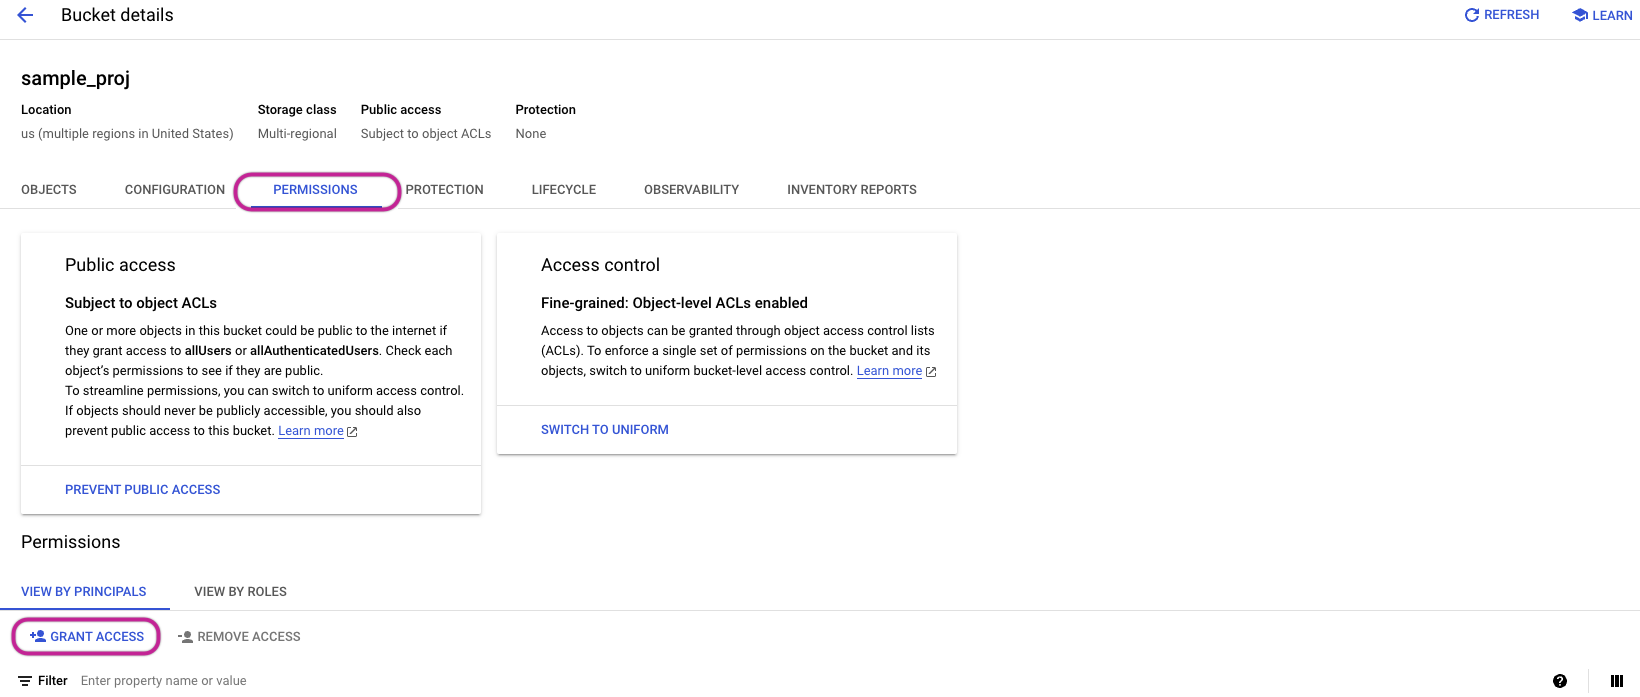
- Provide Access to the Dedicated Bucket for the Service Account:
Navigate to "Cloud Storage" and click "Buckets".
Select the intended bucket (designated for Custom File Zone).
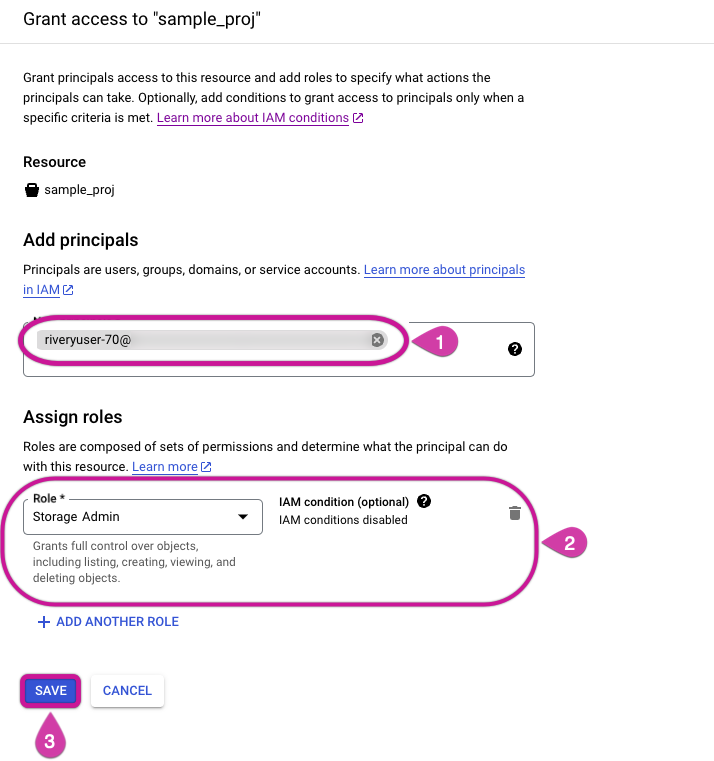
Within the "Permissions" section, click on the "+GRANT ACCESS" option.
In the "Add Principals" area, include your service account.
For role assignment, designate the Storage Admin role for the specified Custom File Zone
Complete the process by clicking the SAVE button.
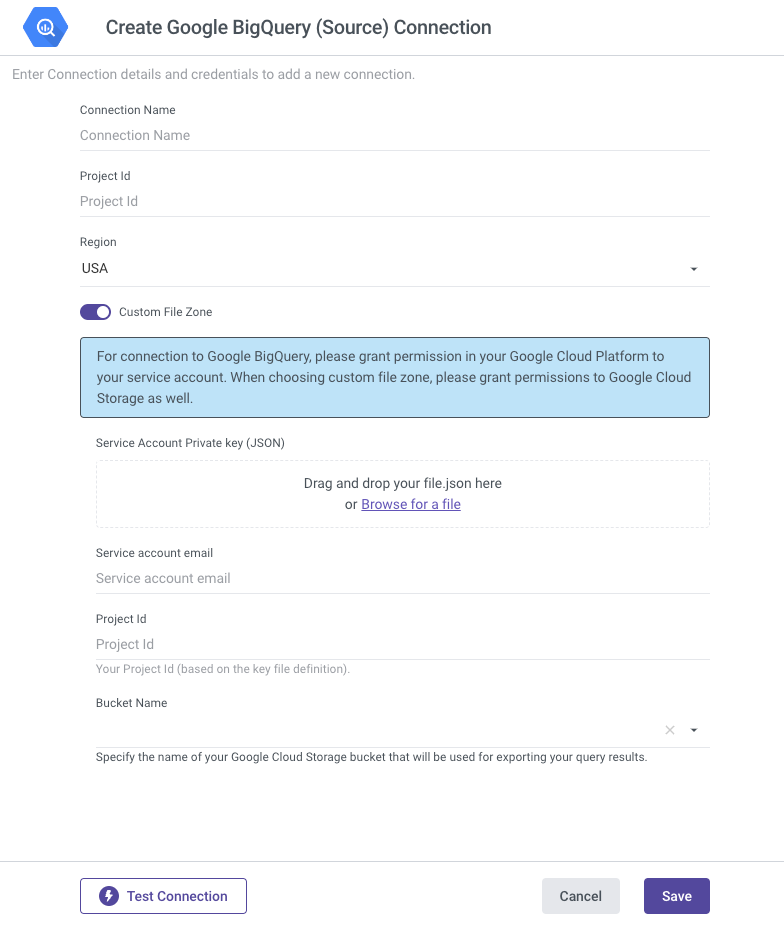
- Configure BigQuery Source Custom Connection in Rivery:
Follow the same steps as described under step 3 in "Default Service Account and Bucket Configuration."
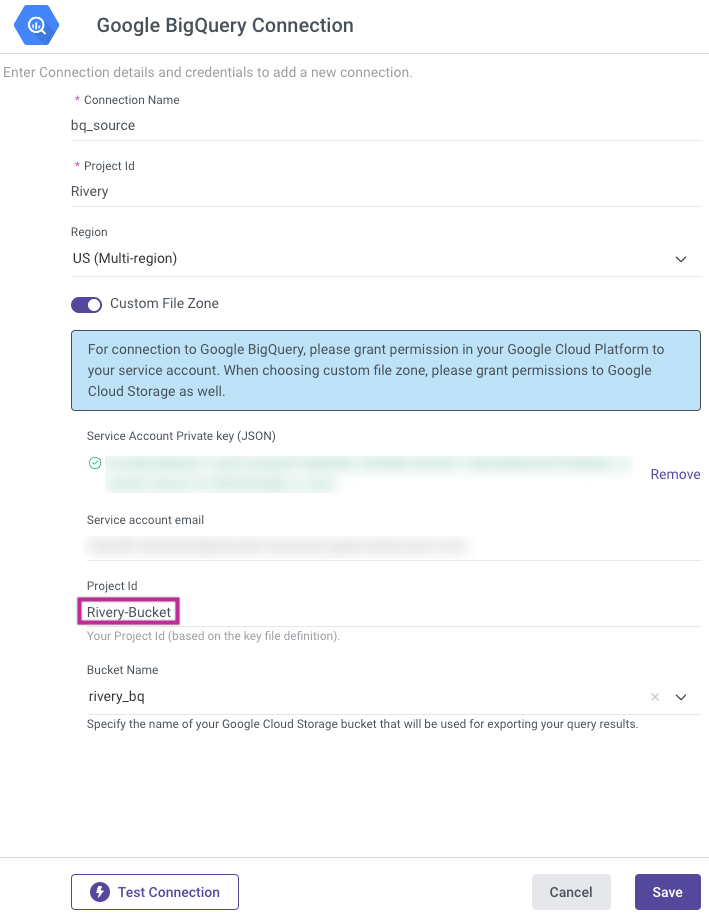
Now, you have the option to enable the "Custom File Zone" toggle, which is where the Custom Service Account and Bucket Configuration come into action.
Provide the Service Account email.
Submit your Service Account Private Key (JSON) file. To create your JSON file for the Service Account, adhere to these instructions:
Log in to the Google Cloud Platform Console.
Navigate to "IAM & Admin" and click "Service accounts".
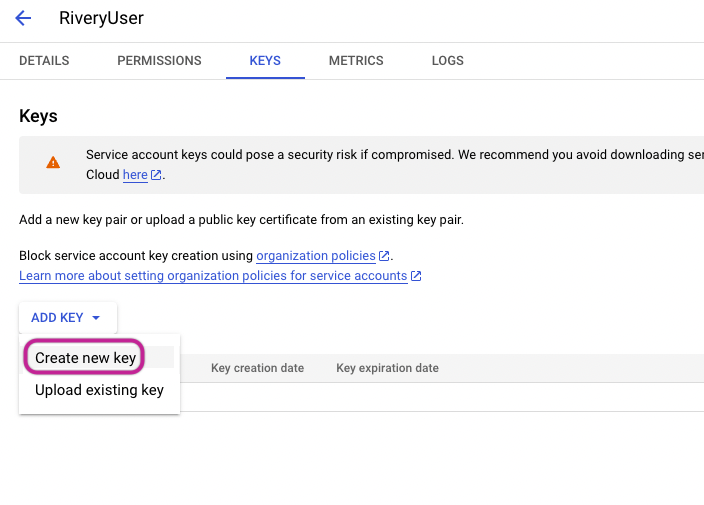
Select the relevant service account from the menu and access the "Manage Keys" option.

Click on the dropdown for adding a key, then choose to 'Create New Key".
Opt for a JSON key format and proceed by clicking the "Create" option.
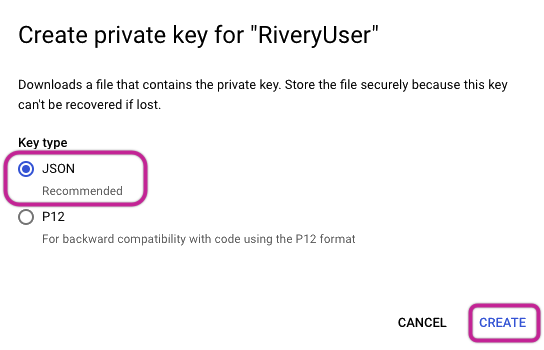
- This action will result in the generation of a JSON file, which will then be downloaded to your local device.
Set the Service Account Private Key (JSON), and this action will lead to the automatic population of the Service Account Email and Project ID fields.
Set the Default Bucket to the one created earlier, ensuring Region consistency.
Test the connection and save the settings.
Project ID and Custom File Zone Association
The project ID specified in the attached Service Account Private key (JSON) file determines the Custom File Zone.
For instance, in the case of "Rivery-Bucket," this Project ID is extracted from the Service Account Private key (JSON), and this specific Project ID dictates the buckets available for use as the Custom File Zone.
Supported Regions
Users have the capability to utilize BigQuery data across various geographic locations, offering increased flexibility and accessibility. Numerous tables are accessible to users regardless of where they are located. However, it's crucial to acknowledge that some tables might not be included in this accessibility framework.
This discrepancy arises from BigQuery's requirement for users to explicitly specify the location of each table. While efforts have been made to ensure widespread accessibility, certain tables may not be readily available due to this requirement. Therefore, users should be aware of the potential limitations and take necessary steps to address any missing data.
In Rivery, there is a strict region definition; the region in the connection must match the region of the datasets.
Was this article helpful?