Google Play Store Connection
- 2 Minutes to read
- Print
- DarkLight
- PDF
Google Play Store Connection
- 2 Minutes to read
- Print
- DarkLight
- PDF
Article summary
Did you find this summary helpful?
Thank you for your feedback!
This is a step-by-step tutorial for creating a Google Play Store connection.
Prerequisites
To connect to the Google Play Store, you must first create a Service Account and grant API access to it.
Service Account
To create one, simply follow these steps:
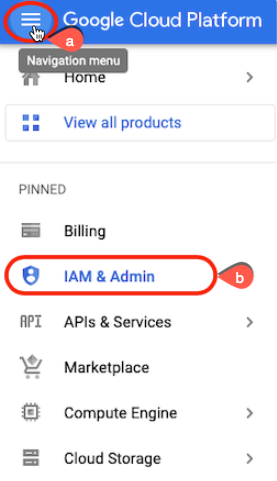
- Go toon your Google Cloud Platform and click on the Navigation menu -> IAM & Admin.
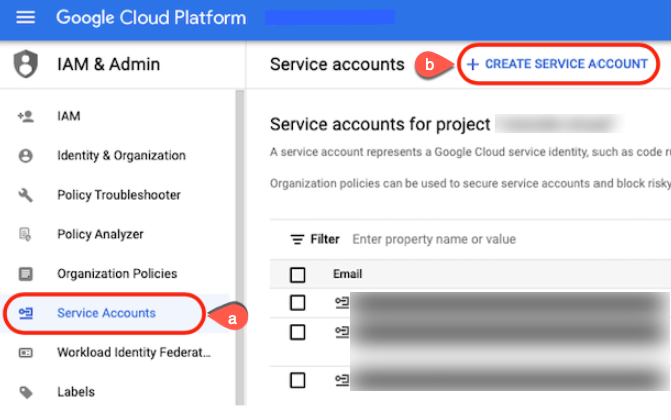
- Select Service Accounts from the drop-down menu and Create Service Account.
- Fill in the name of the Service account and then click Create and Continue.
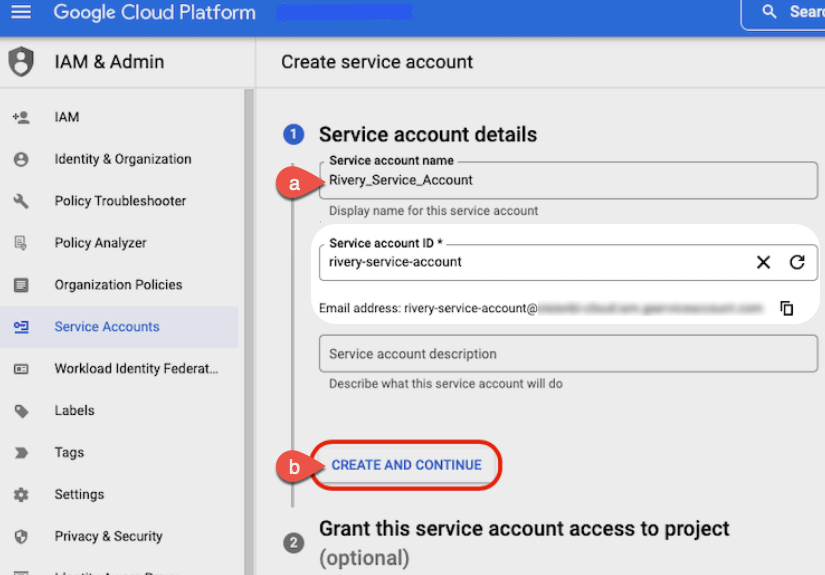 Note: The Service account ID (Email address) is filled in automatically.
 Copy it to your clipboard because you'll need it later.
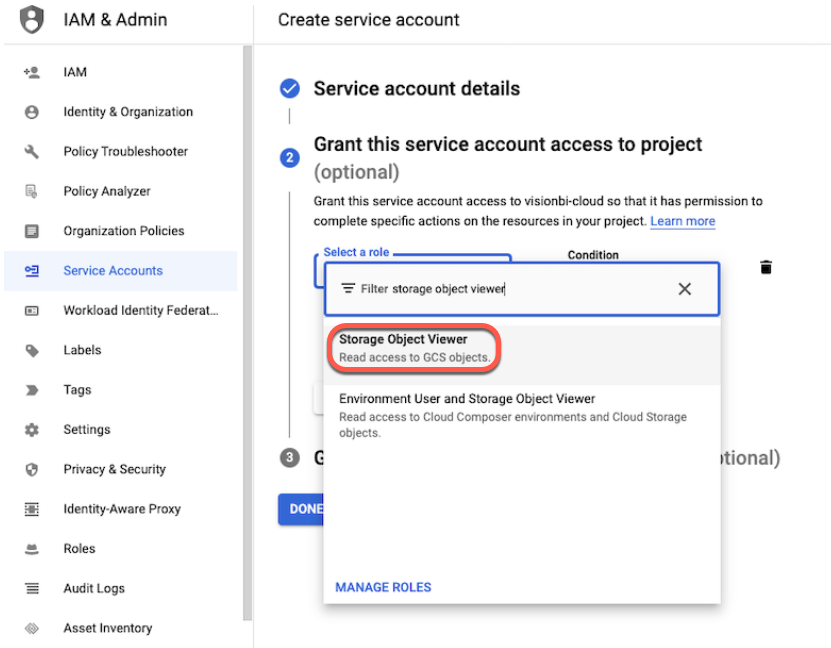
- Select the Storage Object Viewer role and then click Continue.
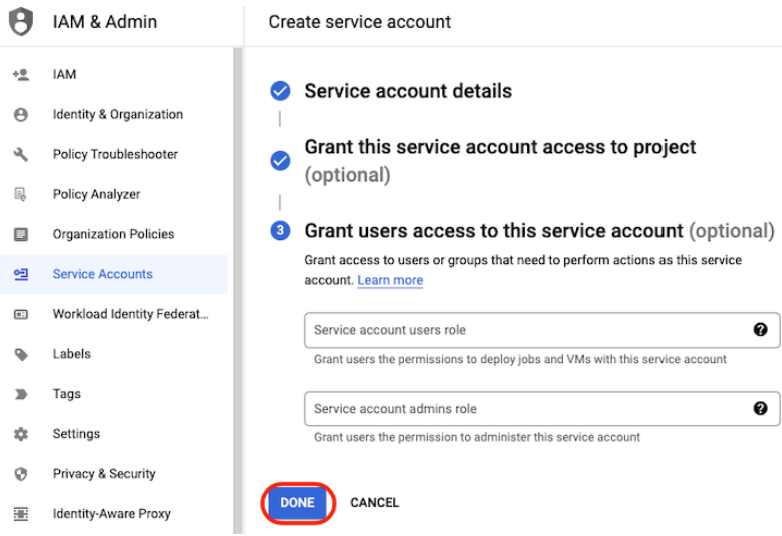
- Skip the step of granting users access to this service account and go straight to the Done button.
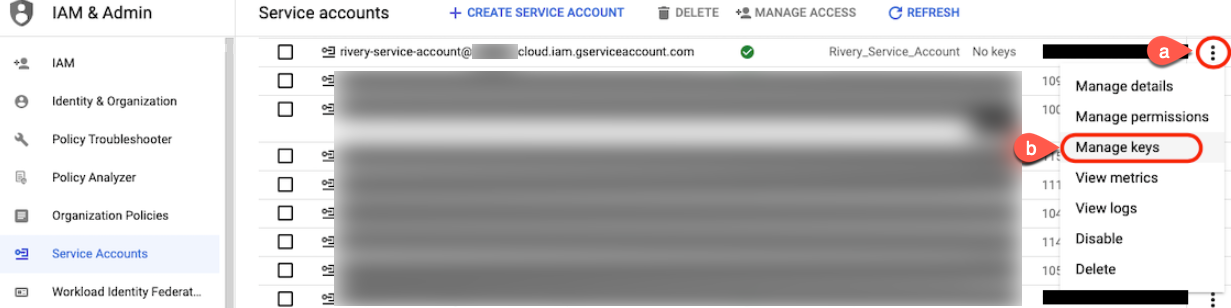
- Next to the Service Account you just created, select the 3 dots -> Manage Keys.
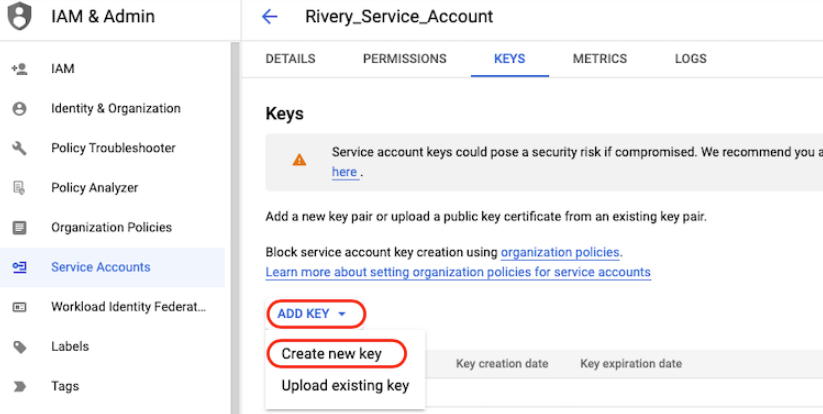
- Go to Add Key > Create New Key.
- Select the P12 Type and then click Create.
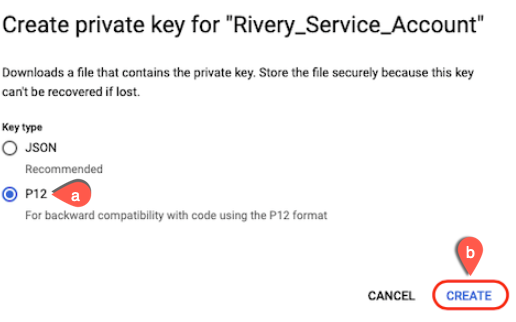
- Download the P12 file.
Setting Up API Access to Your Google Play Developer Account
Before you can begin making API calls to the Google Play Developer API, you must first configure access through both the Google Play Console and the Google Cloud Console. This setup process ensures that your application is properly authenticated and authorized to interact with the Google Play Developer services.
Follow the steps below to complete the required configuration:
Create a Google Cloud Project
Please Note: If you already have an existing project, you can use it.
If you already have an existing Google Cloud Project that you'd like to use, you can skip this step.
To create a new project:
Go to the Google Cloud Console.
Click on the Project dropdown in the top navigation bar and select New Project.
Provide a name for your project and select a billing account (if applicable).
Click Create.
For detailed guidance, refer to Creating and managing projects.
Enable the Google Play Developer API
Once your Google Cloud Project is set up, you need to enable the Google Play Developer API for that project.
To enable the API:
5. Open the Google Play Developer API page in the Google Cloud Console.
6. Ensure your project is selected in the top navigation bar.
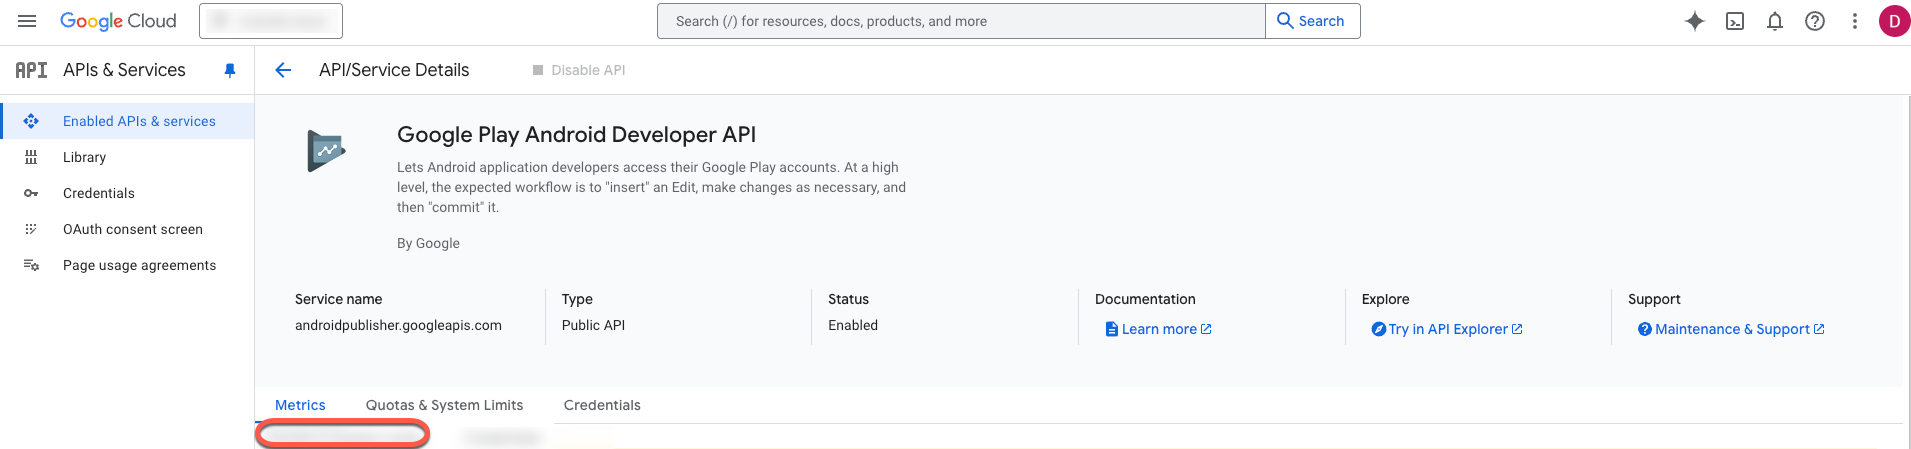
7. Click the Enable button to activate the API for your selected project.
Set Up a Service Account with Proper Permissions
To allow your application to access the Google Play Developer API, you must create a service account and assign it the necessary permissions within the Google Play Console.
Steps:
8. In the Google Cloud Console, go to IAM & Admin > Service Accounts.
9. Click Create Service Account.
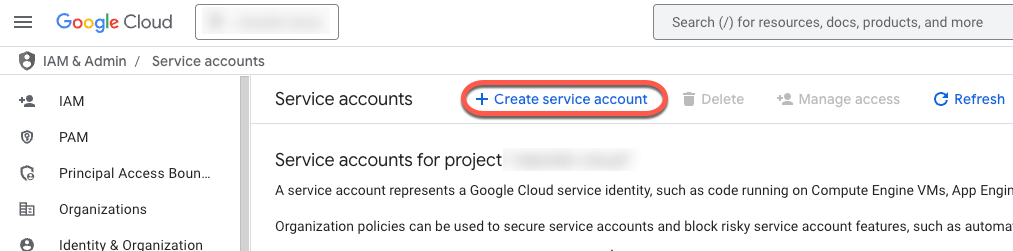
10. Provide a name and description, then click Create and Continue.
11. Assign the role Service Account User or other appropriate roles, then click Done.
12. After creating the service account, generate a P12 key file by selecting the account and choosing Manage keys > Add key > Create new key.
13. Save this key securely, it will be used to authenticate API requests.
14. In the Google Play Console, go to Setup > API access.
15. Click Grant access and add the service account you just created.
16. Assign appropriate permissions (e.g., View app information, Manage orders and subscriptions, etc.) depending on your use case.
17. Once these steps are complete, your service account will be authorized to interact with the Google Play Developer API, and you can begin making authenticated API calls.
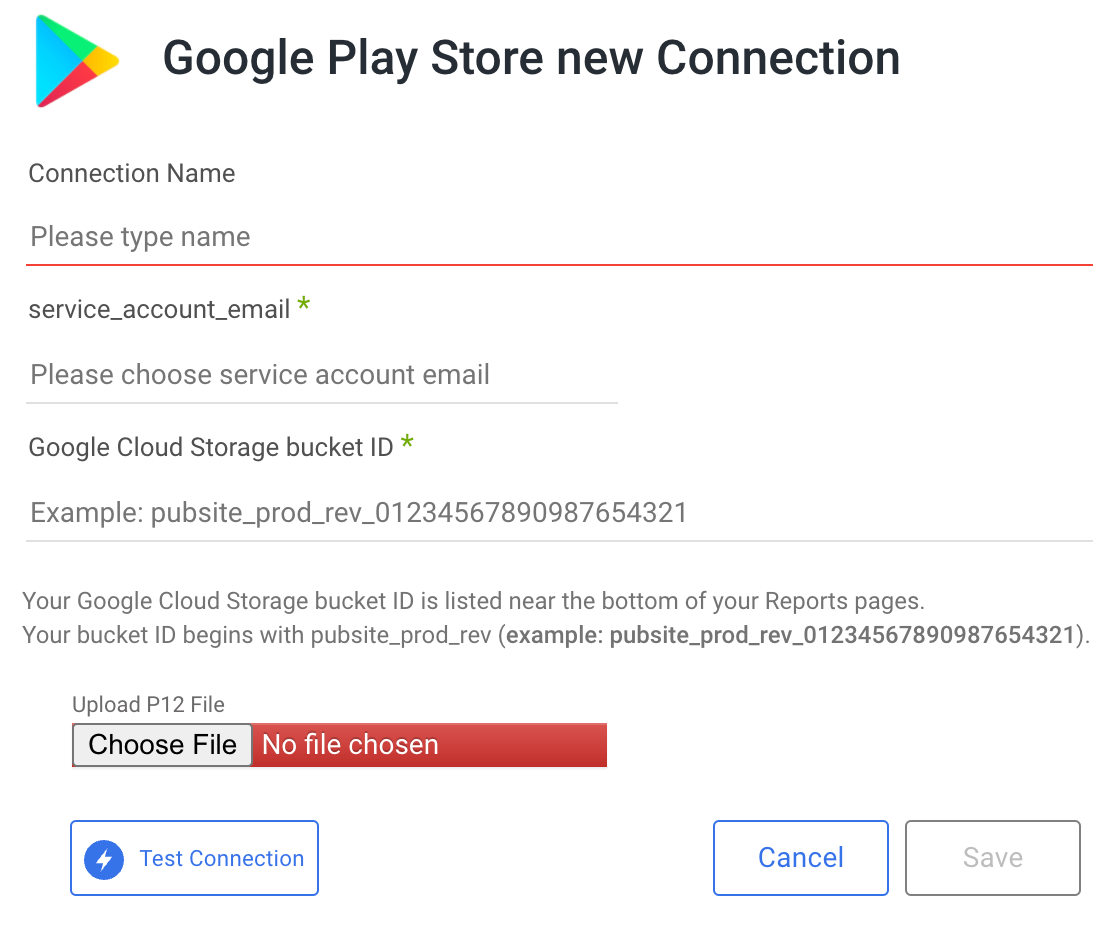
Connection Procedure
- Enter your Connection's Name.
- Fill in the Service Account Email field.
- Type in your Bucket ID.
- Upload the P12 File.
- Use the Test Connection function to see if your connection is up to the task.If the connection succeeded, you can now use this connection in Rivery.
Was this article helpful?