Klaviyo v2024-02-15 Connection
- 1 Minute to read
- Print
- DarkLight
- PDF
Klaviyo v2024-02-15 Connection
- 1 Minute to read
- Print
- DarkLight
- PDF
Article summary
Did you find this summary helpful?
Thank you for your feedback!
Starting June 30th, 2024, Klaviyo will no longer support Klaviyo Legacy v1 and v2 APIs. These APIs will be replaced by the Klaviyo v2024-02-15 API.
Introduction
This guide provides detailed instructions to set up the Klaviyo connection in Rivery.
Prerequisite
To connect Rivery to Klaviyo, you can use either an API Key or OAuth2 authentication method.
Setting Up an API Key
If you choose the API Key connection method, follow these steps to generate your API Key in Klaviyo:
- Log in to your Klaviyo account.
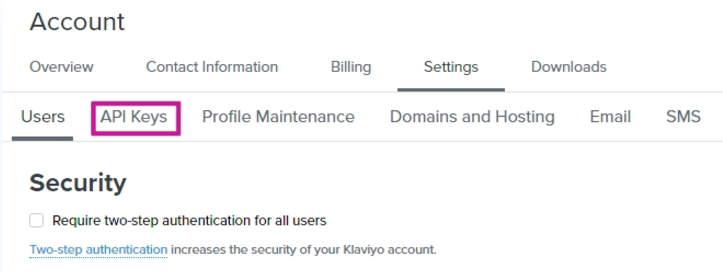
- Click on your account icon and go to the Account section.
- In the Account section, click on Settings.

- Go to the API Keys section.

- Click the Create Private API Key button.

- Once generated, click the icon to reveal the API Key.
- Copy the key and save it securely. You will use it during the connection setup in Rivery.
Establishing a Connection in Rivery
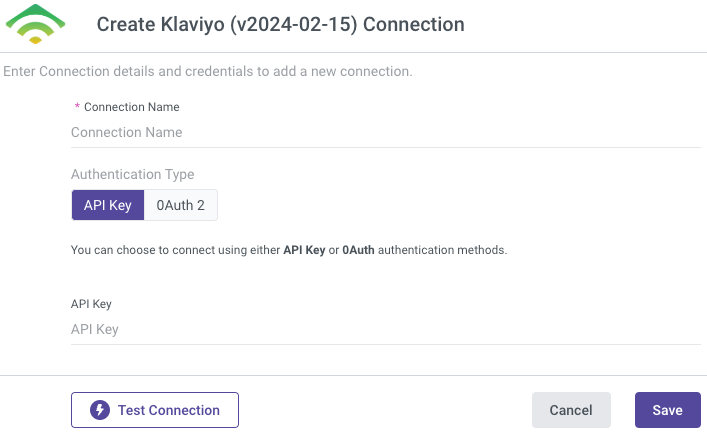
- Provide a meaningful name in the Connection Name field to identify your connection.
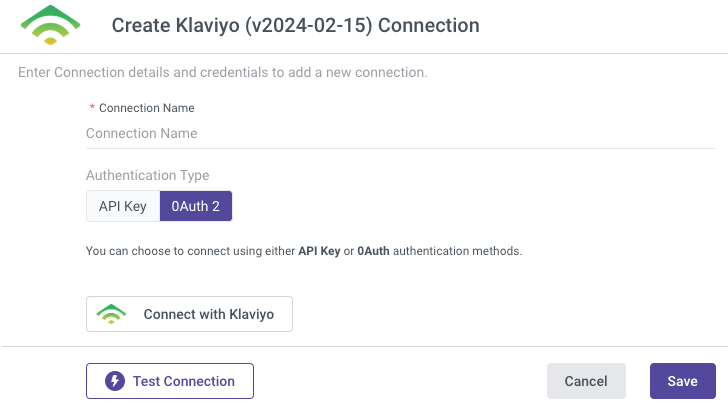
- Choose your connection method: API Key or OAuth2.
- API Key
- Paste the API Key you generated from your Klaviyo account into the provided field.

- Paste the API Key you generated from your Klaviyo account into the provided field.
- OAuth2
- Click on the Connect with Klaviyo button.
- Enter your Email and Password to authenticate the connection.
- Ensure your browser allows pop-ups. If nothing happens after clicking the button:
- Look for a pop-up blocked notification, typically near the browser's URL bar.
- Click the notification and select Always allow pop-ups from Rivery.
- Retry connecting by clicking Connect with Klaviyo. A pop-up window will appear to complete the connection process.

Click the Test Connection button to verify that the integration is correctly configured.
If the test is successful, your connection is ready to use with Rivery.Click Save to finalize the setup.
Was this article helpful?

