MongoDB Atlas Connection
- 2 Minutes to read
- Print
- DarkLight
- PDF
MongoDB Atlas Connection
- 2 Minutes to read
- Print
- DarkLight
- PDF
Article summary
Did you find this summary helpful?
Thank you for your feedback!
Create MongoDB Atlas Connection
Step 1 - Whitelist Rivery's IP's In Your Mongo Instance
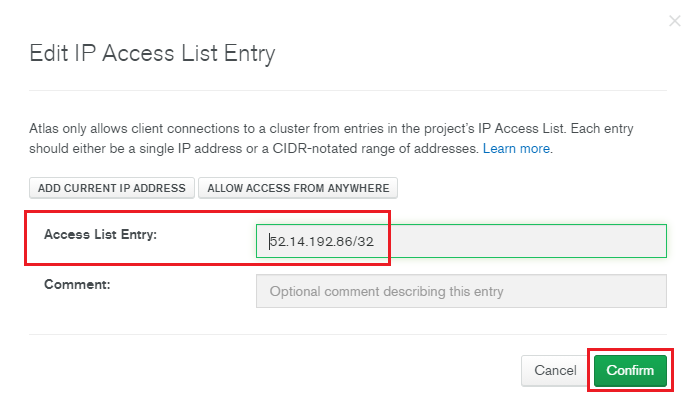
1.In your MongoDB Atlas account - Go to Network Access and Click on Add IP Adresses

2.Whitelist the following IP's in your Mongo Instance -
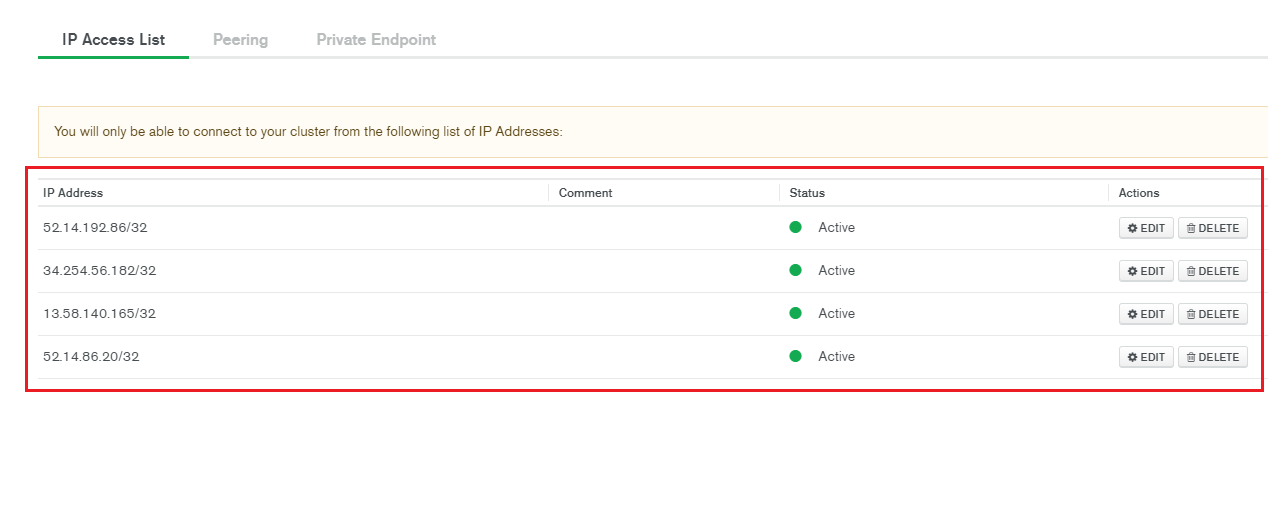
After Whitelisting the IP's, the outcome result will be the following -
Connect to Mongo Atlas using Private Endpoint (Optional)
Utilizing Private Endpoint for connecting to Mongo Atlas is exclusively accessible to users on the Enterprise plan.
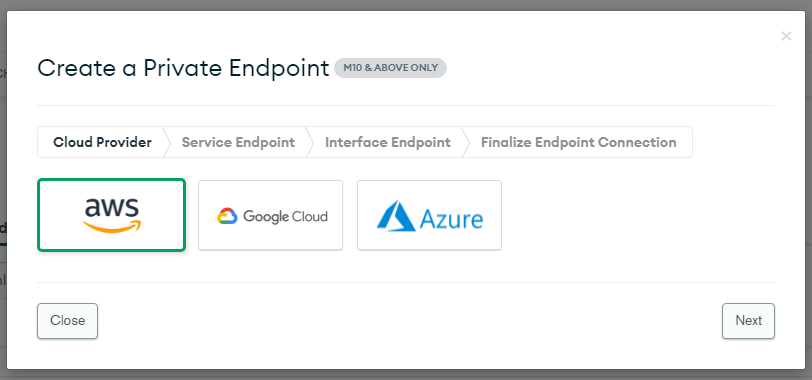
Under Database Network, choose Private Endpoint and click on Add Private Endpoint:

On Cloud Provider - Choose AWS and click Next
Choose Region.

Rivery supports PrivateLink in the next regions:
On console.rivery.io:
- us-east-1
- us-east-2
- us-west-2
On eu-west-1.console.rivery.io - eu-west-1
- eu-central-1
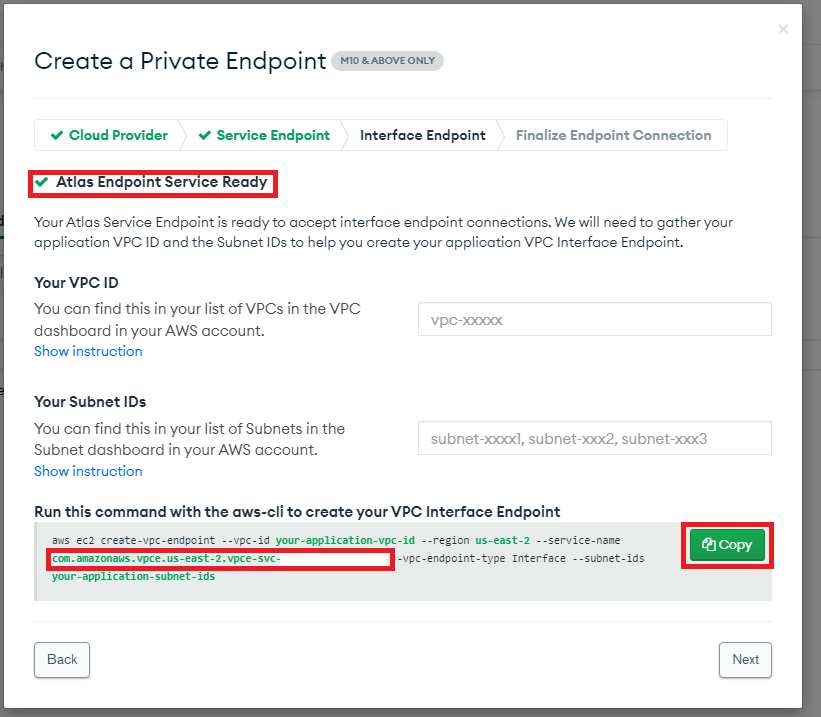
Wait for a while until the endpoint will be available, and a green v is shown up.
After that, copy the command aside, and get the--service-namevalue:
Provide the
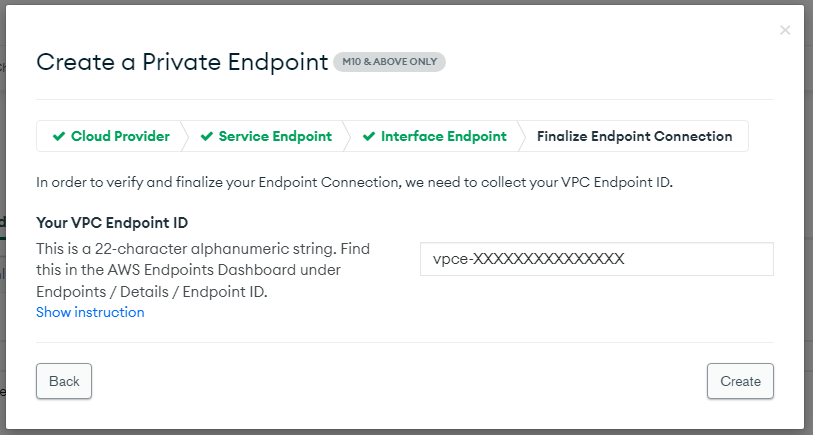
service-nameto your Rivery Account Manager or to the Support team. In this step, Rivery internally will make a handshake with your Mongo Atlas Private Endpoint, and should provide you a VPC-Endpoint-ID, with the next format:vpce-XXXXXXXXXXXXXXXPaste the VPC Endpoint ID in the right place and click on Create:
Step 2 - Retrieve A Connection String
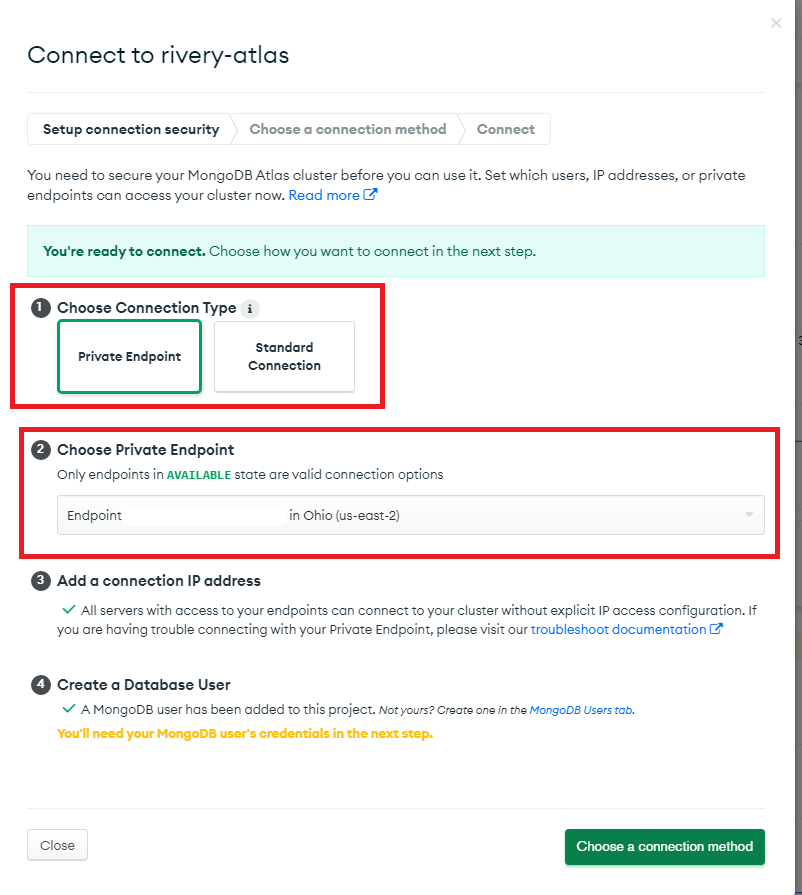
- In your MongoDB Atlas account - Go to Databases, choose your database and Click on Connect

If Private Endpoint created on Step 1, choose Private Endpoint as connection method, and also choose the Private Endpoint you've created on Step 1:
Then, select Connect your application

Lastly, copy the URL shown in the screen, and paste aside.
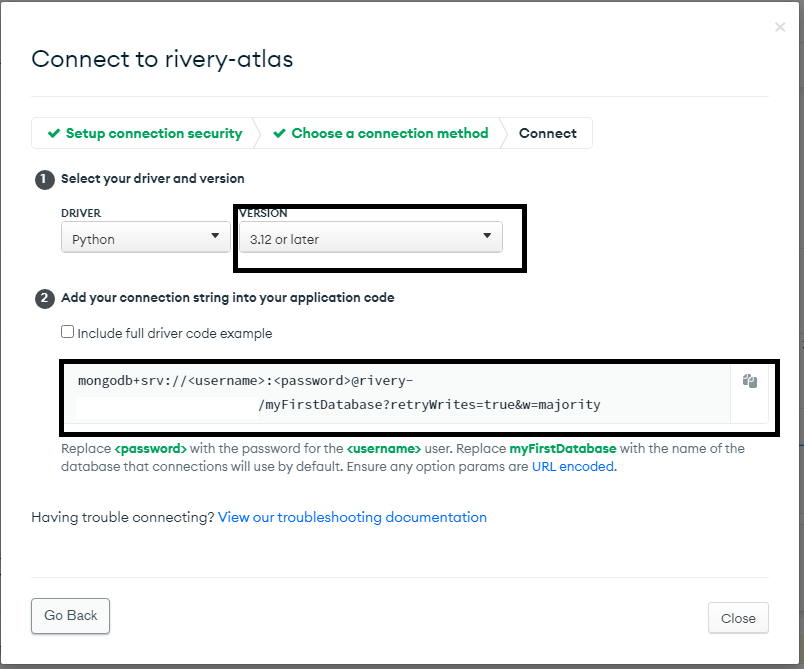
And Change the <username> and <password> to {username} and {password} and change the MyFirstDatabase to the database name you want to connect to:

Important: Formatting MongoDB Connection Strings Correctly
When connecting to MongoDB Atlas clusters, ensure the connection string includes the +srv prefix. This prefix allows the use of DNS SRV records for cluster discovery and connection configuration.
Here's an Example:
- Incorrect:
mongodb://shilohrajk:hxbTHdLfPZKAVR2v@cluster0.ksugj.mongodb.net:27017/sample_mflix
- Correct:
mongodb+srv://shilohrajk:hxbTHdLfPZKAVR2v@cluster0.ksugj.mongodb.net/sample_mflix
Using the +srv format helps prevent DNS-related and authentication issues, ensuring a reliable connection to your MongoDB Atlas cluster.
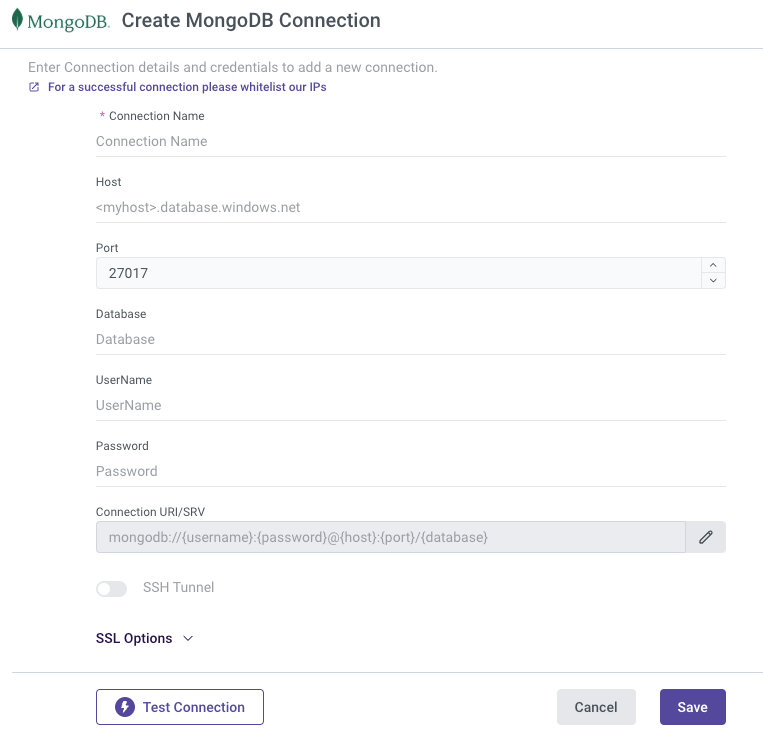
Step 3 - Setting-Up The Connection At The Rivery Console
- Provide a Name for your connection.
- Configure the Host, Port (default: 27017), and Database.
Please Note: The database name must be in lowercase.
- Enter your Username and Password.
- Specify your URI.
- Click Test Connection to verify your credentials.
- Save your connection by clicking Save.
Was this article helpful?