- 1 Minute to read
- Print
- DarkLight
- PDF
NetSuite Connection
- 1 Minute to read
- Print
- DarkLight
- PDF
As of November 8, 2021, new users are only able to use the NetSuite2.com (Netsuite Analytics) data source. Existing users can continue to access the NetSuite.com (Netsuite) data source, but it is no longer being updated and support will end soon. All customers are encouraged to switch to NetSuite2.com. More information can be found in the "New Accounts and Access to the Connect Data Source" document.
Setting up the connection
To set up a connection you will need to create a dedicated admin user for Rivery in your NetSuite account and locate the following information: Account ID, Role ID, and Service Host, in addition to the user login password and email.
Create a dedicated admin user in your NetSuite account for Rivery, We suggest using "Rivery" as the name of the user.
Follow the instructions in the link below: https://netsuiteorg.atlassian.net/wiki/spaces/DOC/pages/11468802/Adding+New+Users+in+Your+Account
Make sure to select the Administrator role under the Roles section
Locate your Account ID
Login to your NetSuite Account
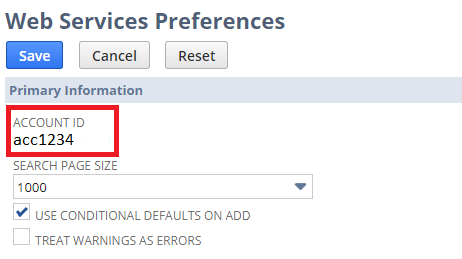
From the main screen, navigate to: Setup ->Integration ->Web Services Preference
Under Primary Information you will find your Account ID
Locate the Role ID of your dedicated Rivery user
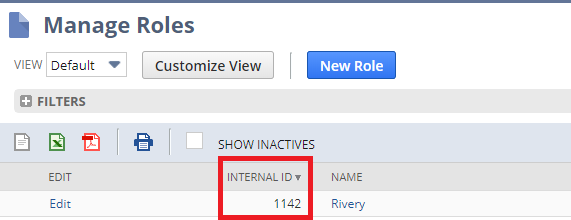
From the main screen navigate to: Setup ->Users/Roles ->Manage Roles
The Role ID is located under the Internal ID column.
3. If you can't locate the Internal ID column you might need to add it.
1. Click on the Customize View button
2. Search for the Internal ID column in the input box that opened and select the field
3. Click Add and then click Save
Locate your service host
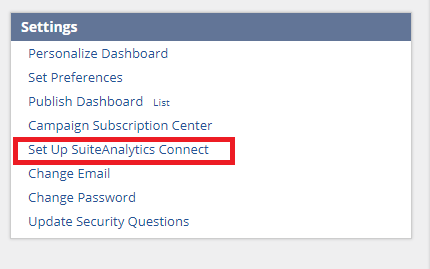
- From the main screen find the Settings view and select Set Up SuiteAnalytics Connect
- Click on Your Configuration >
- Your host is under SERVICE HOST
- From the main screen find the Settings view and select Set Up SuiteAnalytics Connect
Creating a NetSuite connection in Rivery
In your Rivery Account , go to Connections
Press on +Create New Connection
Choose NetSuite
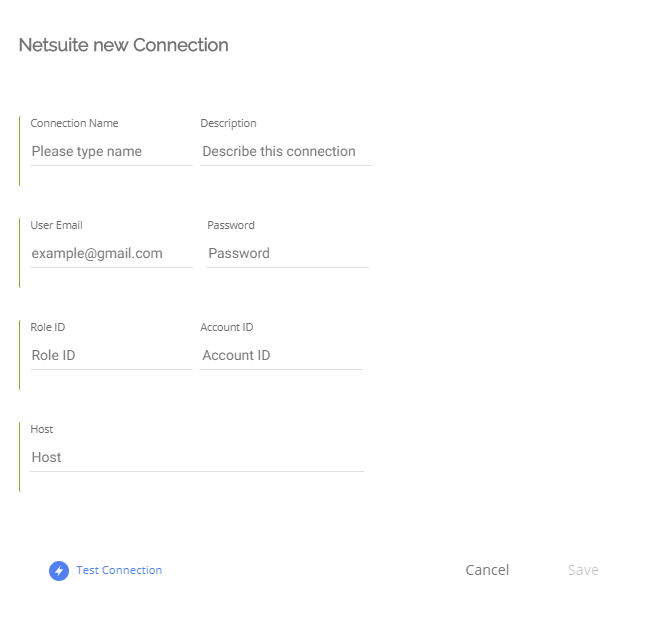
Fill a suitable name under Connection Name and insert the connection details you've located to the corresponding fields.
- User Email - The email used to login to your NetSuite Account
- Password - The password for the login
- Role ID - The located Role ID
- Account ID - The located Account ID
- Host - The located Service Host
*Make sure to not include the https:// prefix in this field
Click Save and create the connection


