NetSuite Analytics Connection
- 2 Minutes to read
- Print
- DarkLight
- PDF
NetSuite Analytics Connection
- 2 Minutes to read
- Print
- DarkLight
- PDF
Article summary
Did you find this summary helpful?
Thank you for your feedback!
As of November 8, 2021, new users are only able to use the NetSuite2.com (Netsuite Analytics) data source. Existing users can continue to access the NetSuite.com (Netsuite) data source, but it is no longer being updated.
All users are encouraged to switch to NetSuite2.com.
More information can be found in the "New Accounts and Access to the Connect Data Source" document.
All users are encouraged to switch to NetSuite2.com.
More information can be found in the "New Accounts and Access to the Connect Data Source" document.
This is a step-by-step tutorial for creating a NetSuite Analytics connection.
Prerequisite
An Admin user is required to create additional user accounts.
Create a Role for Rivery and Grant Netsuite Analytics Permissions
Create a Role
- Navigate to Setup -> Users/Roles -> Manage Roles -> New.
- Name your role "Rivery".
- Under "Subsidiary Restrictions", select "All".
- Choose "Primary" under "Accounting Books".
- Scroll down and check the "WEB SERVICES ONLY ROLE" under "Authentication."
Role Permission Options:
Below is a list of the minimum permissions that must be granted to the role in order to use Rivery with Netsuite:
| Permission | Level | Tab |
|---|---|---|
| SOAP Web Services | Full | Setup |
| Log in using Access Tokens | Full | Setup |
| User Access Tokens | Full | Setup |
| SuiteAnalytics Connect - Read All | Full | Setup |
| SuiteAnalytics Connect | Full | Setup |
| Access Token Management | Full | Setup |
| Custom Body Fields | View | Setup |
| Custom Fields | View | Setup |
| Custom Lists | View | Setup |
| Custom Record Types | View | Setup |
| Deleted Records | View | Setup |
| Perform Search | View | Lists |
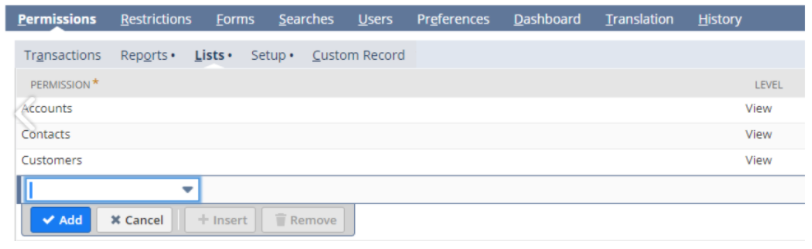
How to add permissions:
- Under the permissions tab, locate the sub-tab that corresponds to the entity you want to extract (for example, lists).
- Locate the record to which you want to add permission (such as Accounts).
- Set the level of permission for that record (for example, view).
- Select Add.
- Continue until all entities are added.
- Click Save.
Sign Out/Sign In
At this stage in the process, it is recommended to sign out and then sign back into the Netsuite account to ensure that the previous steps have been properly saved.
Create a New User
Create a new user and assign the previously created role to this user:
- Navigate to Lists -> Employees -> Employees -> New.
- Enter your Name and Email address.
- Select the Access sub-tab.
- Check the boxes for 'Give Access' and 'Send Notification Email'.
- Check the box next to 'Manually Assign or Change Password'.
- Set your own password.
- Choose the Role that you want to assign. In this case, type "Rivery" and then click the Add button.
- Save the record.
Log In with the Rivery User You Just Created
Log in with your newly established Rivery user and create a Rivery integration application.
Follow the steps below to obtain the Consumer Key and Consumer Secret:
- Navigate to Setup -> Integration -> Manage Integrations -> New
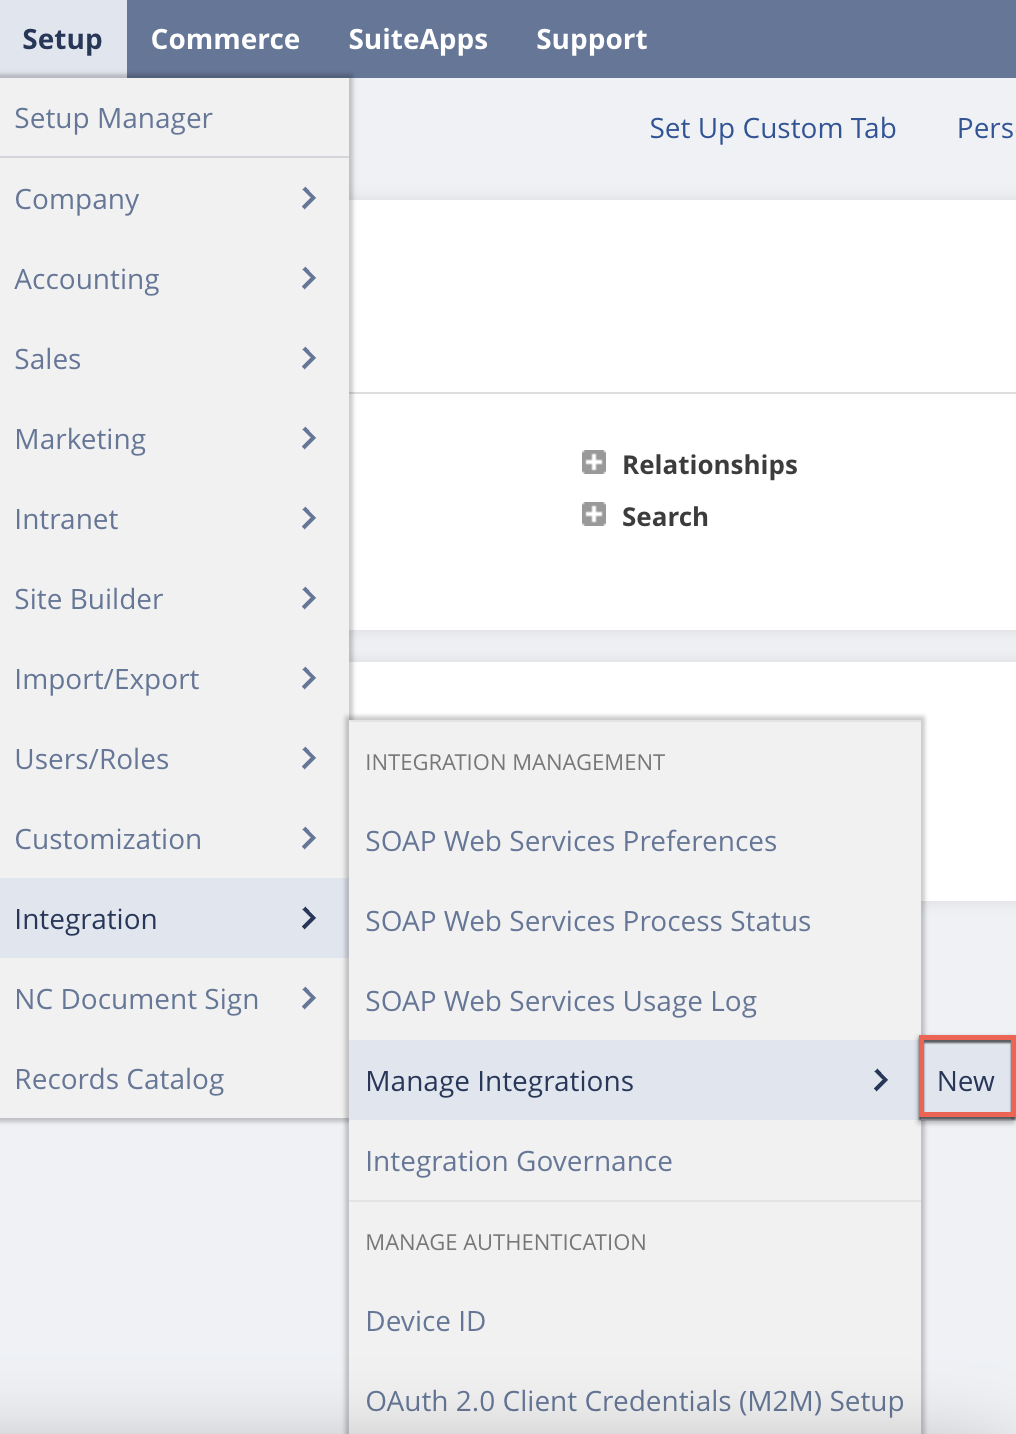
- Name your integration "Rivery".
- Ensure the TOKEN-BASED AUTHENTICATION (TBA) is enabled.
- Click the Save button.
- A Consumer Key and Secret will be displayed once. Copy them to your clipboard because you'll need them later.
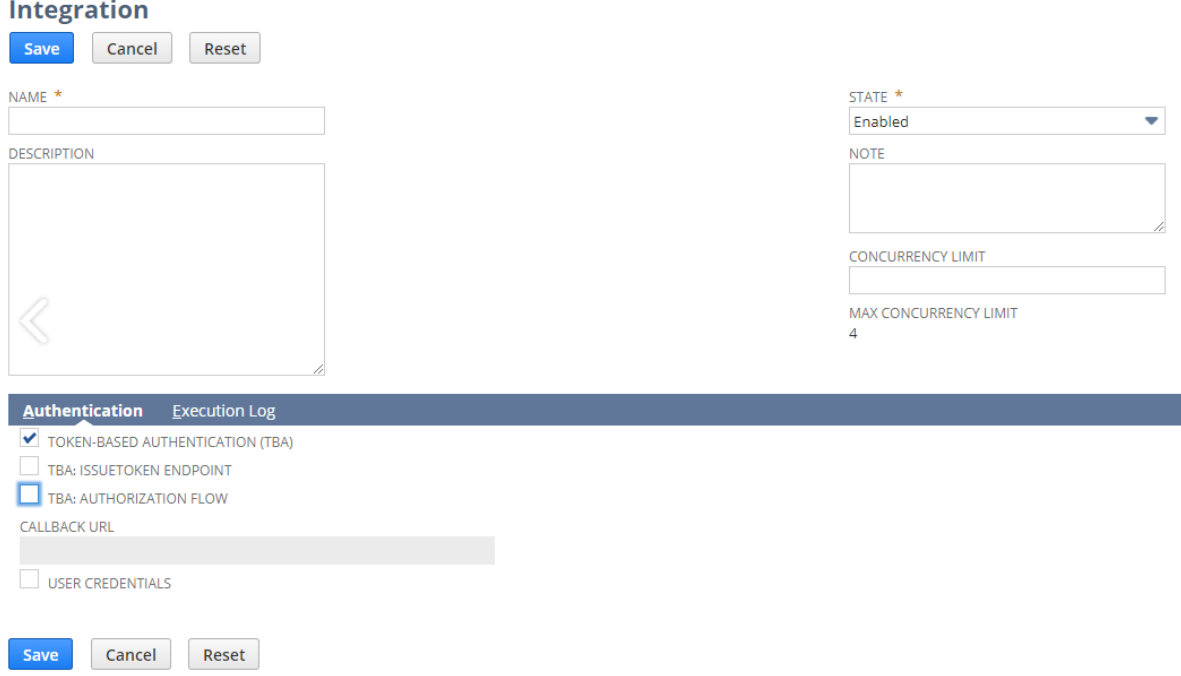
Create an Access Token
- Navigate to Setup -> Users/Roles ->Access Tokens -> New
- Select the previously created application (an integrated record).
- Choose the previously created user.
- Choose the role you've assigned to that user.
- Enter a name for the access token or use the one that is generated.
- A Token Key and Secret will be displayed once. Copy them to your clipboard because you'll need them later.
Sign Out/Sign In
At this stage in the process, it is recommended to sign out and then sign back into the Rivery account to ensure that the previous steps have been properly saved.
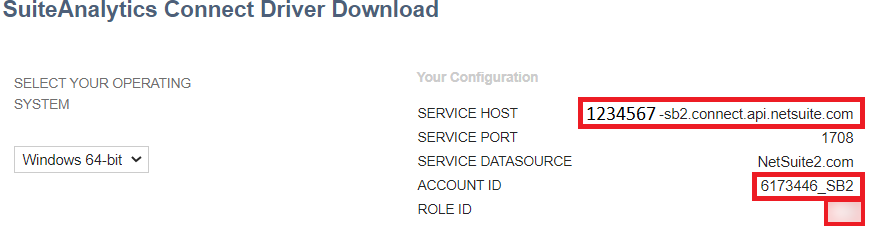
Locate Your Service Host, Account, and Role ID
- Locate the Settings button on the main screen and select Set Up SuiteAnalytics Connect.
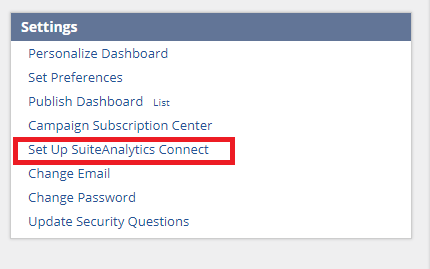
- Click on Your Configuration.
- Your host is listed under SERVICE HOST ('sb2' stands for sandbox).
- Account ID and Role ID can be found directly beneath, as shown in the image below.
- Copy them to your clipboard because you'll need them later.
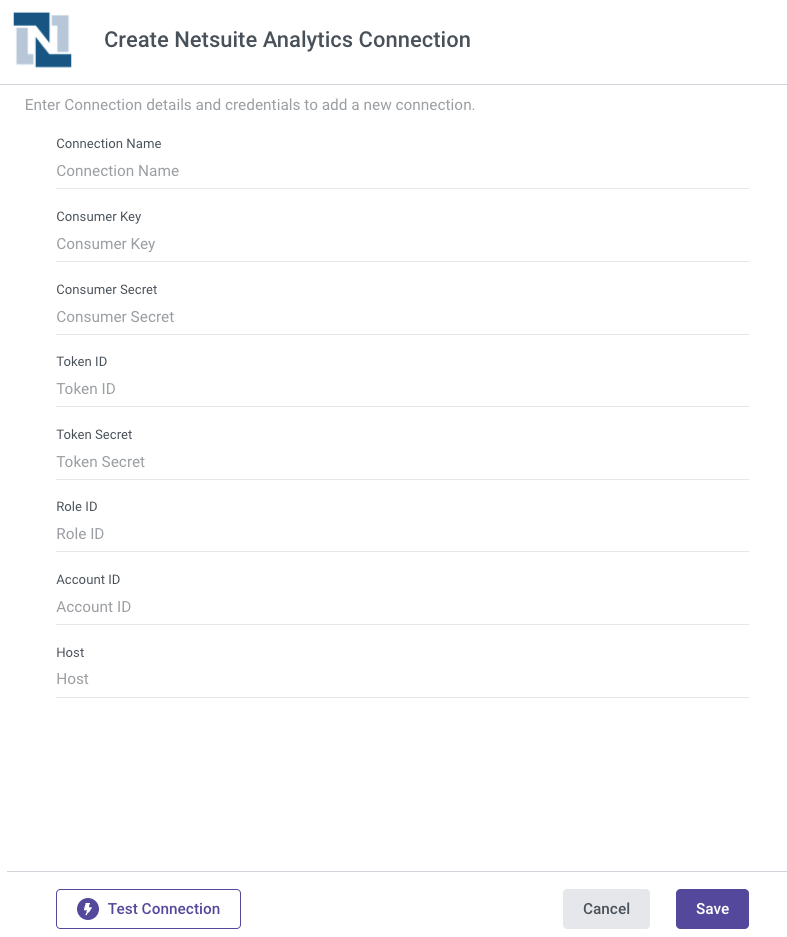
Netsuite Analytics Connection Procedure
- Choose your Connection Name.
- Enter the Consumer Key and Secret generated by the Integration Application.
- Fill in the Token ID and Secret that were generated in the Access Token section.
- Input the Role and Account ID.
- Enter Host.
- Click Save.
- Use the Test Connection function to see if your connection is up to the task. If the connection succeeded, you can now use this connection in Rivery.
Was this article helpful?