NetSuite Reporting Connection
- 3 Minutes to read
- Print
- DarkLight
- PDF
NetSuite Reporting Connection
- 3 Minutes to read
- Print
- DarkLight
- PDF
Article summary
Did you find this summary helpful?
Thank you for your feedback!
Setting up the connection
For the following steps please make sure you are logged in as an Administrator.
Enable web services & token-based authentication
Under Setup -> Company -> Enable Features
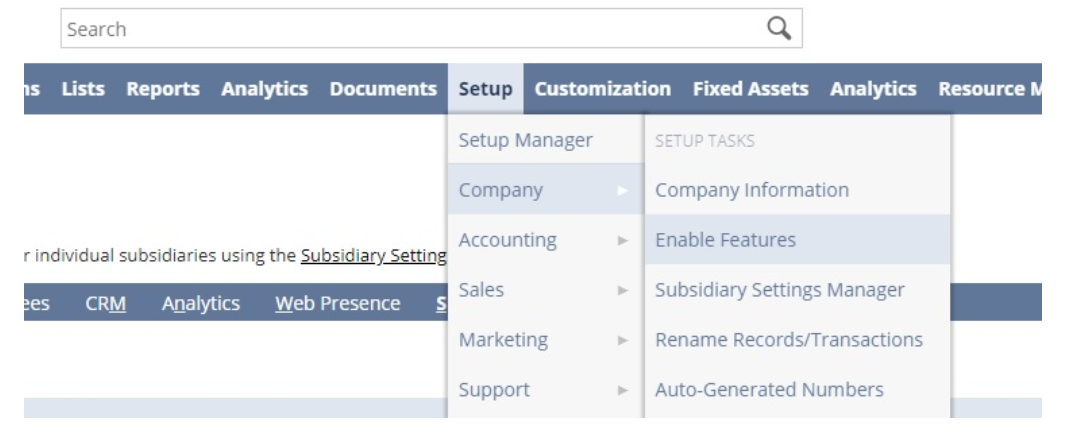
Click on SuiteCloud

Under SuiteTalk, enable SOAP WEB SERVICES

Under Manage Authentication, enable TOKEN-BASED AUTHENTICATION

Scroll to the end or start of the page and click on Save
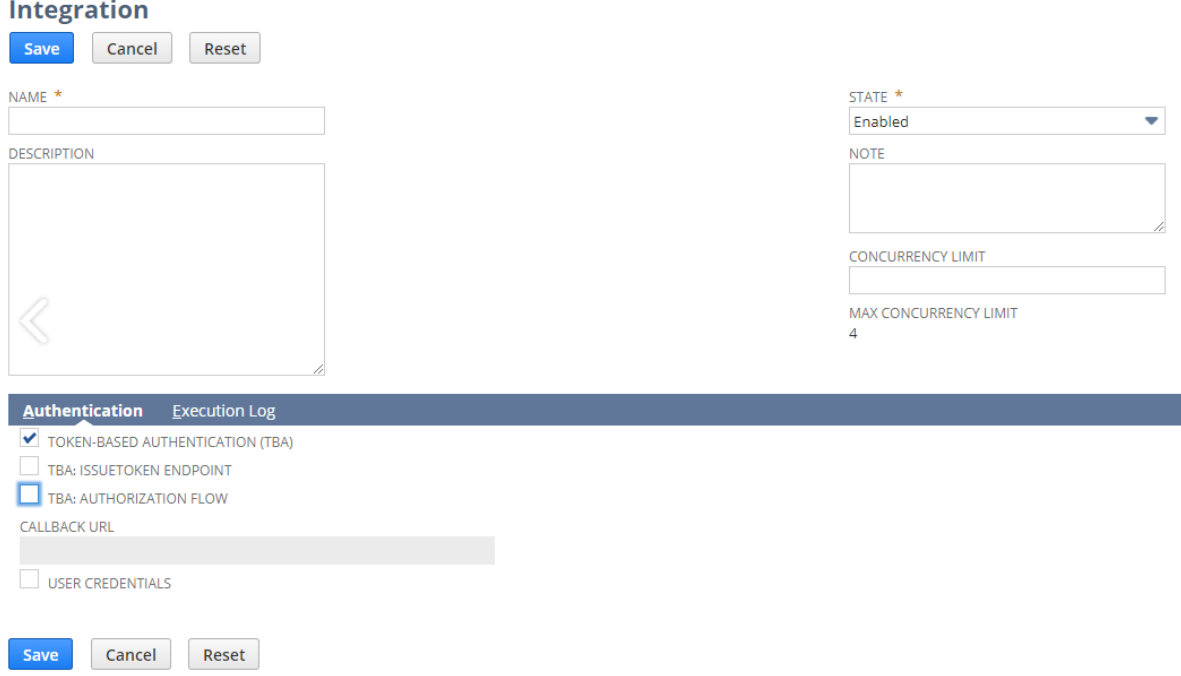
Create an integration record (app) for Rivery
- Under Setup -> Integration -> Manage Integrations -> New
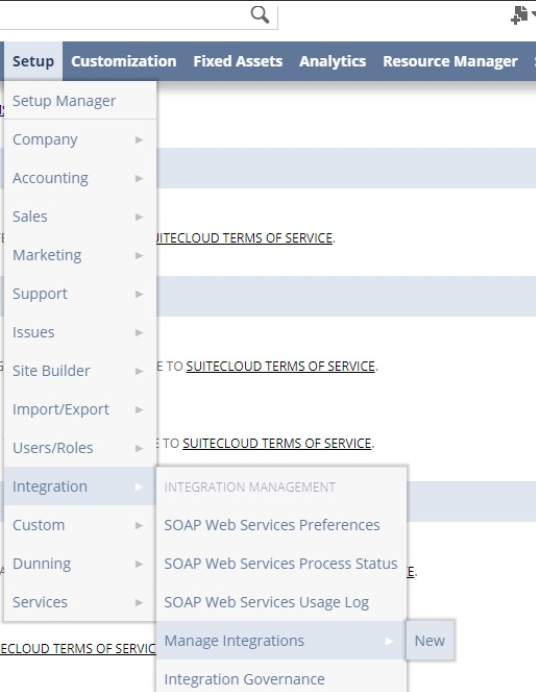
Name your integration "Rivery"
Make sure the TOKEN-BASED AUTHENTICATION (TBA) is enabled
Click Save. A consumer secret and key will appear. Make sure to write them down as we will be using them later (also, they will only appear once).
Create a role for Rivery and set permission
- Create a role
- Setup -> Users/Roles -> Manage Roles -> New
- Name your role "Rivery"
- Under Authentication enable the 'WEB SERVICES ONLY ROLE' option.
- There are two options when setting permission for the role:
Set the administrator role:
This is done under the General tab -> issue role -> administrator
If you choose this option, please continue to the "Create a user" section once the role is set (don't forget to save the role)Set specific permission for the role:
Below, you will find a list of minimum permissions you need to grant to the role to be able to use Rivery with Netsuite, In addition you need to add specific permissions for each record you want to use Rivery to extract, e.g. Accounts, Invoice etc. Please follow the stesp 1-5 for each of these records.
| Permission | Level | Tab |
|---|---|---|
| SOAP Web Services | Full | Setup |
| Log in using Access Tokens | Full | Setup |
| User Access Tokens | Full | Setup |
| Custom Body Fields | View | Setup |
| Custom Fields | View | Setup |
| Custom Lists | View | Setup |
| Custom Record Types | View | Setup |
| Deleted Records | View | Setup |
| Perfrom Search | View | Lists |
    How to add permissions:
   1.  Under the permissions tab, find the subtab that corresponds to the entity you wish to extract, e.g lists
   2.  Find the record you want to add permission for e.g. Accounts
    3. Set the level of permission for that record e.g. view
    4. Click add
    5. Keep going until all entities have been added
    6.  Click on save
Create a user and assign the role you previously created to the user, We suggest using "Rivery" as the name of the user and the role.
- Go to Lists -> Employees -> Employees -> New.
- Enter the name and the email address.
- Click the Access subtab
- Check Give Access and Send Notification Email.
- Check MANUALLY ASSIGN OR CHANGE PASSWORD
- Assign a password of your choice.
- Select the Role that you need to assign. In this case.. Rivery and click Add.
- Save the record.
Create an Access token for Rivery
Under Setup -> Users/Roles ->Access Tokens -> New
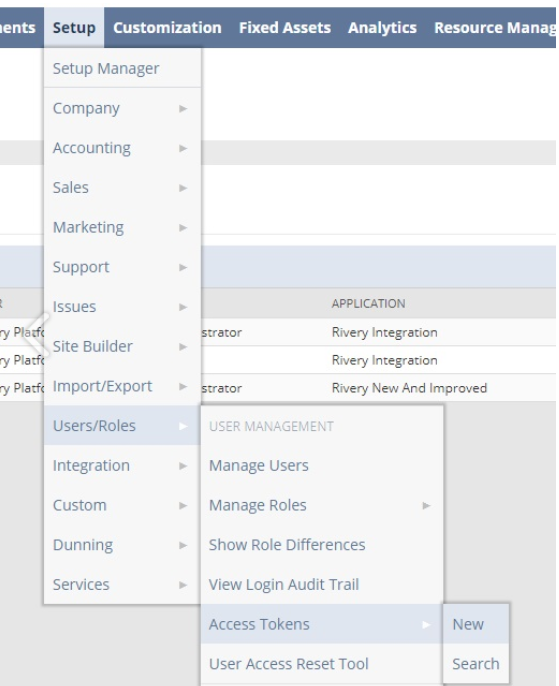
Select the application (an integrated record) you've previously created
Select the user you've previously created
Select the role you've created for that user
Enter a name for the access token or use the generated name
Write the token id and secret, you will need them in the connection in Rivery. (also they will only appear once).
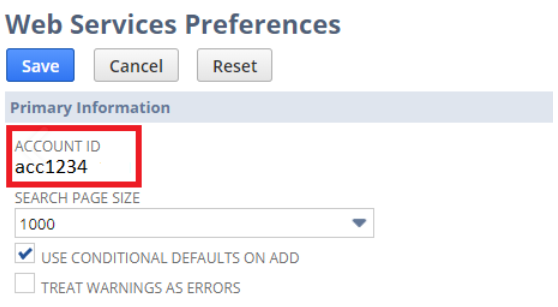
Locate your Account ID
- From the main screen navigate to: Setup -> Integration -> Soap Web Services Preference
- Under Primary Information you will find your Account ID
Creating a NetSuite Reporting connection in Rivery
- In your Rivery Account, go to Connections
- Press on +Create New Connection
- Choose NetSuite Reporting
- Choose the token tab
- Fill a suitable name under Connection Name and insert the connection details you've located/created to the corresponding fields.
- Consumer Key
- Consumer Secret
- Token ID
- Token Secret
- Account ID - The located Account ID
- Click Save and create the connection
- Test the connection if the test is successful you are ready to work with NetSuite Reporting in Rivery
Was this article helpful?