YouTube Connection
- 4 Minutes to read
- Print
- DarkLight
- PDF
YouTube Connection
- 4 Minutes to read
- Print
- DarkLight
- PDF
Article summary
Did you find this summary helpful?
Thank you for your feedback!
Introduction
This document provides a step-by-step guide on connecting YouTube with Rivery. Through this integration, users can simplify data workflows, and consolidate data for analytical purposes.
Prerequisites
There are 2 authentication methods available:
- OAuth.
- Custom Application (Located within the Advanced Options).
Prior to proceeding, ensure that you meet the following prerequisites:
- For OAuth authentication, all you need is a Gmail account linked to your YouTube account.
- For Custom Application authentication, which entails a connection with a Google application, a paid subscription to Google Cloud Platform (GCP) is required. If you don't have one, sign up.
Also, ensure the functionality of your Consent Screen Application. If not created, follow instructions for configuring OAuth consent screen and selecting scopes under Google Workspace.
Before creating a connection between YouTube and Rivery, it is essential to review and comply with YouTube's Terms of Service and Google's Privacy Policy. By proceeding with the integration, users acknowledge their understanding and acceptance of these terms.
YouTube Terms of Service
Please review YouTube's Terms of Service.
Google Privacy Policy
For information on how Google handles user data, refer to Google's Privacy Policy.
Please Note:
By continuing with the integration process, users are bound by the terms outlined in the provided links. It is recommended to thoroughly read and understand these documents to ensure compliance with the respective policies.
Setting up a Custom Application (Optional)
Users have the option to enhance flexibility by creating their own applications through Google APIs, enabling seamless integration with YouTube on Rivery.
This section outlines the steps involved in creating such an application and integrating it with Rivery.
Please Note:
For Custom Application authentication, which entails a connection with a Google application, a paid subscription to a Google Cloud Platform (GCP) account is necessary. If you do not have one, you must sign up for it.
Additionally, you need to ensure the functionality of your Consent Screen Application. If you have not created one previously, please refer to the instructions for configuring the OAuth consent screen and selecting scopes under Google Workspace.
Enable the API in Google Cloud Platform
Log in to your Google Cloud Platform account.
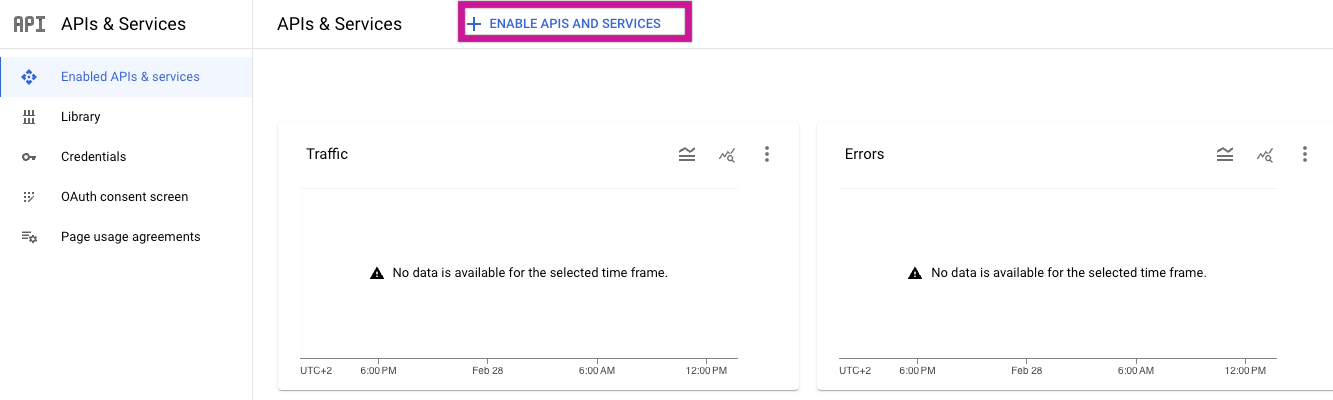
Go to "Enable APIs & Services" section.
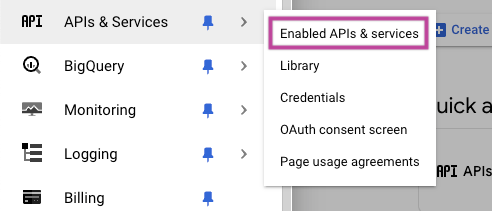
Click on "Enabled APIs And Services" to access the list of APIs that are currently enabled.
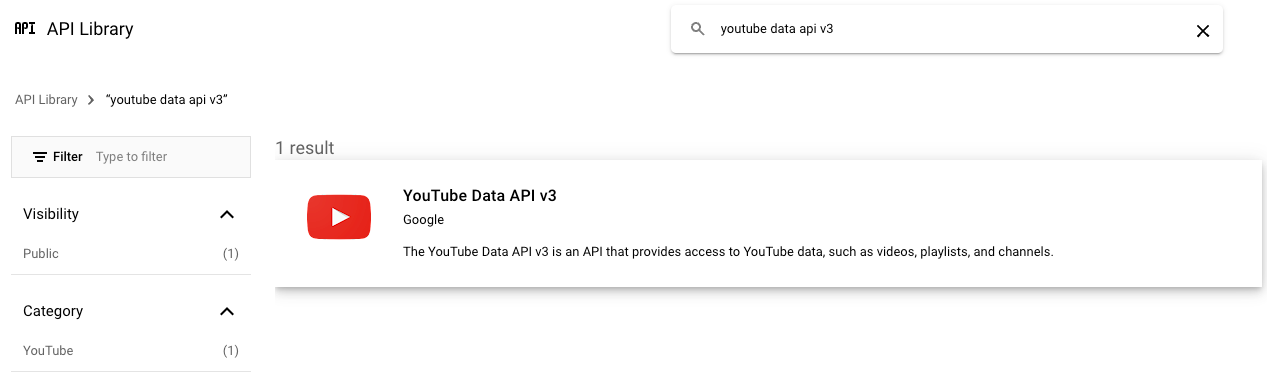
In the search bar, enter the name of the Google API you want to enable.
Select the desired API from the search results.
Click on the "Enable" button to enable the API.
Create Credentials for Rivery Integration
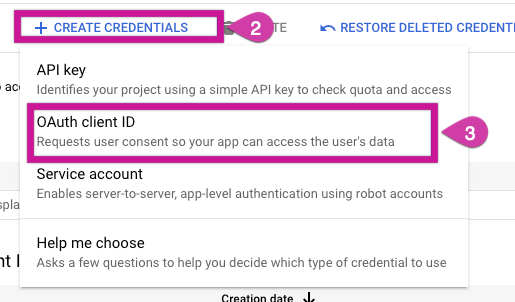
In the "APIs & Services" section, go to "Credentials".
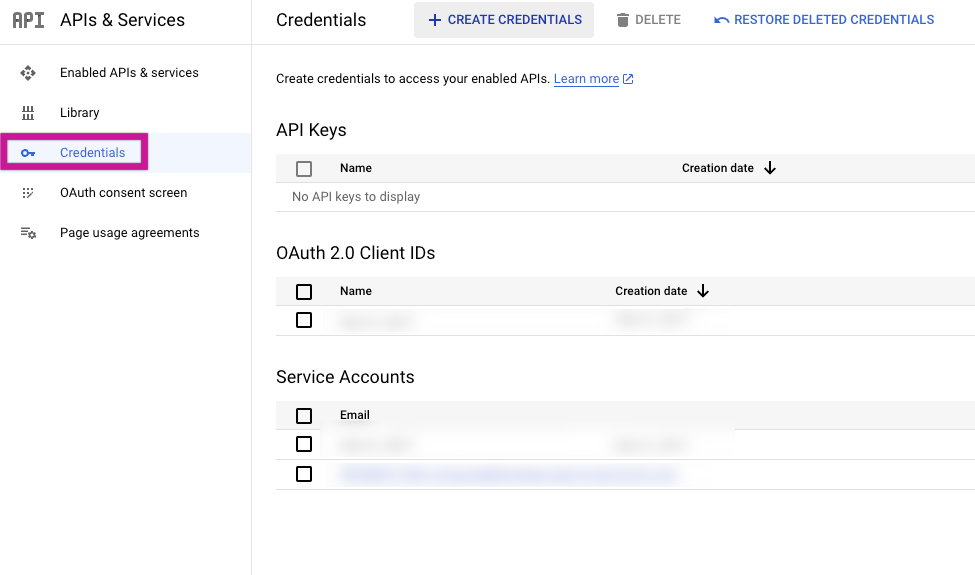
Click on the "Create Credentials" dropdown.
Select "OAuth Client ID" from the list.
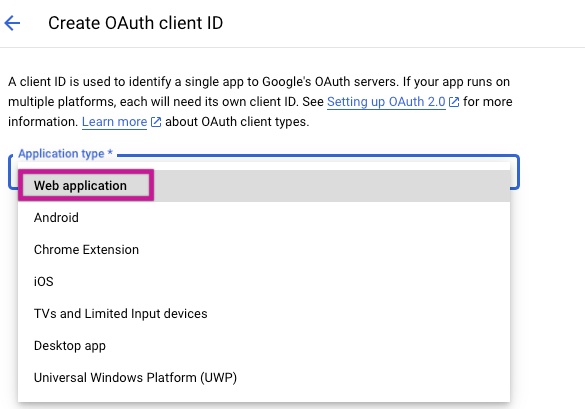
Choose "Web Application" as the application type.
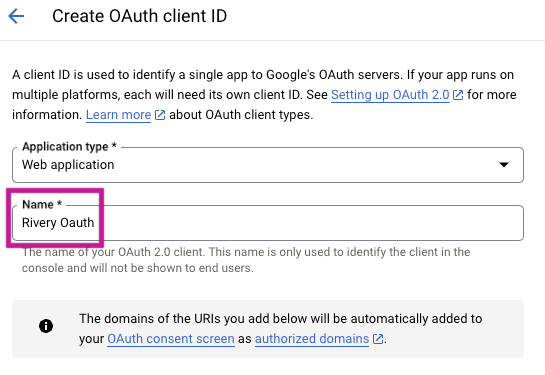
Provide a name for your credentials, such as "Rivery OAuth".
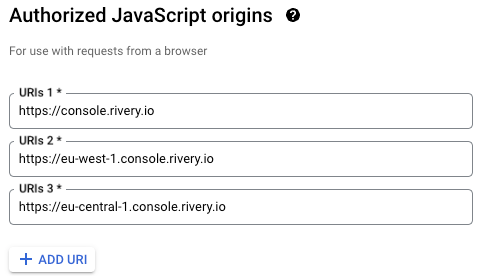
- Configure Authorized JavaScript Origins:
Under "Authorized JavaScript origins", add the following URIs:
https://console.rivery.io
https://eu-west-1.console.rivery.io
https://eu-central-1.console.rivery.io
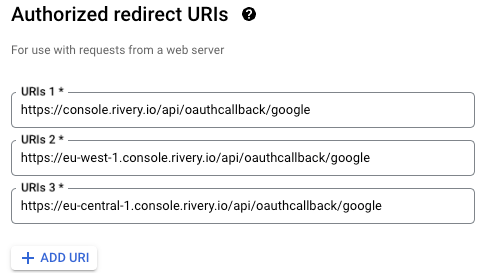
- Configure Authorized Redirect URIs:
Under "Authorized redirect URIs", add the following URIs:
https://console.rivery.io/api/oauthcallback/google
https://eu-west-1.console.rivery.io/api/oauthcallback/google
https://eu-central-1.console.rivery.io/api/oauthcallback/google
Click on the "Create" button to create the OAuth client ID.
Copy Client ID and Client Secret:
Once the OAuth client is created, copy the Client ID and Client Secret provided.
Optionally, if you wish to retain these details, click on "Download JSON" to save the credentials in JSON format.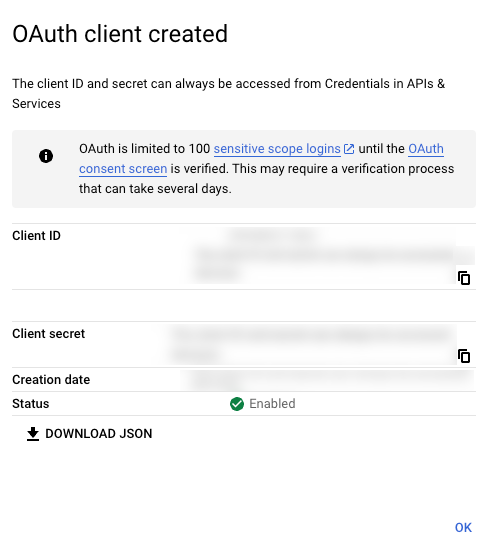
Add Required Scopes:
Navigate to "APIs & Services" → "OAuth Consent Screen" and click on "Edit App".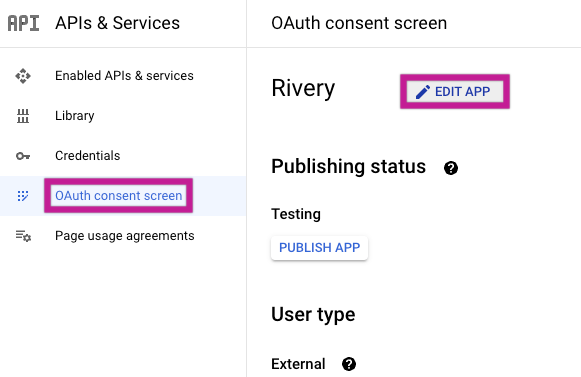
Proceed to "Scopes" and click on "Add or Remove Scopes".
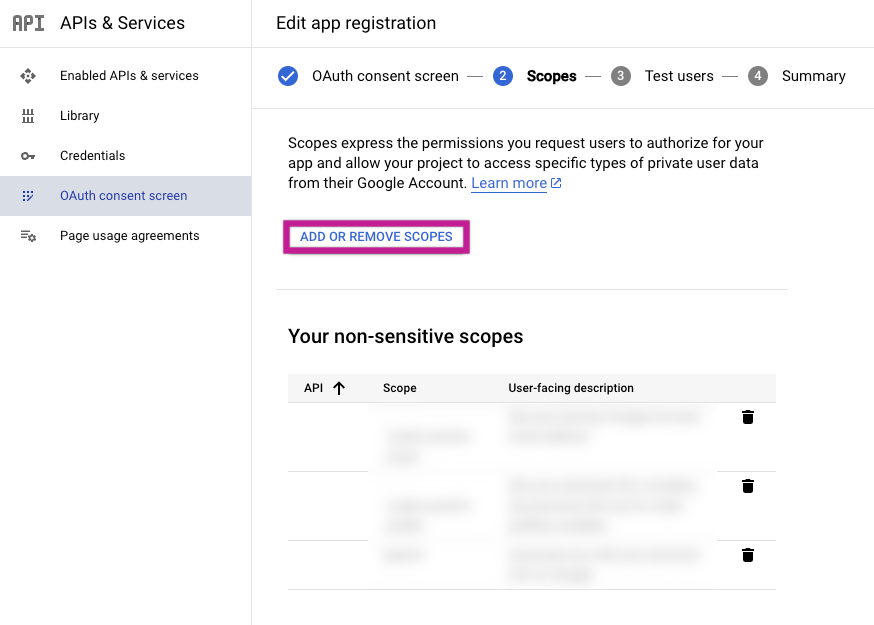
Add the following Scopes:
https://www.googleapis.com/auth/yt-analytics.readonly
https://www.googleapis.com/auth/yt-analytics-monetary.readonly
https://www.googleapis.com/auth/youtube
https://www.googleapis.com/auth/youtubepartner
Proceed with "Save and Continue," then select the Test Users you wish to connect with Rivery. If your application's user type is External and its status is set to Testing, only these designated users will be able to establish connections using this application.
Now, the only step remaining is to establish a connection in Rivery.
Establish a Connection
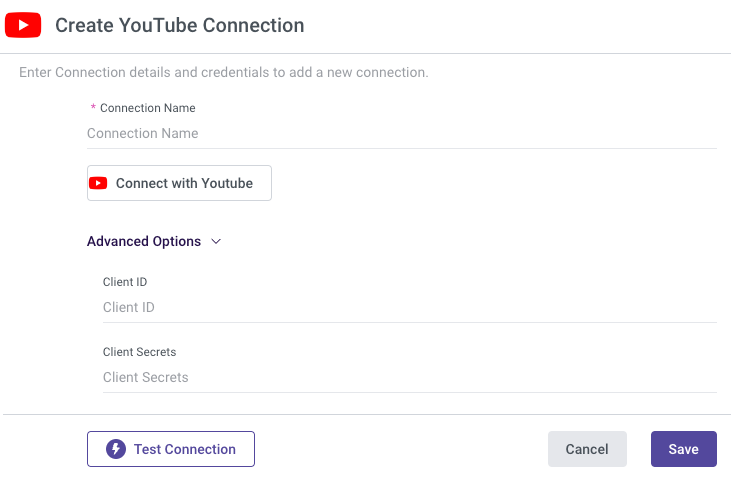
- Assign a name to your connection.
- Choose Authentication Type:
OAuth:
a. Click on the "Connect with Youtube" button.
Make sure your browser doesn't block pop-ups.
b. A window will appear, requesting your authorization for Rivery to access your Google account. To proceed, click on "Allow".Custom Application:
a. Enter Client ID.
b. Input Client Secret.
c. Click on the "Connect with Youtube" button.
Make sure your browser doesn't block pop-ups.
d. A window will appear, requesting your authorization for Rivery to access your Google account. To proceed, click on "Allow".
Please Note:
If nothing happens after you've clicked the "Connect with Youtube" button, it is likely because your browser has blocked the pop up:
On the right side of the URL in your browser, you will find a "pop-up blocked" button:
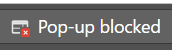
- Click on it and select "Always allow popups from Rivery".
- Click again and sign in with Google button and a pop up to connect to Google will show up on your screen.
- Click on "Save" in order to save the connection in your Rivery account.
- Click on "Test connection". If the test is successful, you are prepared to begin working with YouTube.
Due to restrictions imposed by YouTube, the YouTube connector is constrained to be applicable to only one account/brand. If you have multiple accounts/brands from which you wish to extract data, you must create individual connections in Rivery for each of them.
Disconnecting from YouTube Connection
- In order to disconnect from YouTube connection, click on X Remove button in the connection.
- If you wish to unlink Rivery's application from your Google user, please consult the privacy settings for your user account on Google.
Was this article helpful?