Google Cloud Storage Walkthrough
- 2 Minutes to read
- Print
- DarkLight
- PDF
Google Cloud Storage Walkthrough
- 2 Minutes to read
- Print
- DarkLight
- PDF
Article summary
Did you find this summary helpful?
Thank you for your feedback!
Prerequisites:
- Google Cloud Storage Connection
How to Pull Data from Google Cloud Storage (GCS) using Rivery:
First, select 'Create New River' from the top right of the Rivery screen.

Choose 'Data Source to Target' as your river type.
In the 'General Info' tab, name your river, describe it and choose a group.
Next, navigate to the 'Source' tab.
Find Google Cloud Storage in the list of data sources and select it. (under Storage)
- Under Source Connection, select the connection you created, or create a new one.
- Select the desired Bucket Name from the list.
- Choose an Extract Method.
- Define the Prefix.
- Define the File Pattern.
- Define the File type
- Define what to do After pulling - files will be:
- Optional - configure the Number of files to pull.
Extract Methods:
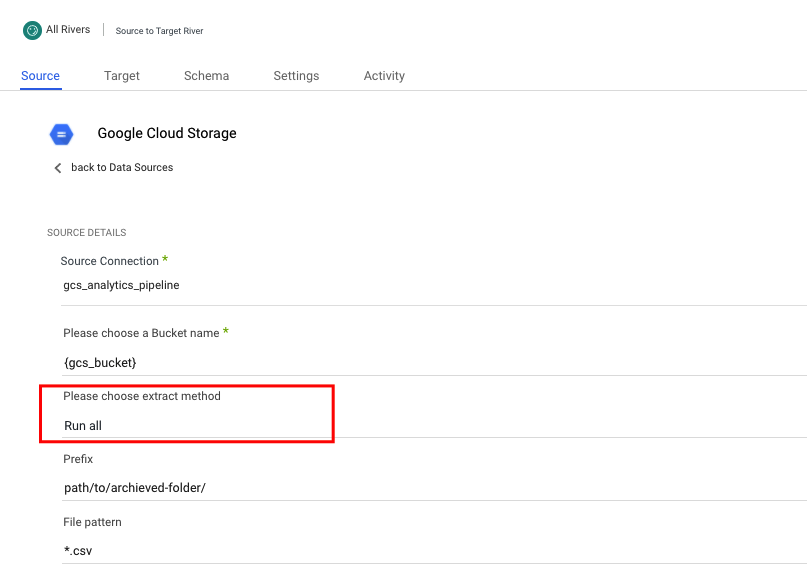
Run all:
- Returns data from all times. Given the provided Bucket, Prefix, and File Pattern.
Incremental run: by modified timestamp
- Pulls data in the date range between the start and end date provided, including the end date. Given the provided Bucket, Prefix, and File Pattern.
- You must select a start date.
- Leaving the end date empty will pull data according to the current time of the River's run.
- Select a timezone offset to send dates considering the offset.
- Use the "Last Days Back For Each Run" to expend the start date and pull data a given number of days back before the chosen start date.
Incremental run: by template
- Templates give you the option to run over folders and load the files according to the folder order. You just need to choose your template type and write your template structure.
- Timestamp Template - Use {} and proper timestamp part in order to define the folder format.
- Epoc time template - Use {e} (for an epoc) or {ee} (for an epoc in milliseconds) in order to define the folder to be able to run on
- epoc time.
- Enter the desired Start Value (required) and End Value (optional)
Note:- This method is valid for whole library and not available for files.
- The Start Date won't be advanced if a River run is unsuccessful.
If you don't want this default setting, click More Options and check the box to advance the start date even if the River run is unsuccessful (Not recommended).

The time-dependent report include Campaigns, Email templates, and Events.
After pulling - files will be:
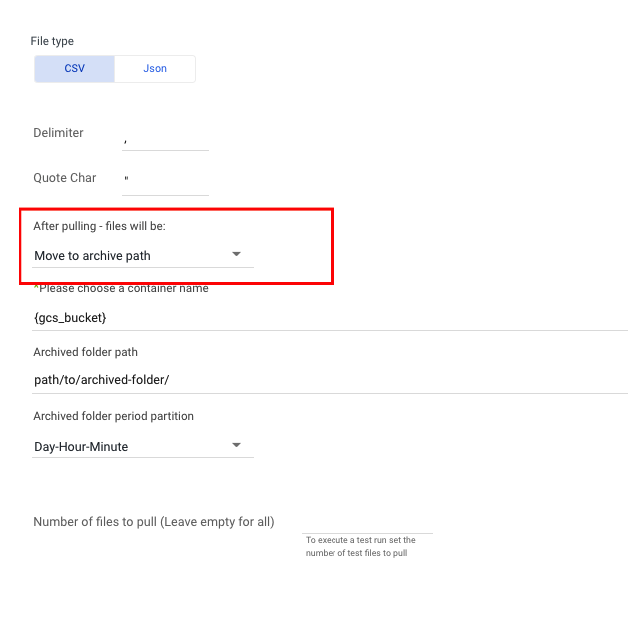
Options:
- Move to archive path
- Remain in original place
- Deleted
Important: The action chosen will remain true for successful and failed rivers. For example, if something fails on the upload to the target we still move it to archive path from source.
Was this article helpful?