Pepperjam Walkthrough
- 1 Minute to read
- Print
- DarkLight
- PDF
Pepperjam Walkthrough
- 1 Minute to read
- Print
- DarkLight
- PDF
Article summary
Did you find this summary helpful?
Thank you for your feedback!
Pepperjam API version 1 is currently supported
This provides a general description of Pepperjam and its capabilities.
Introduction
Pepperjam provides affiliate marketing solutions and supports business growth for marketers seeking a scaled replacement for their primary sales and marketing projects.
Connection
To connect to Pepperjam, follow our step-by-step tutorial.
Choose a Source connection after you've created a connection, as seen here:

Reports
In Pepperjam, there are two types of reports available:
Predefined Reports
Click here to view Predefined Reports.
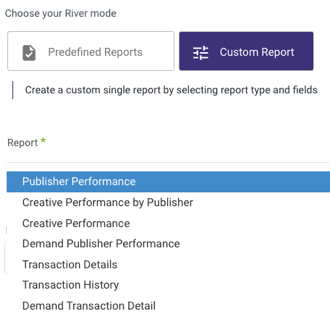
Custom Reports
Create custom reports, and select a specific report to pull data from Pepperjam after you've established a connection.
The following image provides an overview of the various custom reports:
Each report has particular fields, which are displayed beneath the report itself.
Select the desired report, and then click the curved arrow next to each field on the right side of the row to select which field values to keep and which to discard.
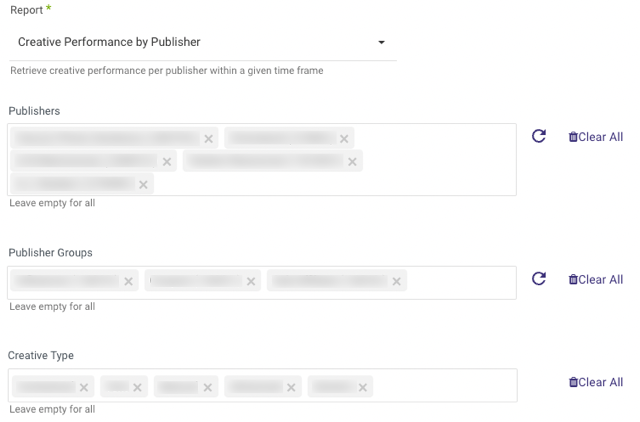
More information about the reports can be found in Pepperjam API documentation.
The date range of your report can be adjusted incrementally for all reports:
Here's an example:

Note:
- Start Date is mandatory.
- Data can be retrieved for the date range specified between the Start and End dates.
- If you leave the end date blank, the data will be pulled at the current time of the river's run.
- Dates timezone: UTC time.
- Use the Last Days Back For Each Run option to gather data from a specified number of days prior to the selected start date.
Breakdown
The Breakdown option can be found at the bottom of the page in some reports.
This option allows for consolidating all of the records from the reports based on the value you chose:
- Publisher
- Date
- Publisher_Date.
Please Note: If you've already run a River and wish to use this feature, you must first access the schema tab, and select Auto Mapping to add the new fields.
Was this article helpful?