Configuring Amazon Redshift as a Target
- 3 Minutes to read
- Print
- DarkLight
- PDF
Configuring Amazon Redshift as a Target
- 3 Minutes to read
- Print
- DarkLight
- PDF
Article summary
Did you find this summary helpful?
Thank you for your feedback!
Introduction
This guide will walk you through the steps of setting up your first Amazon Redshift cluster and acquiring the essentials needed for integration with Rivery.
Prerequisites
Before using this guide, ensure the following prerequisites are met:
Select a Source
Setting up a Target requires first selecting a Source and creating a connection to it.
Amazon Redshift Connection
Ensure that you have established a connection with Amazon Redshift as your Target.
Configuration Process
Click the curved arrow next to Schema on the right side of the row. After the refresh is complete, click the row and choose the Schema where the data will be stored.
Enter the Table Name.
Select a Distribution Method (Note that this option is available only when you select Custom Report, Custom Query or Legact River as the River Mode.):
- All - Involves distributing a complete copy of the table to every node in the cluster. Best suited for tables that are rarely updated or are relatively static (slow moving). It's not typically beneficial for small tables, as the cost of redistribution during queries is low.
- Even - Involves the leader node distributing data rows across slices in a round-robin manner, without considering the values in any specific column. This method is ideal for tables that are not involved in joins. It's also a suitable choice when neither KEY nor ALL distribution methods are clearly advantageous.
- Key - Rows are allocated based on the values in a designated column. The leader node places rows with matching values in the same node slice. Particularly effective when distributing a pair of tables on their joining keys. This ensures that rows with matching values from the common columns are stored together physically, facilitating efficient join operations.
It's important to remember that when using the Key Distribution Method, you must choose a single key column to perform the slicing.

Please Note:
When using Multi-Tables or Predefined Reports as your River Mode, you have the option to choose a Distribution Method. This can be done in the Table Settings, which is accessible by clicking on a particular table in the Schema tab.
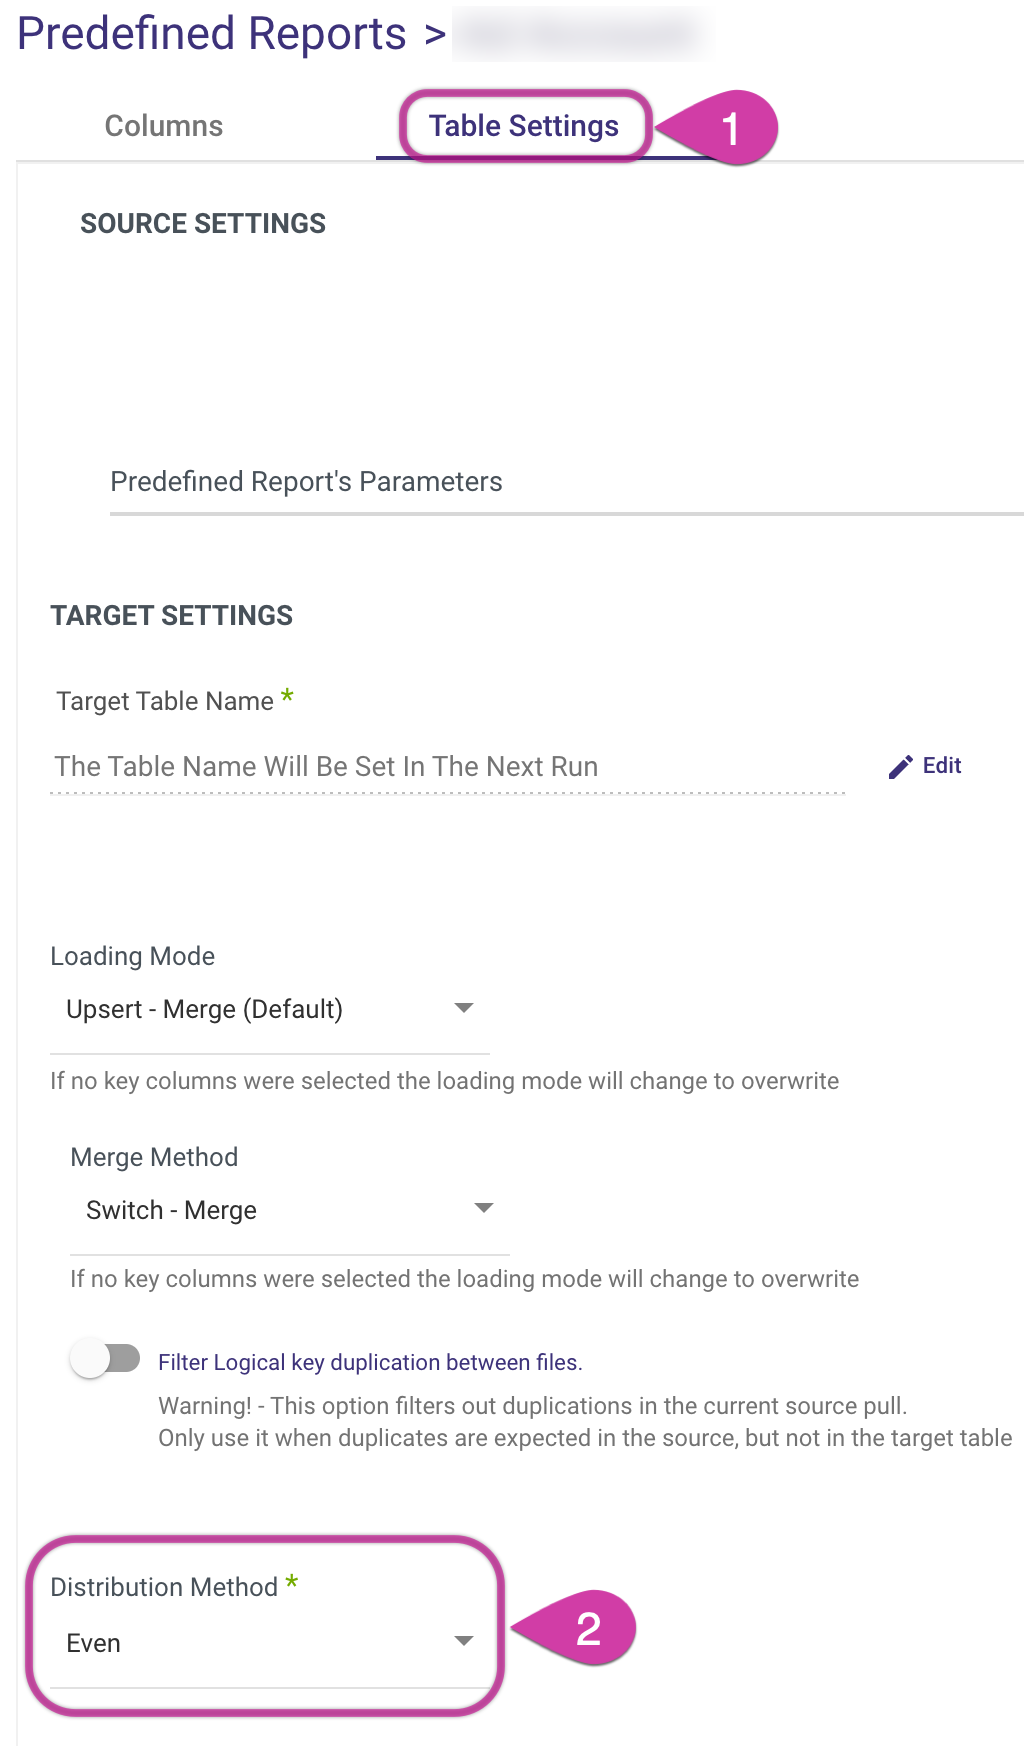
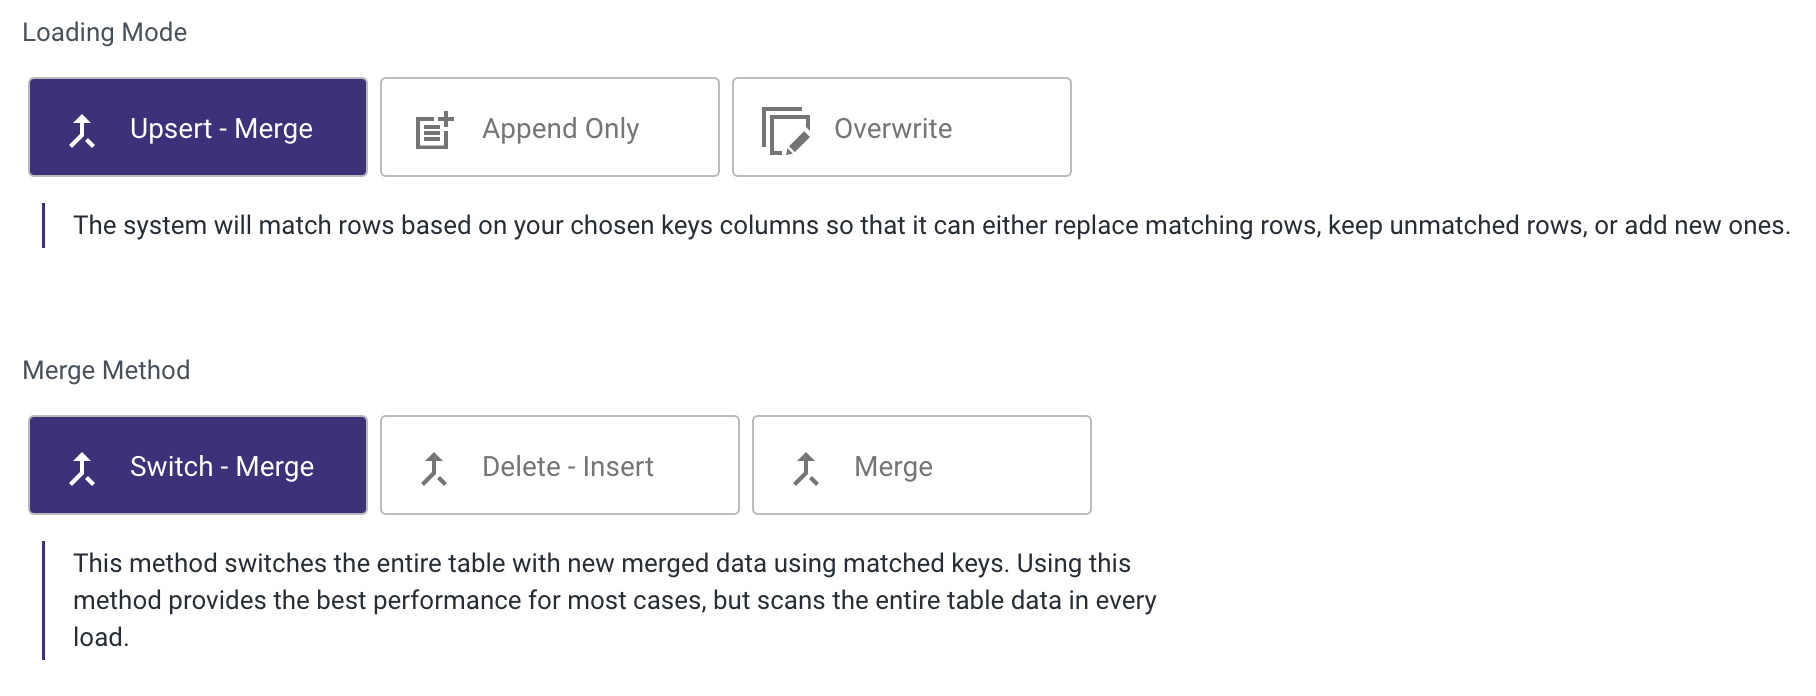
Set the Loading Mode.
Please Note:
Amazon Redshift offers the flexibility to choose different Merge methods. For more information about these options, please refer to the Amazon Redshift Upsert-Merge Loading Mode Options documentation.
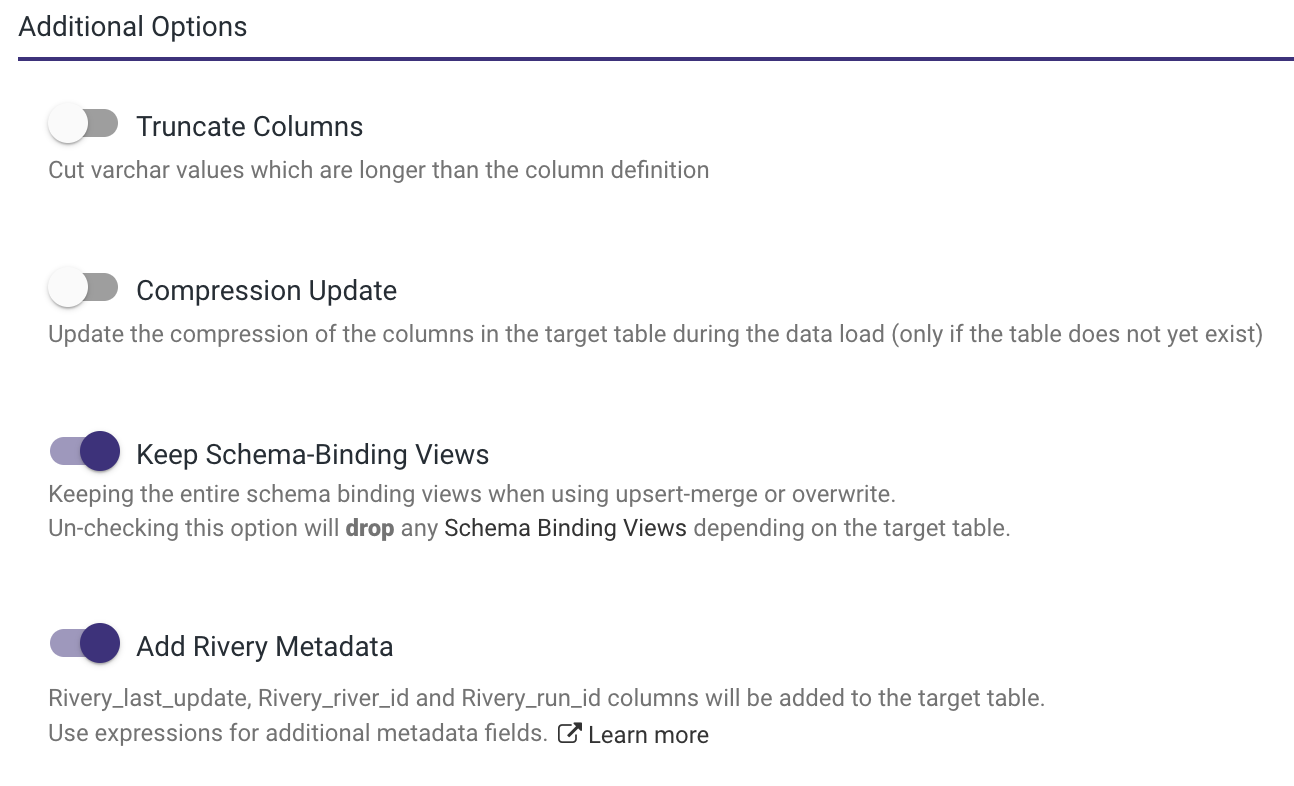
- In the Additional Options menu, the following options are available:
- Truncate Columns - is designed to handle instances where the length of an array exceeds the maximum VARCHAR length allowed in Redshift. Since Redshift's array type has limited flexibility and can change between different data loads, Rivery ensures compatibility by converting arrays into VARCHAR(max) type. However, if an array surpasses the maximum VARCHAR length, the Truncate Columns option, found under Advanced Options in the Target tab, can be used to truncate the array data to fit within Redshift's maximum size constraints.
- Compression Update - updates the column compression in the target table during data loading. This action occurs only if the target table has not been previously created.
- Keep Schema-Binding Views - ensures that all schema-binding views remain intact when employing upsert-merge or overwrite methods. If this option is not selected, any schema-binding views that depend on the target table will be dropped.
- Add Rivery Metadata - designed to enhance the Target table by automatically including three columns: Rivery_last_update, Rivery_river_id, and Rivery_run_id. This feature also provides the flexibility to incorporate more metadata fields by utilizing expressions.
Please Note:
When the Source is in Multi Table mode, this option becomes available.
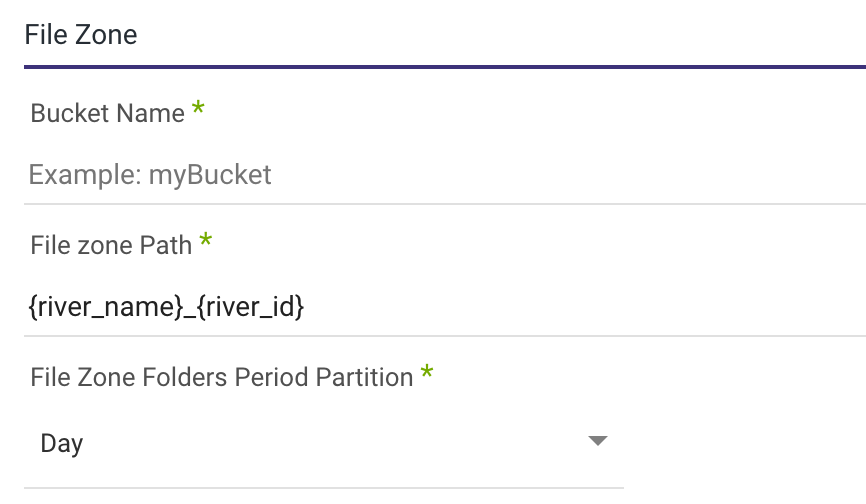
5.If you have configured a Custom File Zone, select a Bucket and specify a path where your data will be stored. Additionally, establish a timeframe for period partitioning within a FileZone folder.
Note: You can instruct Rivery to divide the data according to the data insertion day, the Day/Hour, or the Day/Hour/Minute. This means that Rivery will produce data files from your sources under folders that correspond to the correct partition you've selected.
6. Any Source to Target River can now send data to your Amazon Redshift Bucket.
Was this article helpful?