Reverse SSH Tunnel
- 3 Minutes to read
- Print
- DarkLight
- PDF
Reverse SSH Tunnel
- 3 Minutes to read
- Print
- DarkLight
- PDF
Article summary
Did you find this summary helpful?
Thank you for your feedback!
Reverse SSH Tunnel is exclusively available to users on the Enterprise plan
Introduction
Reverse SSH (Secure Shell) tunneling allows you to securely connect to a device located behind a firewall or NAT (Network Address Translation) from a remote location. This document outlines the steps to set up a Reverse SSH Tunnel using Rivery, enabling remote access to services on the local machine.
Overview
Reverse SSH is a technique used to establish a secure connection from a remote machine to a local machine when the remote machine is behind a firewall or NAT (Network Address Translation).
Here's a simplified explanation of how reverse SSH works:
Customer Connectivity Account (Local Machine):
Rivery provides customers a dedicated VPN within a dedicated account, designed to actively listen a specified port for incoming SSH connections.Client Network (Remote Machine):
The Client Network runs the SSH protocol to establish a connection with the Customer Connectivity Account provided by Rivery.
The connection is initiated from the Client Network to the Customer Connectivity Account, which is why it's called "Reverse" SSH.Tunnel Establishment:
Once the SSH connection is established, a secure tunnel is created between the Client Network and the Customer Connectivity Account.
This tunnel allows traffic to flow securely.Bridging the Rivery Workers Account and Customer Connectivity:
The Rivery Workers Account establishes a link with the Customer Connectivity Account, allowing services operating within the Customer Connectivity Account to be accessed by the Client Network as if they were running locally.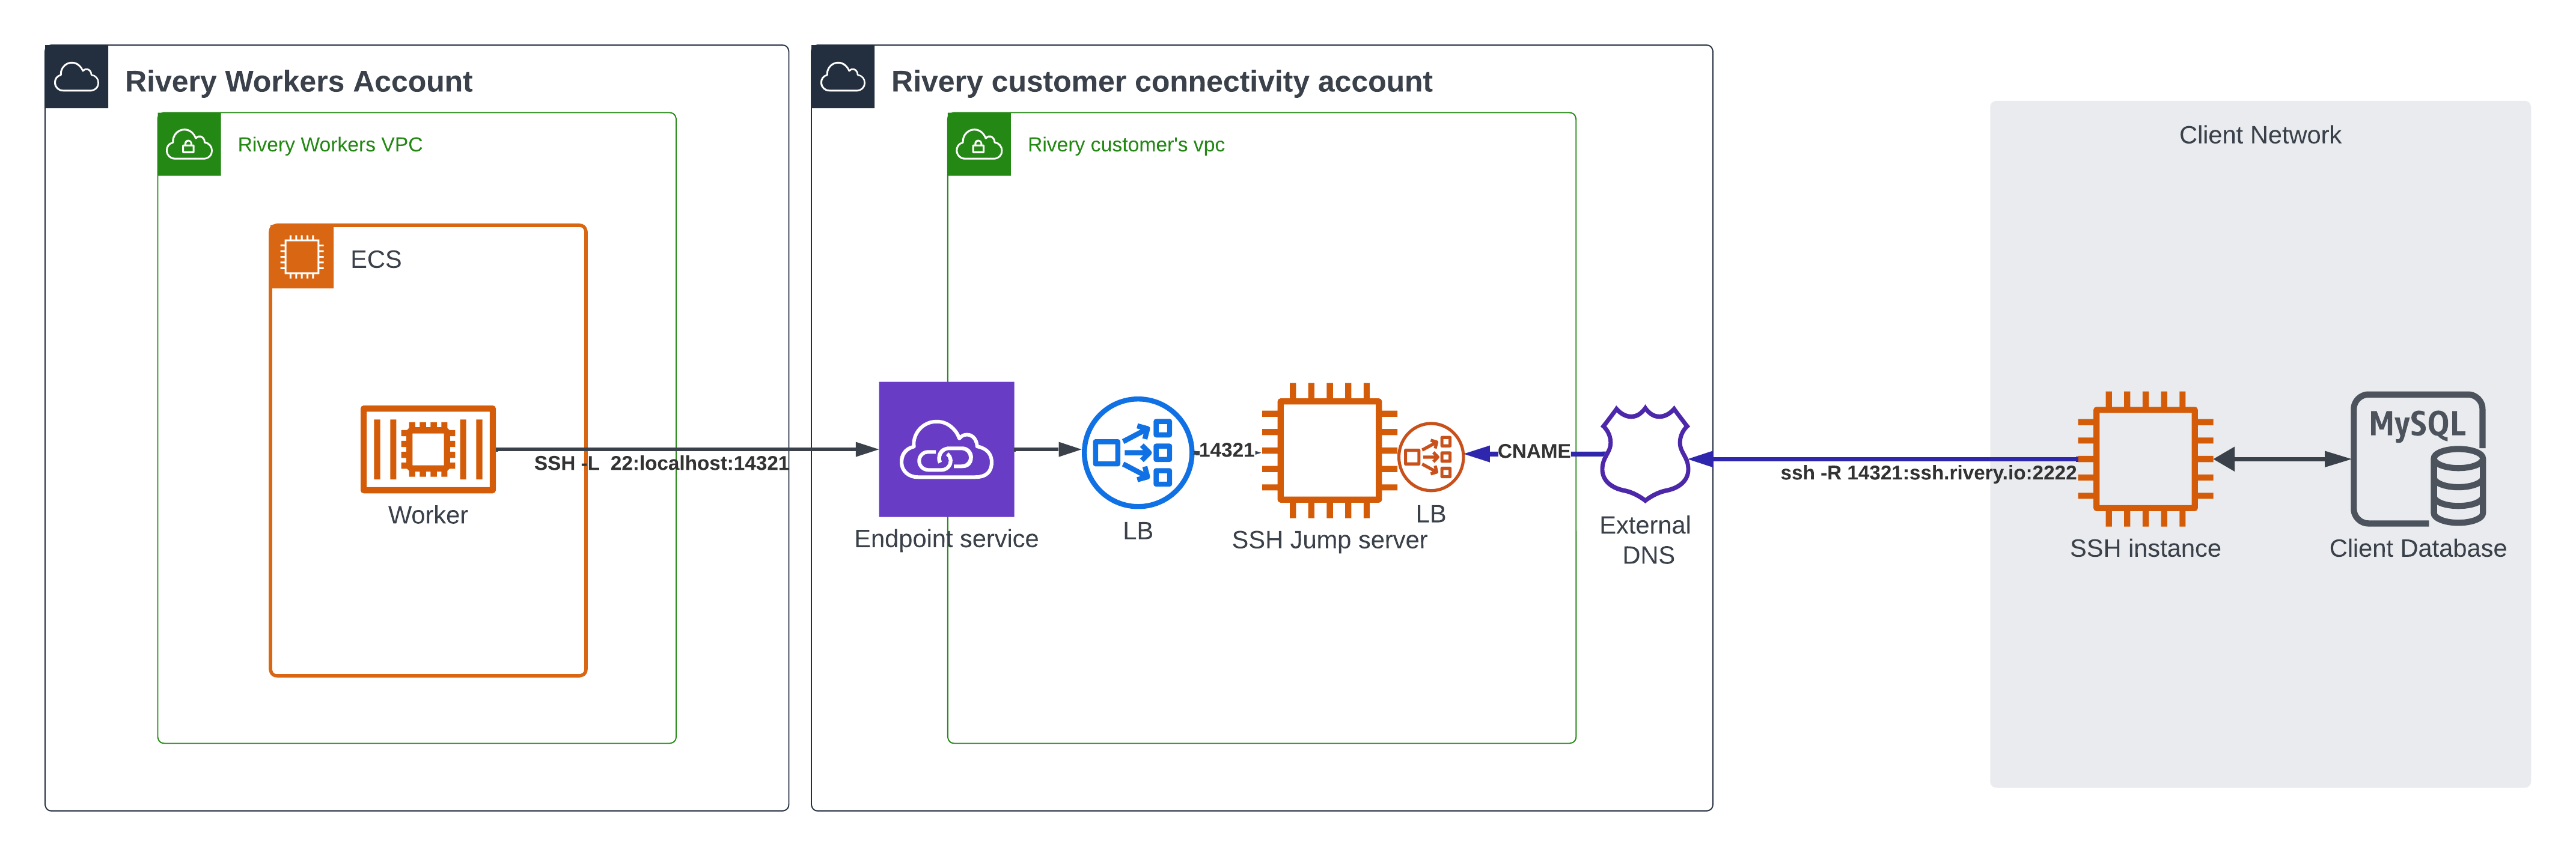 (LB - Load Balancer)
Prerequisites
- Internal database hostname and port
- Your SSH keys (Refer to step 1).
- Public IP address (CIDR notation) of your SSH bastion host or proxy server.
Setup Instructions
Please Note:
All instructions will be executed within a Linux environment.
Step 1 - Generate SSH Public Key
- On your SSH host, generate an SSH key pair.
- Make a note of the key path; you will need it for the setup.
- Do not enter a password for the key file.
ssh-keygen
- View the contents of the public key:
cat ~/.ssh/id_rsa.pub
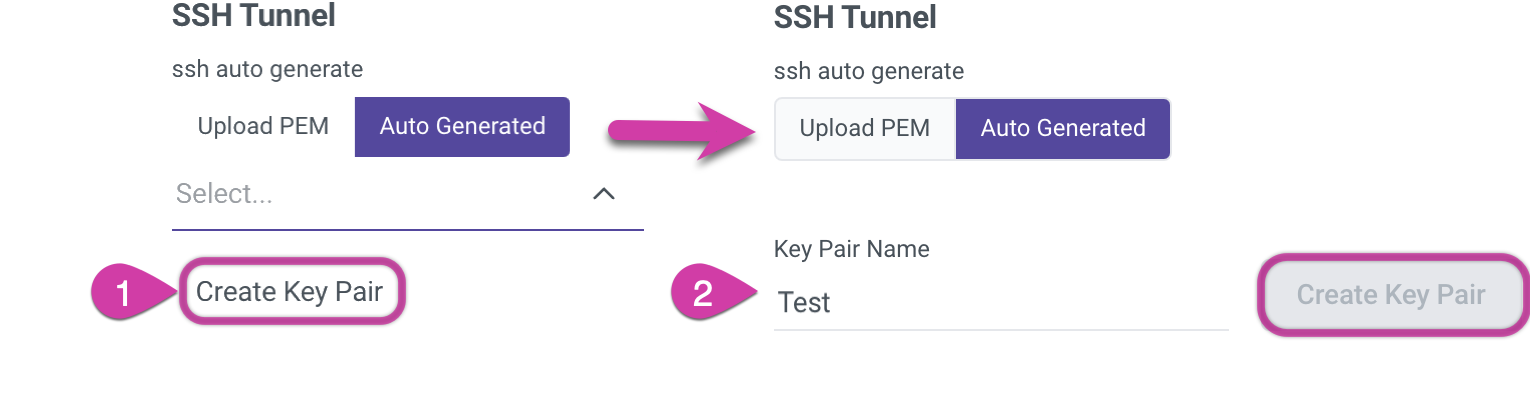
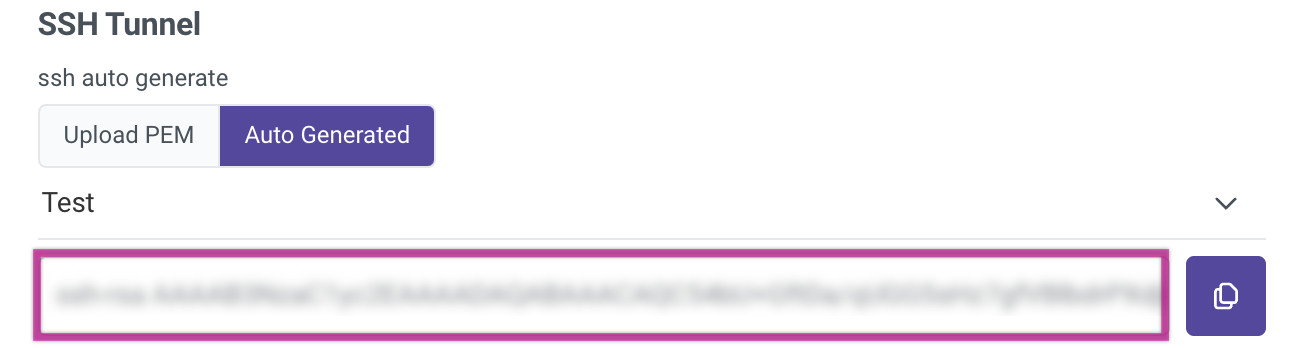
- Head to Rivery and create an SSH key pair:
- Submit a support ticket to Rivery's Support team, attaching both SSH keys.
Step 2 - Information Rivery Will Provide You:
Upon completion of the setup on Rivery's side, Rivery will provide you the following information:
Username for the SSH tunnel user (for instance, "rivery").
Reverse SSH IP address.
SSH high port (distinct for each connector instance and not a reserved port number).
Please Note: To set the SSH high port number, it is advised to include a single digit, typically 1, as a prefix to the source database port. For instance, when connecting to MySQL with a default port of 3306, it is recommended to use port 13306 for the SSH high port of your initial MySQL connector, port 23306 for the second connector, and so forth.Internal IP address or name of the local database host machine.
Internal open port for communication with the database host.
Step 3 - Run the Script
Replace the placeholder variables in the following script and run it on the SSH host in a single line:
autossh -M 0 -f -N -R <SSH_HIGH_PORT>:<PRIVATE_DB_MACHINE_NAME_OR_IP>:<PRIVATE_DB_MACHINE_PORT> rivery@<RIVERY_SUPPLIED_IP> -g -i <PATH_TO_PRIVATE_KEY> -o ServerAliveInterval=10 -o ServerAliveCountMax=1 -o ExitOnForwardFailure=yes -o StrictHostKeyChecking=no -o UserKnownHostsFile=/dev/null
Please Note:
- You can track the progress by removing the -f flag and add the -v flag for verbose logging
- If you reuse the autossh script for the same SSH high port, terminate the original script before proceeding.
Step 4 - Rivery Database Setup
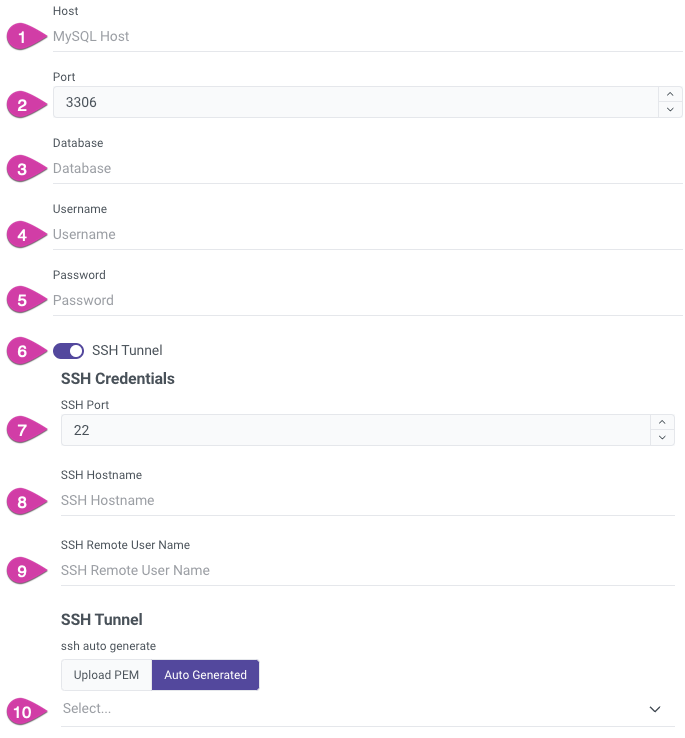
After successfully establishing the Reverse SSH connection, enter the following details into the Rivery setup form for your database:
| No. | Field | Value | Description |
|---|---|---|---|
| 1. | Host | 127.0.0.1 | Allows your SSH host to handle port routing |
| 2. | Port | { SSH high port } | e.g., 13306. The port that your SSH host will translate |
| 3. | Database | { Database name } | The name of the database you want to replicate |
| 4. | User | { Database user } | The user account for accessing the database |
| 5. | Password | { Database user's password } | The password associated with the database user |
| 6. | SSH Tunnel Toggle | True | When set to true, all SSH fields become visible |
| 7. | SSH Port | 22 | The port number for the SSH connection |
| 8. | SSH Hostname | { IP Address } | Supplied by Rivery |
| 9. | SSH User | Rivery | The user account used for the SSH connection |
| 10. | SSH Tunnel - Auto Generated | Key Pair Name | Select the name of the auto generated key pair that you have previously set up (e.g., "Test") |
Please Note:
Replace the placeholder variables with the corresponding values obtained during the setup process.
Was this article helpful?