- 2 Minutes to read
- Print
- DarkLight
- PDF
API Tokens
- 2 Minutes to read
- Print
- DarkLight
- PDF
The Rivery API allows users to interact with Rivery resources.
Authentication
The administrator of an account has the ability to add, view, and delete tokens for the account.
Only admin users are allowed to access this functionality.
Please Note:
This functionality can only be accessed by admin users.
Working With Tokens
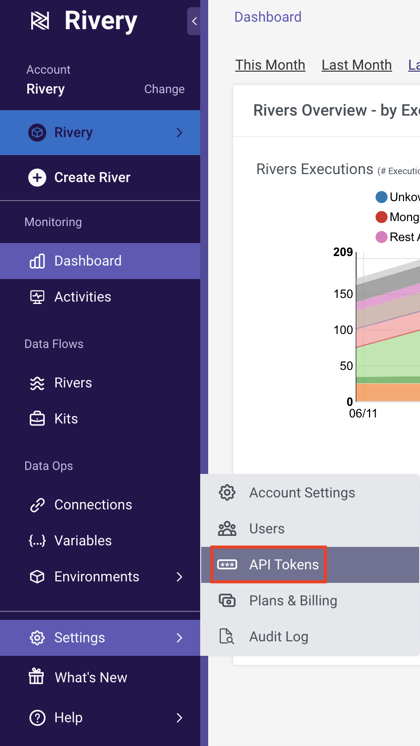
On the left side navigation bar, go to Settings --> API Tokens
There will be a list of all the API tokens associated with your account, along with information about each token, such as its name, creation date and time, creator, and other details.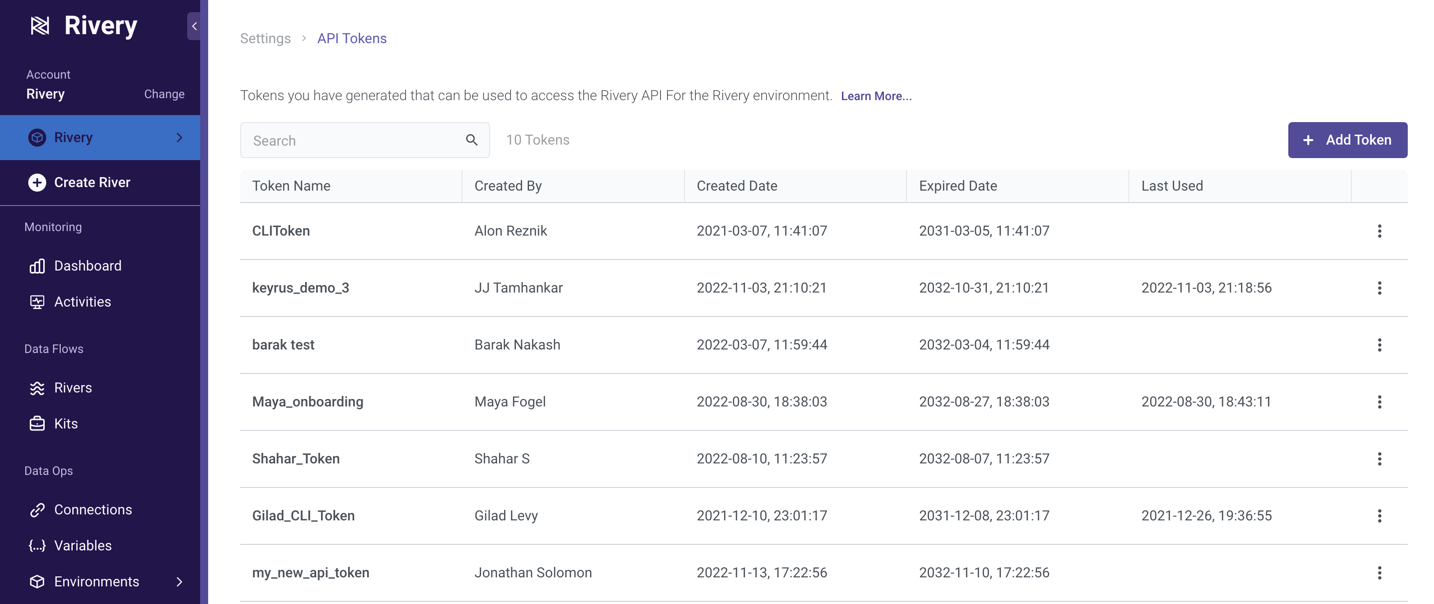
Creating a Token
1. In the top right corner of the screen, select the Add Token button to create a token.
2. You will be prompted to provide the token name and select the scopes (permissions) you want to give the token in a new window.
It is advised that you give your tokens names that are instructive and distinctive.
3. By selecting the checkbox next to each scope name, the list can be expanded or contracted. Each scope contains a description that explains the level of access it gives the token.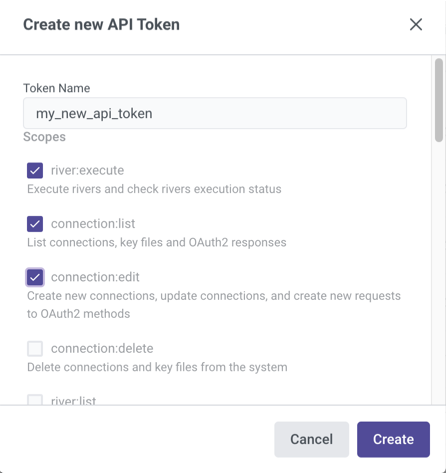
4. Once you are satisfied with the token definitions, click on the create button. If you wish to stop the process at this point, click cancel.
5. A new window displaying the generated token will open after you click the Create button.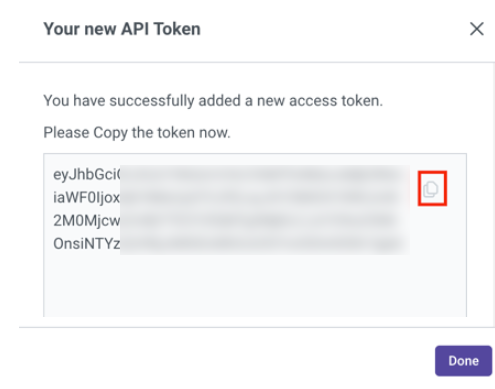
The token can only be viewed at this time, so please be sure to copy your new token using the copy button and save it.
6. You've successfully produced your token; click Done to close the screen.
7. Your token list will now include the new token, and by selecting the View button, you can see the scopes that have been assigned to it.
Deleting a Token
1. On the right side of the API Tokens screen, select the token you want to delete by clicking on the trash can symbol.
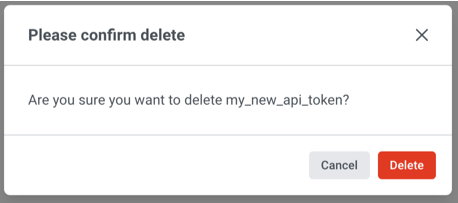
2. You will see a pop-up asking for confirmation before the token can be deleted.
Please note:
A token can never be used again once it has been deleted.

When transitioning from the Pro Plan to the Starter Plan, you will receive a 14-day notice period before any tokens are deleted from your account. During this time, you can take the necessary actions to manage your API tokens. After the 14-day notice period, any remaining tokens associated with your Pro Plan will be deleted.
Making API Calls
The token must be used as a bearer token under Authorization in the header.
Let's examine a practical illustration of how to use a River.
First, you will need to find the River ID.
This can be done by navigating to a specific River in the console and extracting the River ID from the URL:
In this case, the river id is: 63b724fc690def001131d242
Let's assume your token is: XYZ
This would be the specific curl in our example:
curl -X POST "https://console.rivery.io/api/run"
-H "accept: application/json"
-H "Authorization: Bearer XYZ"
-H "Content-Type: application/json"
-d "{ \"river_id\": \"63b724fc690def001131d242\"}"
The following describes the general curl:
curl -X POST "https://console.rivery.io/api/run"
-H "accept: application/json"
-H "Authorization: Bearer {token}"
-H "Content-Type: application/json"
-d "{ \"river_id\": \"{river_id}\"}"
Technical Use Cases
If you are using editors like Python, make sure to JSON dumps the data payload inside the POST call. I.e., you can use the following use case to run a River:
import requests
import json
RIVER_ID = '1234567abcd'
url = 'https://console.rivery.io/api/run'
payload = json.dumps({"river_id": RIVER_ID})  # converting dictionary into JSON string
headers = {'accept': 'application/json', 'Authorization': f"Bearer {river_api_token}", 'Content-Type': 'application/json'}
r = requests.post(url, data=payload, headers=headers)

