Single Sign On Using Google Workspace
- 2 Minutes to read
- Print
- DarkLight
- PDF
Single Sign On Using Google Workspace
- 2 Minutes to read
- Print
- DarkLight
- PDF
Article summary
Did you find this summary helpful?
Thank you for your feedback!
- SSO is only available in the Enterprise plan.
- To manage users exclusively through SSO, please contact support and specify that you want user management to be restricted to SSO.
Overview
Rivery supports connecting into your account using the Single Sign On (SSO) method, using your Google Workspace configuration.
Please Note:
- For specific plans only.
- In order to start this process, please reach out to your CSM.
Configuring needed in Google Workplace
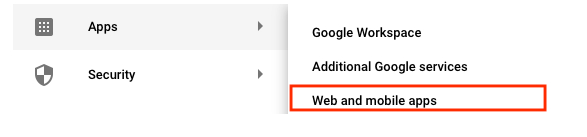
- Log in to your Google Admin account and go to the Apps -> Web and mobile apps.
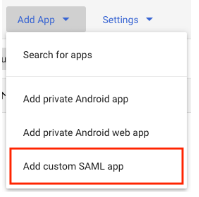
- In the panel, select Add App.

- Click Add custom SAML app.
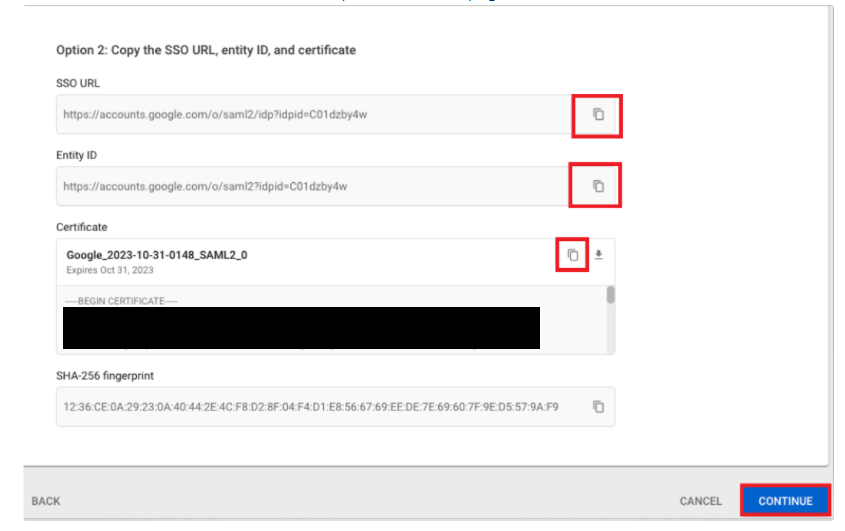
- Enter “Rivery” as the application name and click Continue to switch to the Google Identity Provider details page.
Get Sign on URL, Issuer (Entity ID) and Public certificate
Make a note of the SSO URL. This is the Sign on URL in Rivery.
Make a note of the Entity ID. This is the Issuer in Rivery.
Make a note of the Certificate: Open the copied certificate file in any text editor.
The certificate is a string inside the
-----BEGIN CERTIFICATE-----and-----END CERTIFICATE-----statements.Click Continue to switch to the Service provider details page.
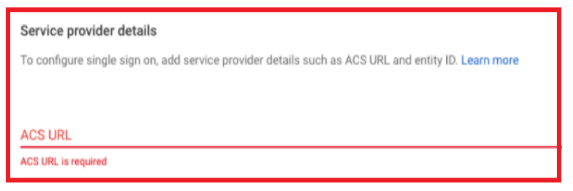
Contact your Rivery CSM and Provide him/her the SSO URL, Entity ID, and the certificate to your workspace.
The CSM will provide you as a response the ACS URL.
Configure the custom SAML application for Rivery
Enter the ACS URL provided to you by your CS.
Enter “Rivery” as the Entity ID.

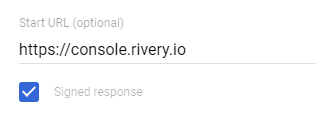
Set the Start URL in the following way (by the acquivilant region):
For US console: https://console.rivery.io/
For EU console: https://eu-west-1.console.rivery.io/
Leave and the Signed response checkbox checked.
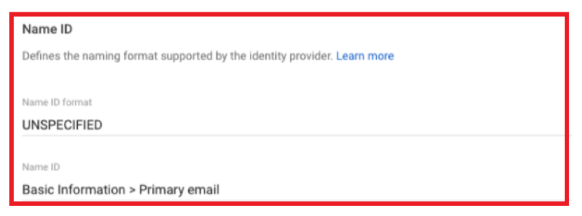
Set the Name ID format to
UNSPECIFIED.Set the Name ID to
Basic Information > Primary email.
Click Continue to switch to the Attribute mapping page.
In the Attribute mapping page, Click ADD MAPPING twice.
- Select the Basic Information/Primary email in the Google Directory attributes for the third row → Enter
emailin the App attributes for the third row.
- Select the Basic Information/Primary email in the Google Directory attributes for the third row → Enter
Select the Basic Information/First name in the Google Directory attributes for the first row → Enter
firstnamein the App attributes for the first row.Select the Basic Information/Last name in the Google Directory attributes for the second row → Enter
lastnamein the App attributes for the second row.Select the Basic Information/Primary email in the Google Directory attributes for the third row → Enter
NameIDin the App attributes for the third row.
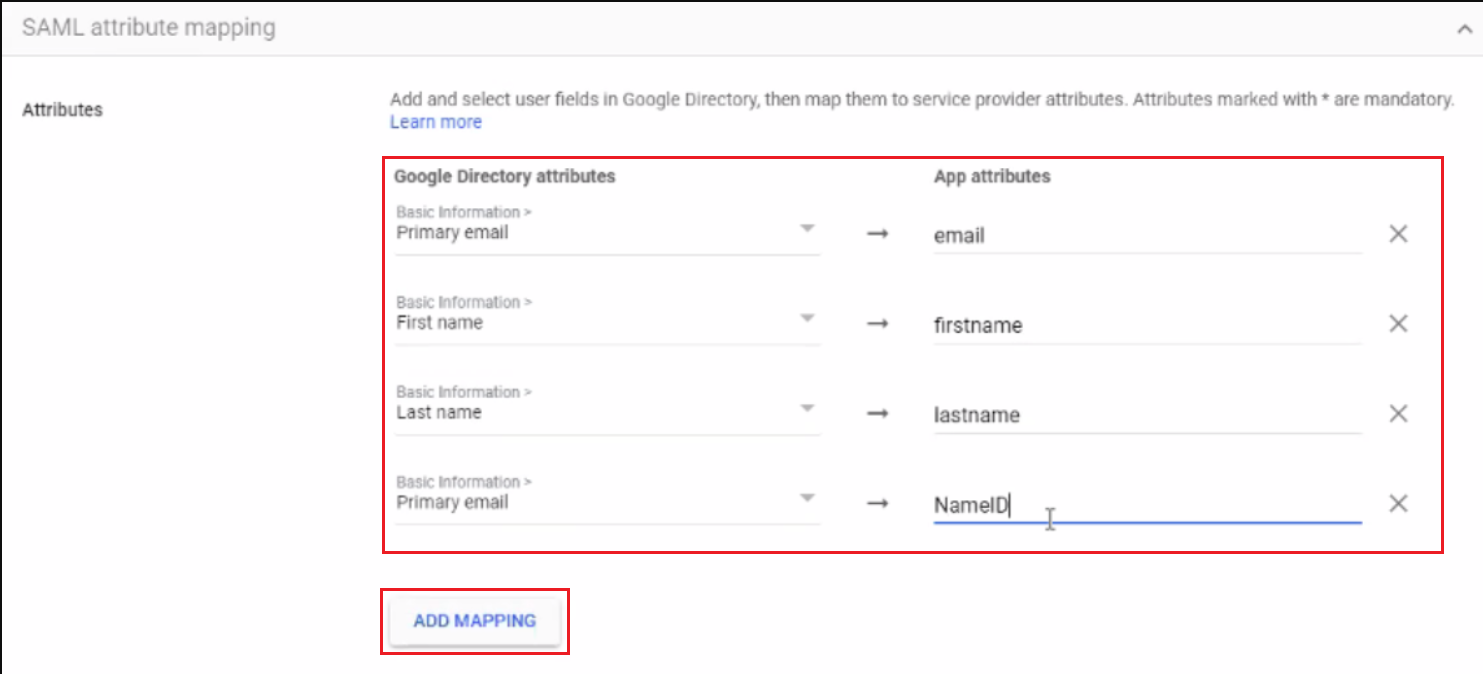
Click FINISH.
Testing your SSO
Log in to the Google account you have granted access to.
Select the Rivery button from the App selector:
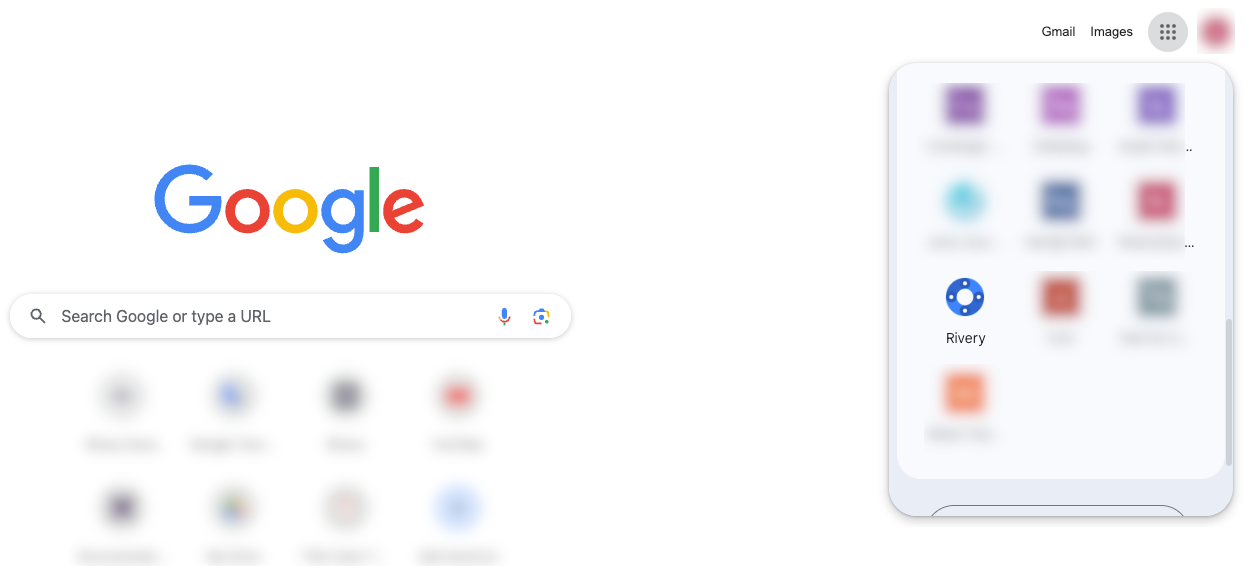
You will be redirected to your Rivery account.
Please Note:
After setting up SSO, the default landing URL for your Rivery console will be https://console.rivery.io/home/[account_id]/default_env, indicating that all users have access permissions to the default Environment.
Was this article helpful?