Single Sign-On Using Microsoft Entra ID (Azure Active Directory)
- 2 Minutes to read
- Print
- DarkLight
- PDF
Single Sign-On Using Microsoft Entra ID (Azure Active Directory)
- 2 Minutes to read
- Print
- DarkLight
- PDF
Article summary
Did you find this summary helpful?
Thank you for your feedback!
- SSO is only available in the Enterprise plan.
- To manage users exclusively through SSO, please contact support and specify that you want user management to be restricted to SSO.
Introduction
This document provides step-by-step instructions for configuring Single Sign-On (SSO) between Rivery and Microsoft Entra ID (formerly knows as Azure Active Directory). With SSO, users can seamlessly access Rivery using their Microsoft Entra ID account.
Prerequisites
Before proceeding, ensure you have an active Microsoft Entra ID account with administrative privileges.
What to provide to Rivery Support for SSO configuration:
- Rivery Account URL
- SSO_PROVIDER_NAME (e.g. Azure )
- DEPLOY_ENVIRONMENT (e.g. dev, prod )
- DEFAULT_ROLE within Rivery (e.g. viewer/developer/admin etc)
- METADATA_URL (see steps how to retrieve below)
If you don’t have metadata_url:
- ENTITY_ID_URL
- SSO_URL
- CERTIFICATE
Configuration Steps
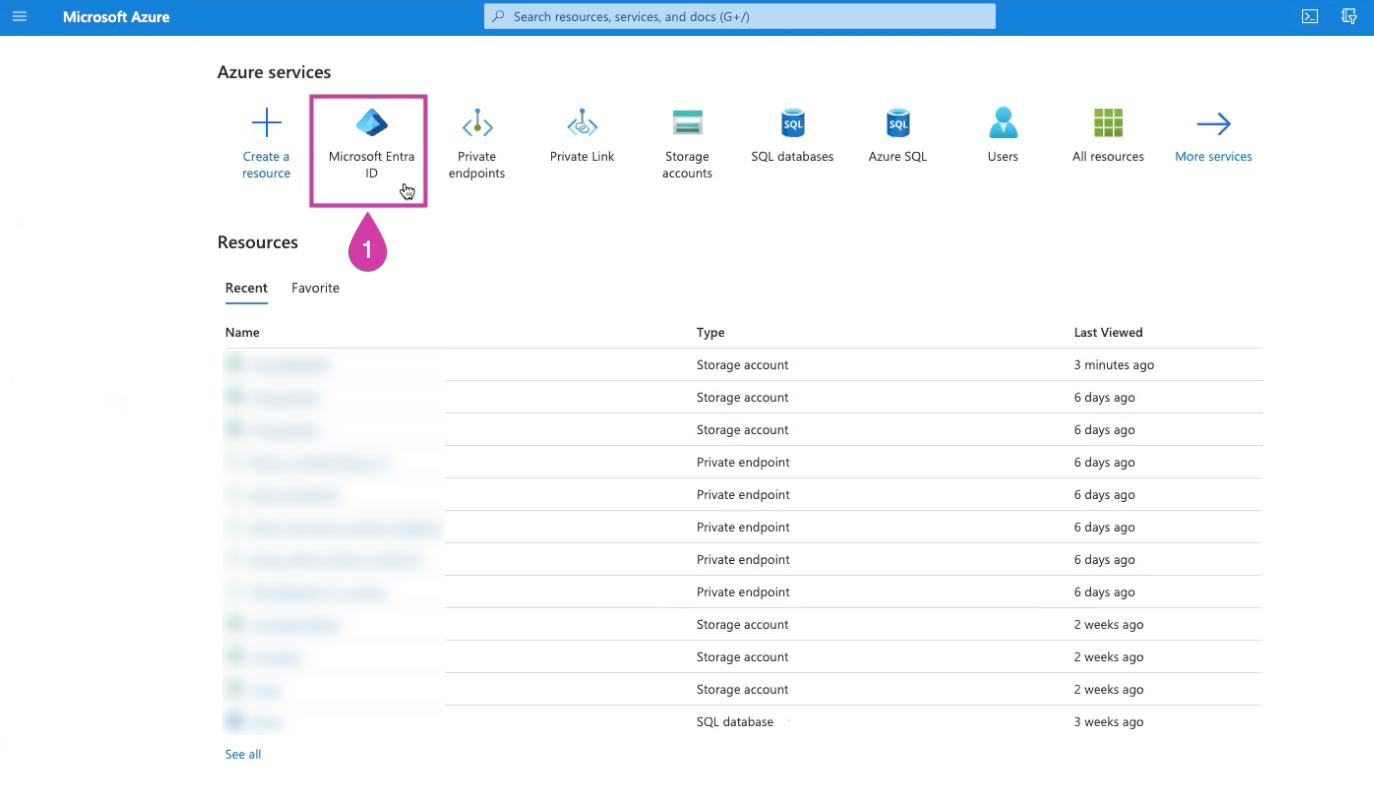
Log in to your Azure Portal and navigate to Entra ID in the top search panel.
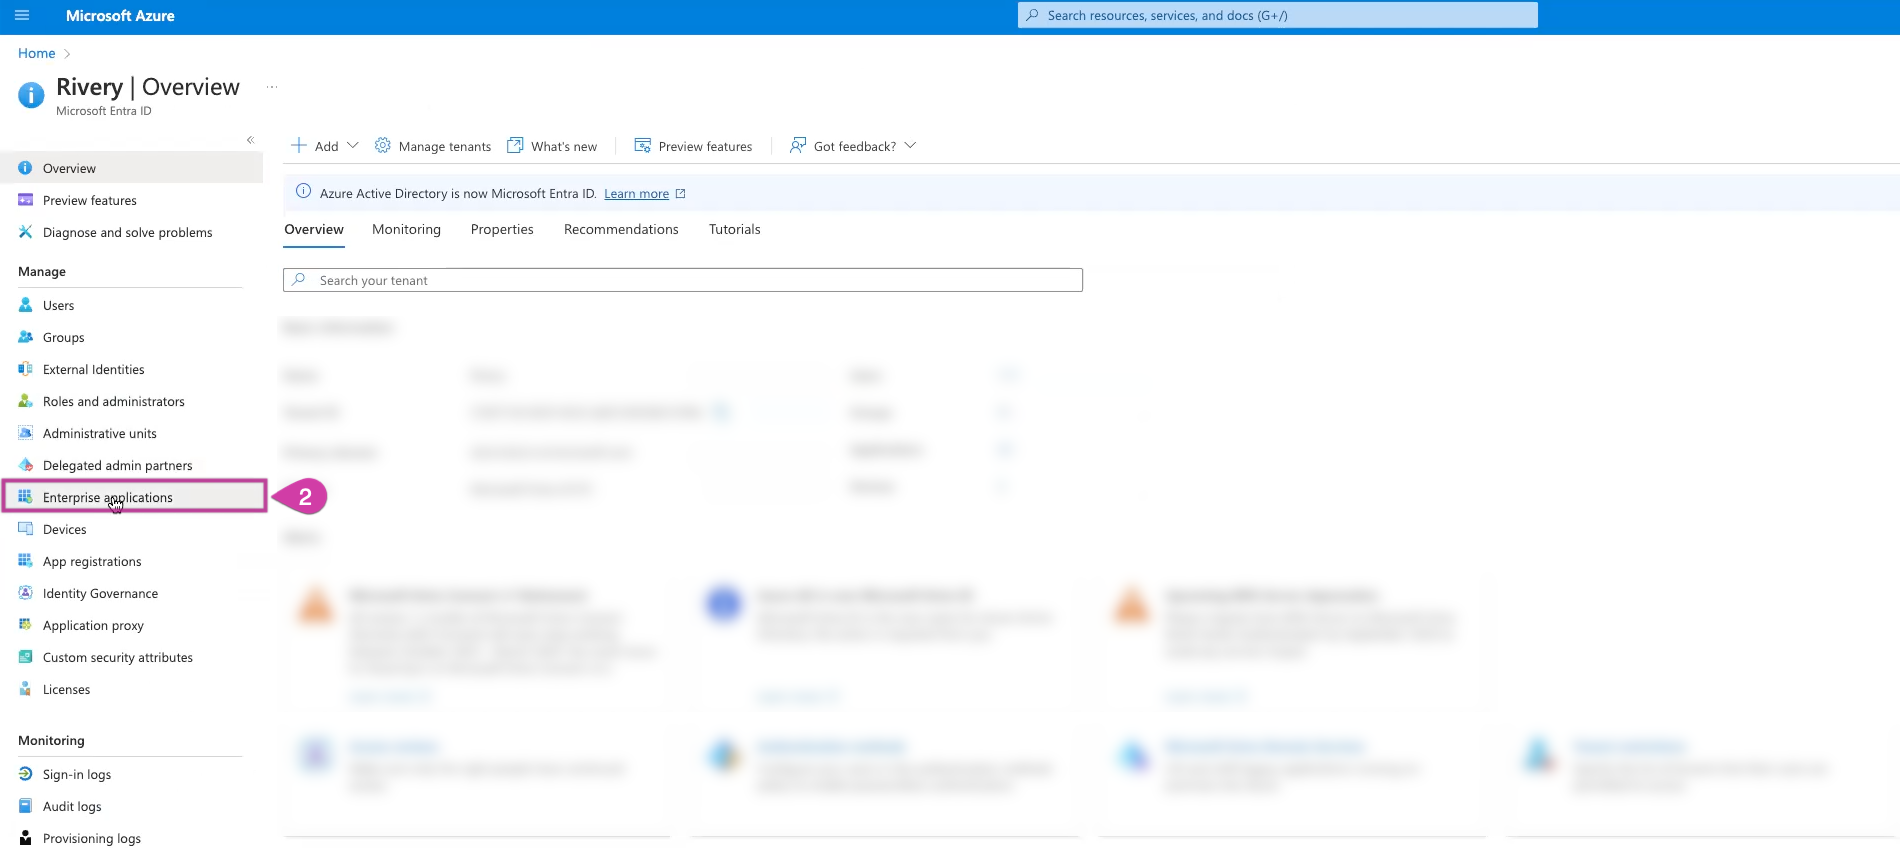
Select Enterprise Applications from the menu on the left-hand side and click on it.
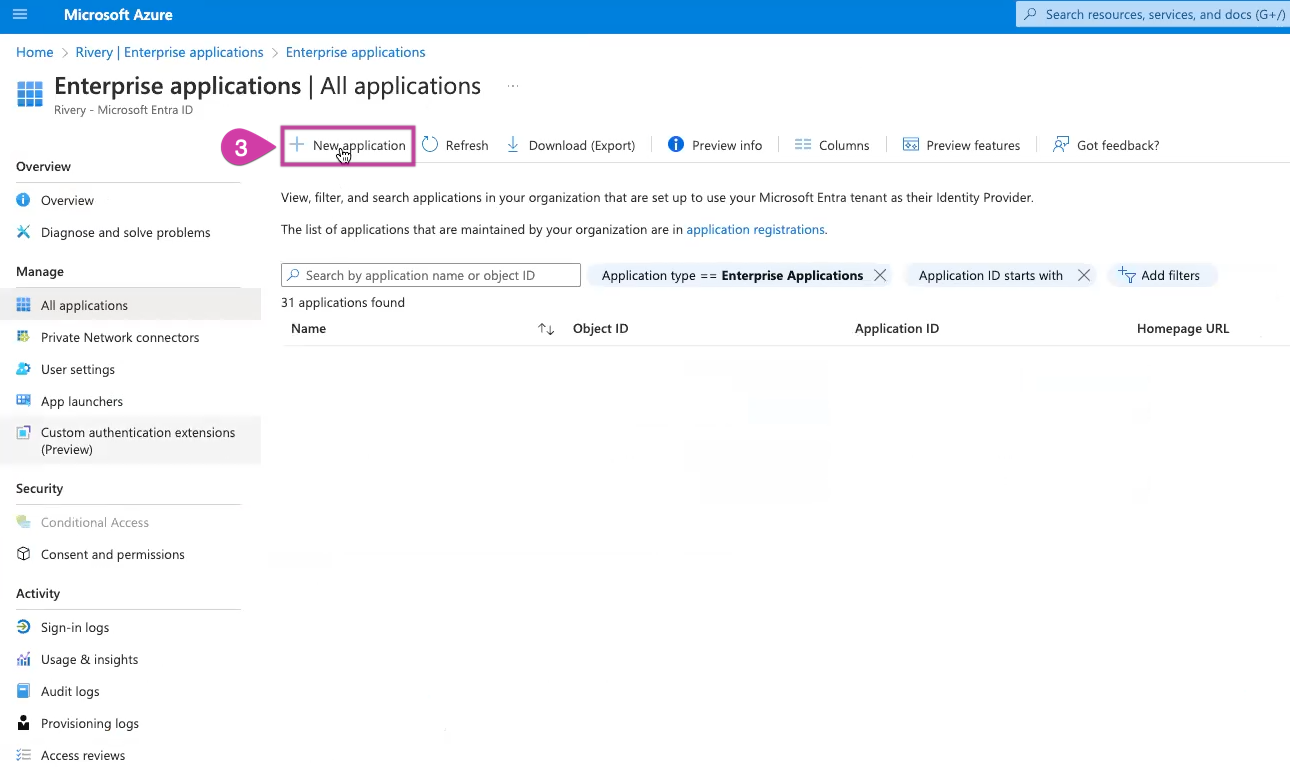
Click on New Application.
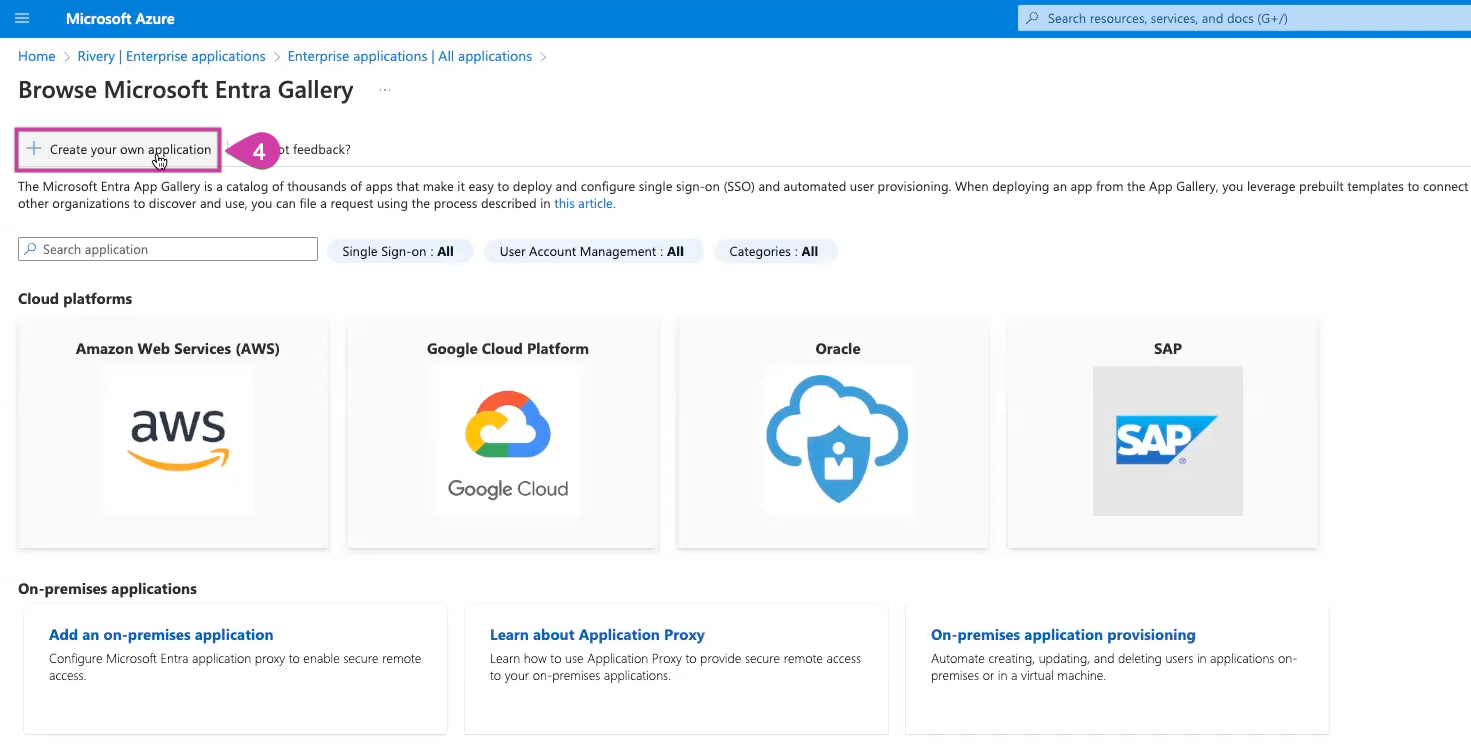
Choose Create your own application.
Name it (e.g., Rivery). and choose "Integrate any other application you don't find in the gallery".
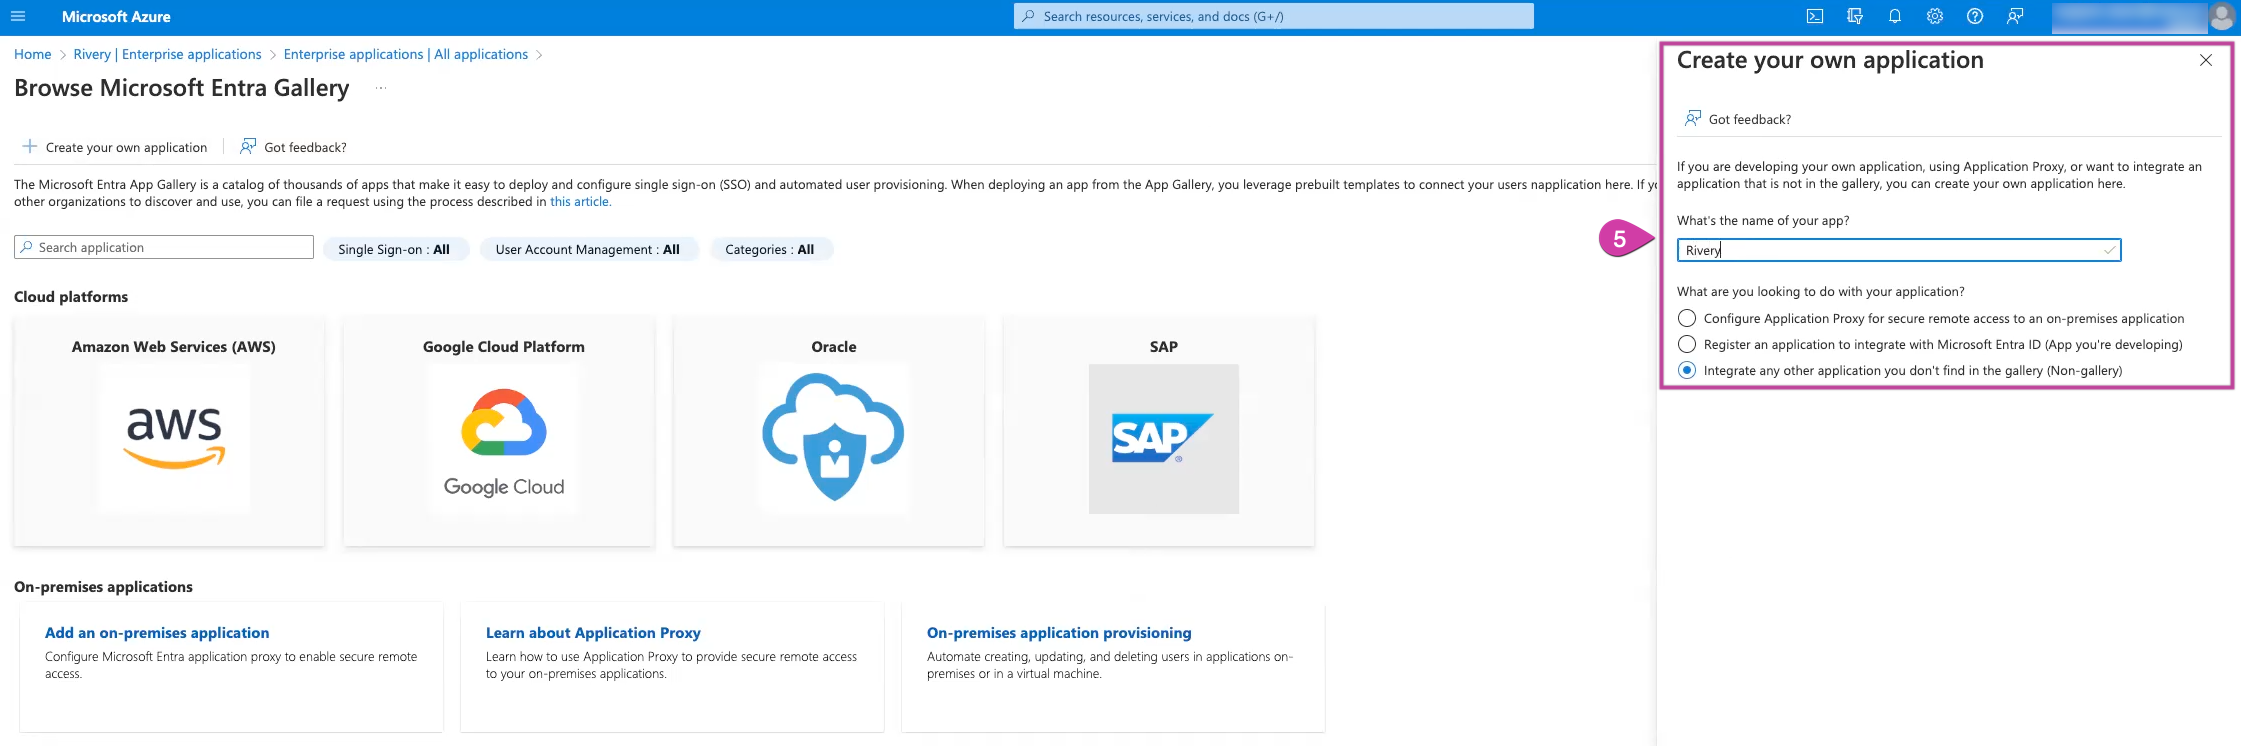
Select Create and then wait for the process to finish.
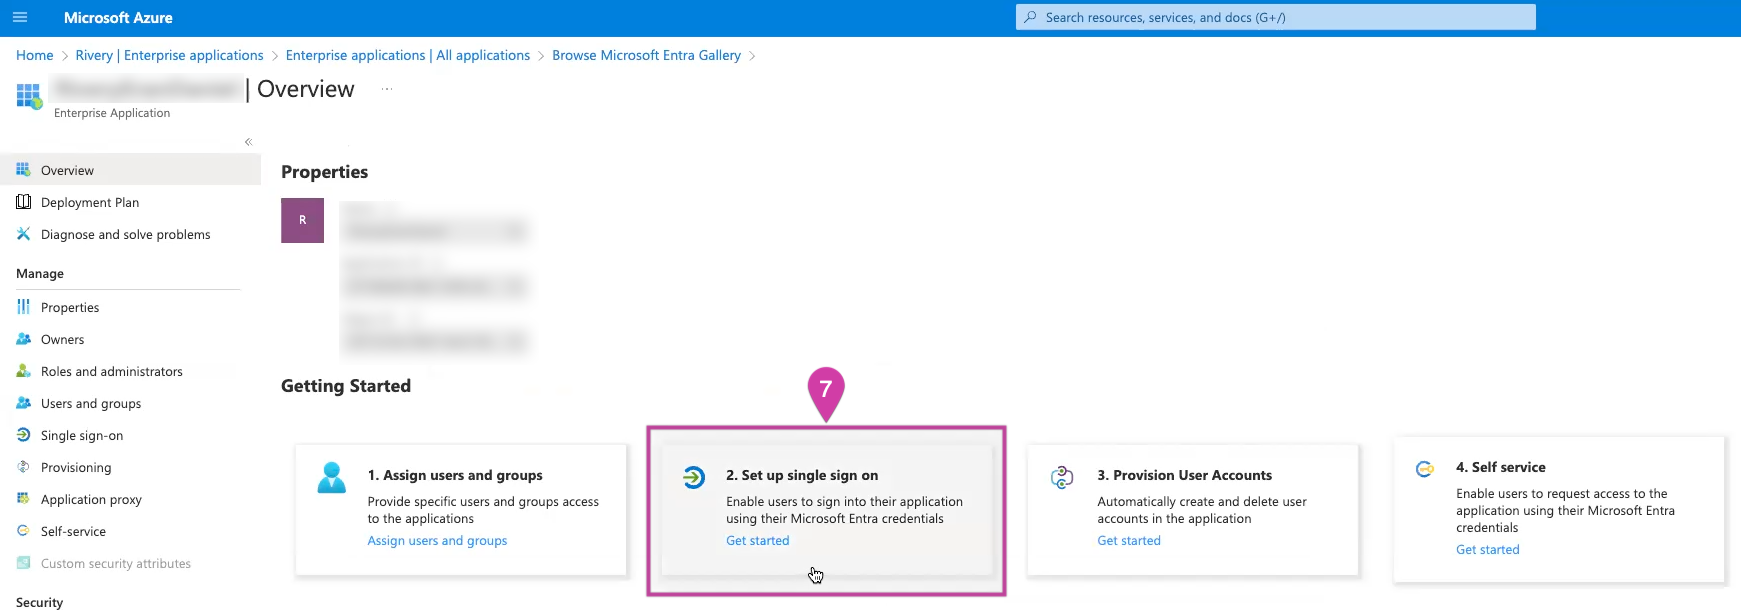
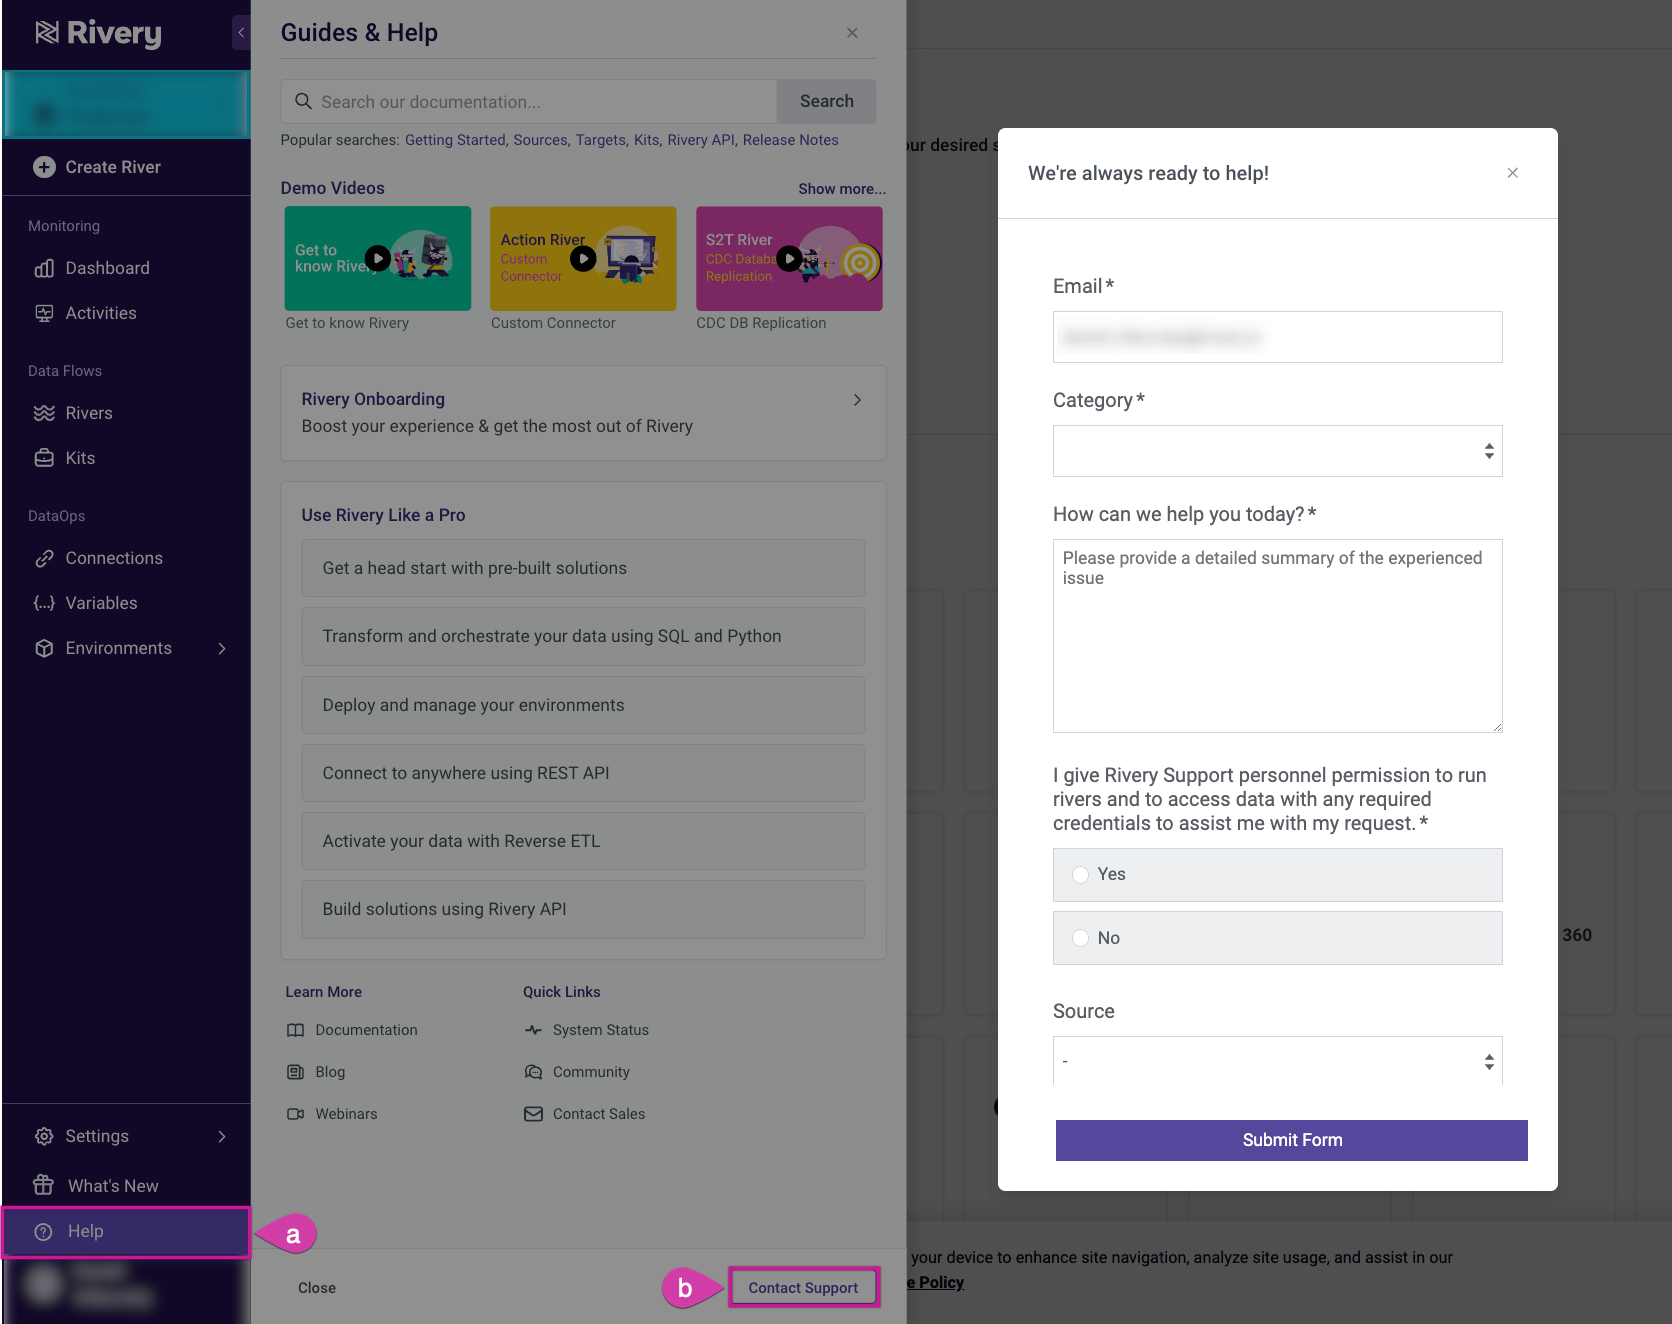
Within the Getting Started menu, choose Single sign-on.
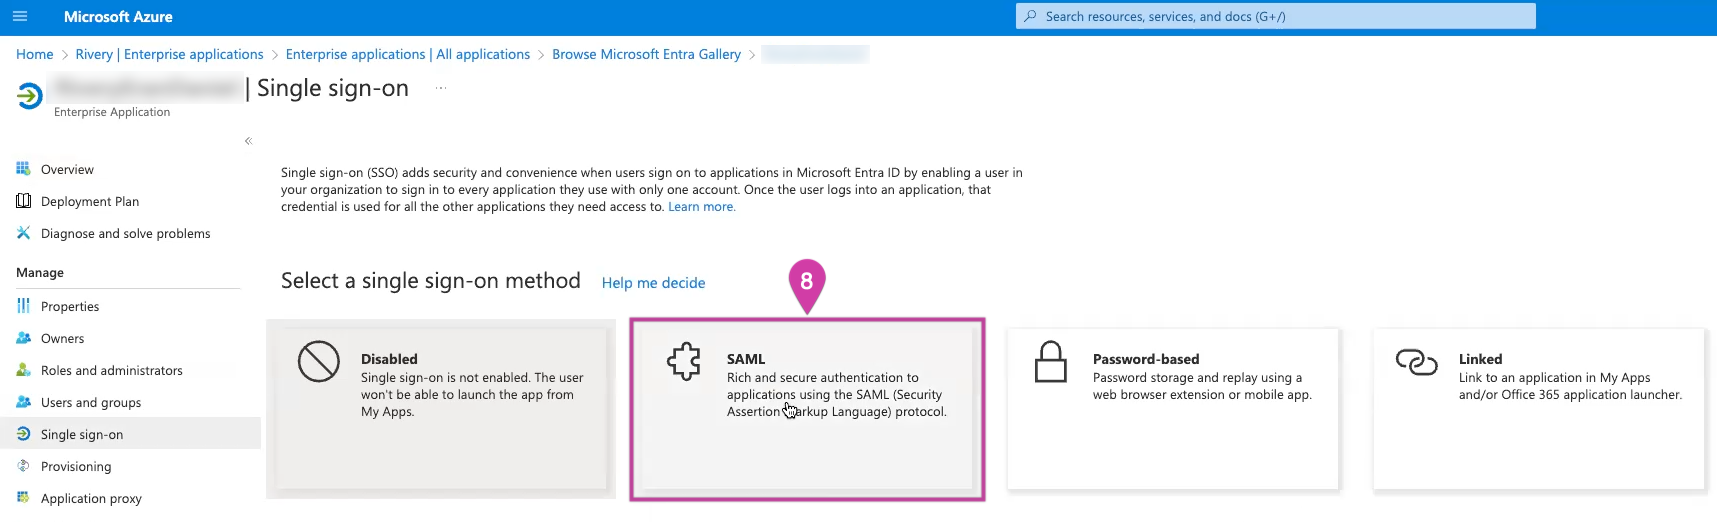
- Choose the option labeled SAML.
- Obtain the App Federation Metadata URL from the SAML Signing Certificate section.
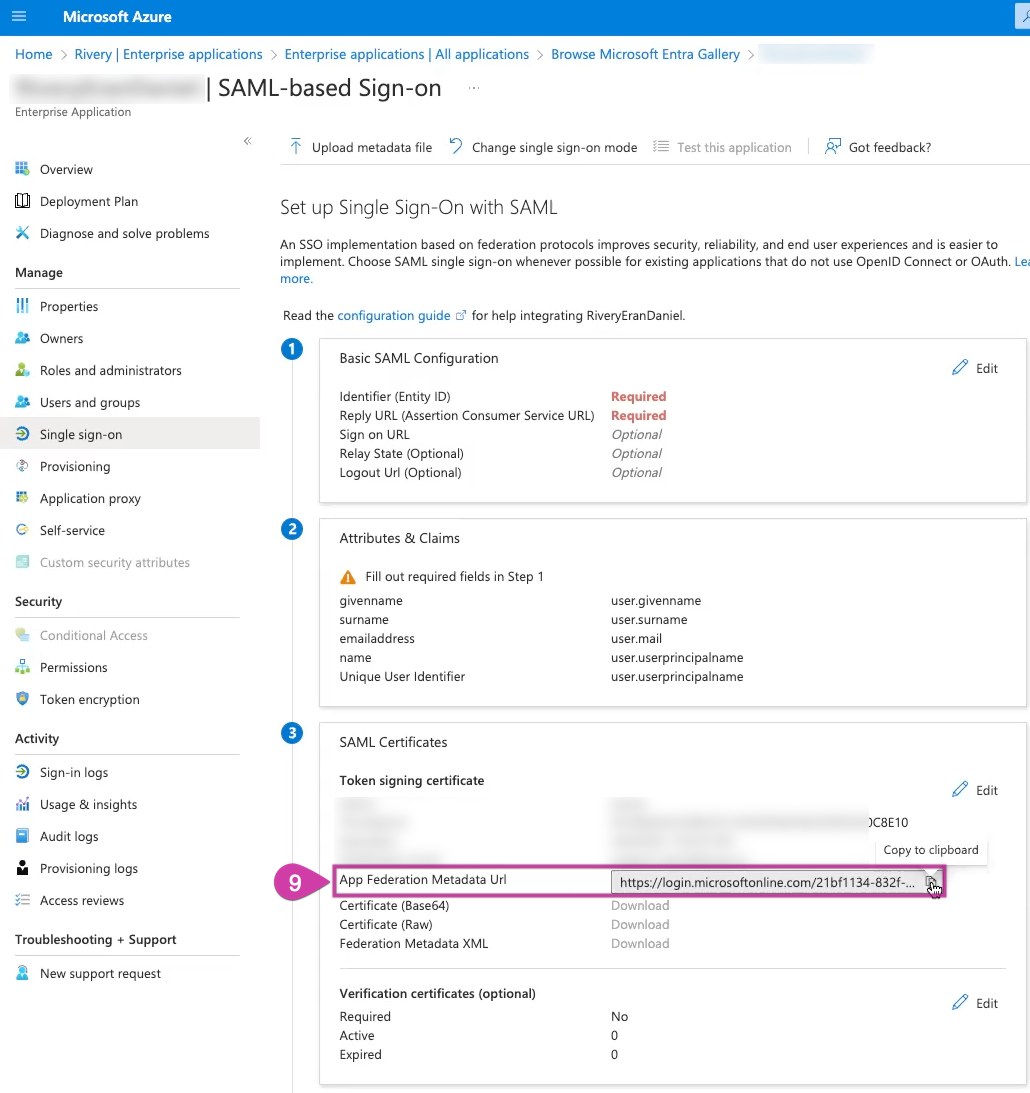
- Use the Help menu in the Rivery console to open a Support ticket. Include the App Federation Metadata URL and specify your preferred Default Role for new Rivery users when they log in.
You'll receive Metadata and ACS endpoints for configuration from Rivery Support.
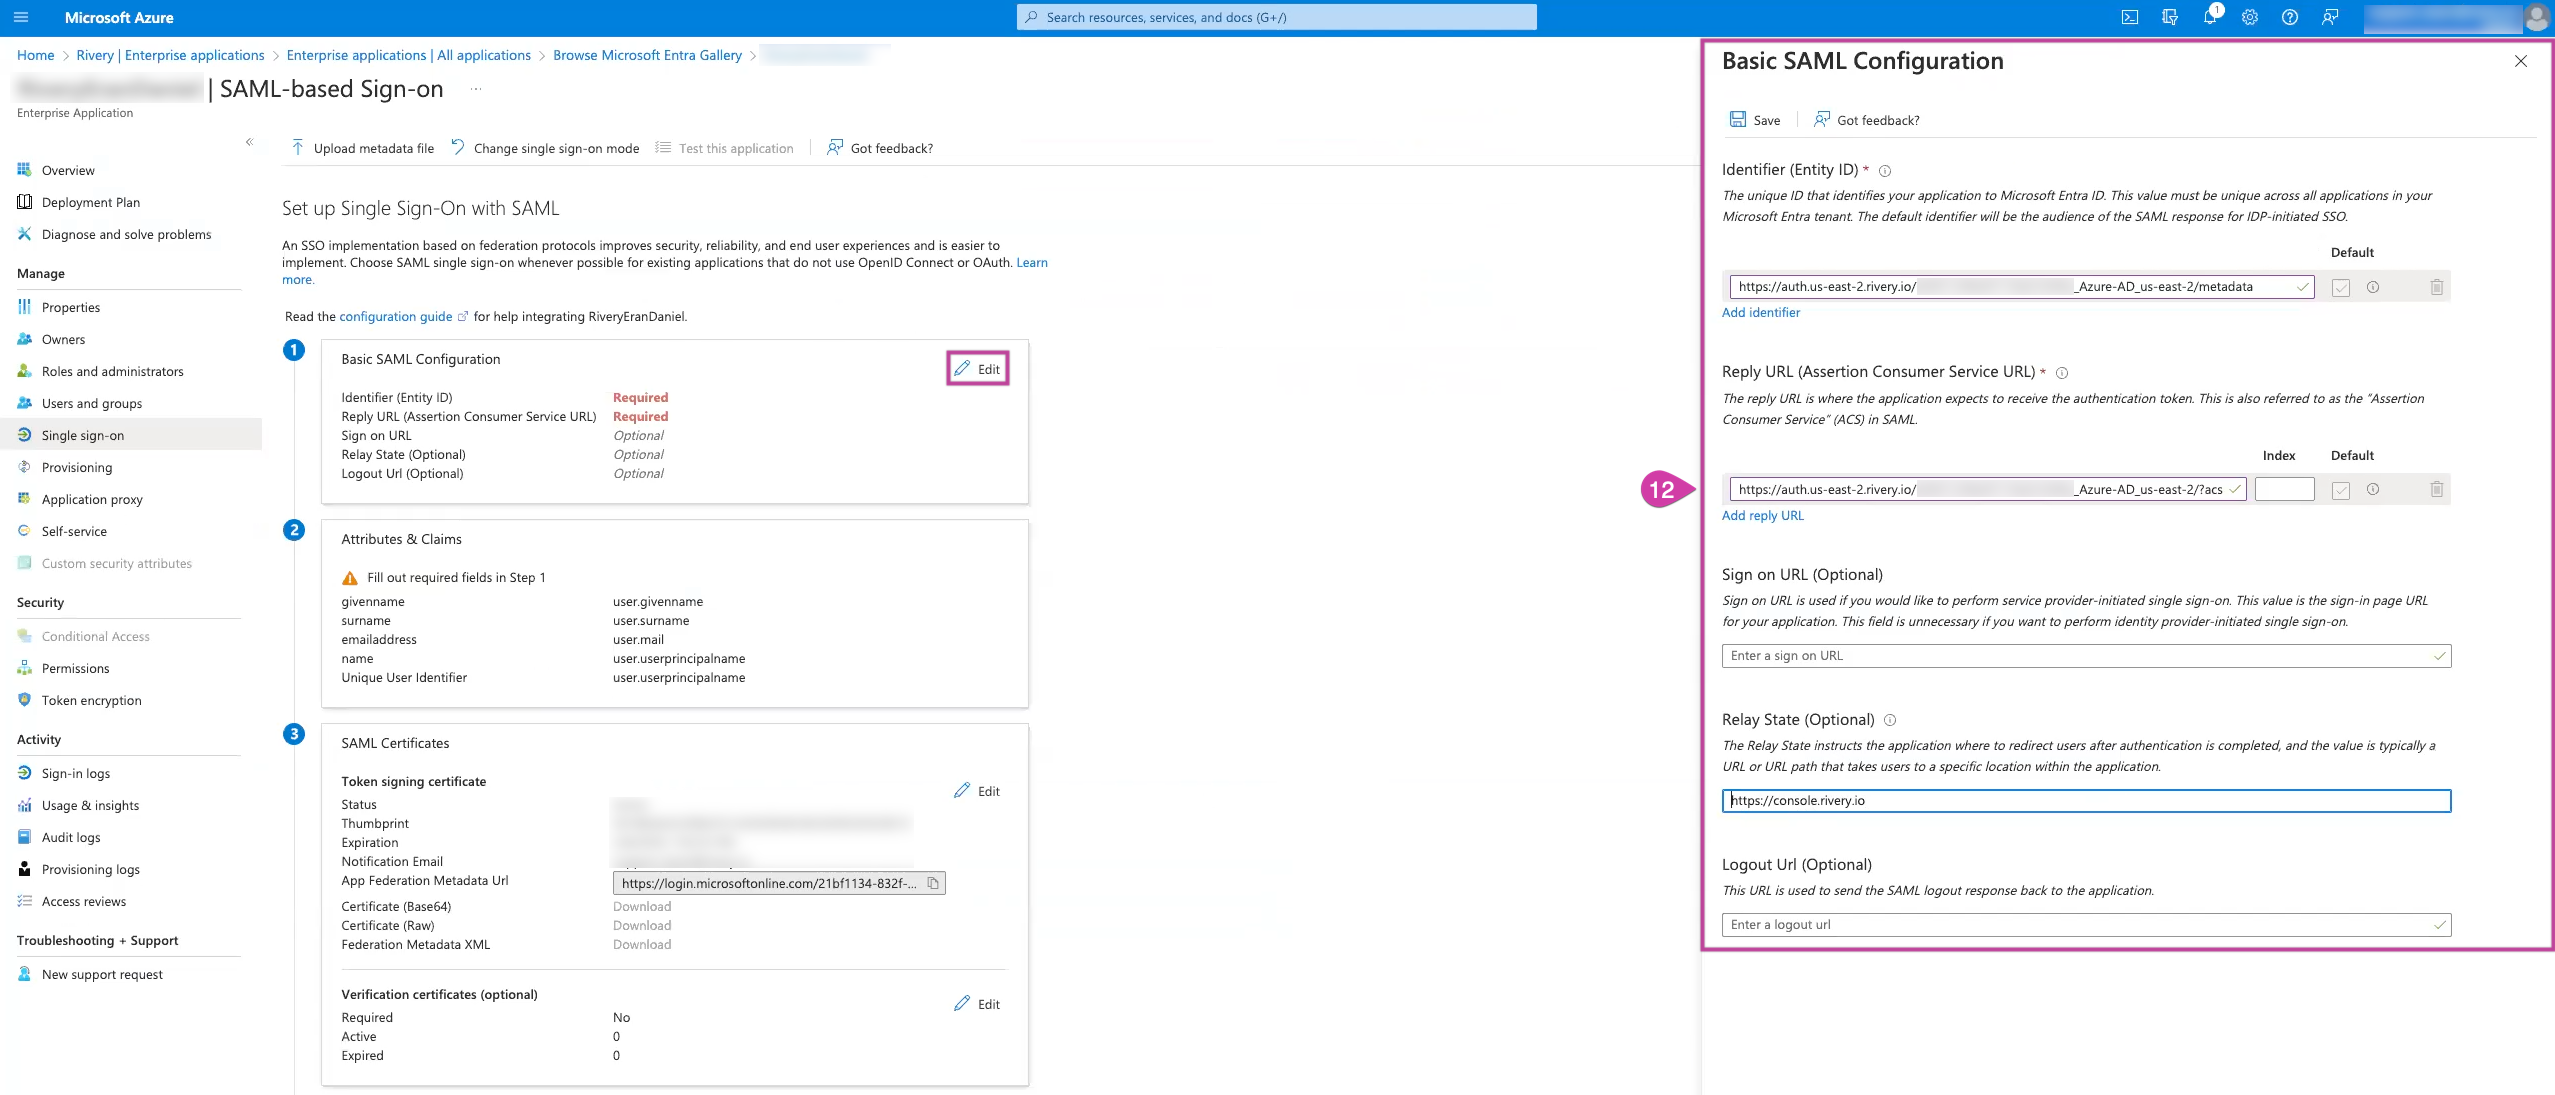
Configure SAML Settings in Azure:
In the Basic SAML Configuration section, Click Edit to configure the following settings:
- Identifier Entity ID (Ends with Metadata):
Example:
https://auth.[console-region].rivery.io/[account-id]Azure_AD[console-region]/metadata
- Reply URL (Ends with ACS):
Example:
https://auth.[console-region].rivery.io/[account-id]Azure_AD[console-region]/?acs
- Relay State URL
Relay State URL Region https://console.rivery.io us-east-2 https://eu-west-1.console.rivery.io eu-west-1 https://eu-central-1.console.rivery.io eu-central-1
Please Note:
- Ensure that you include the URLs provided by Rivery Support.
- Your Account ID is located in the Console URL: https://console.rivery.io/home/[account-id]/563f5b17b0a105467kle07a4we5435ff4c33, there is no need to do any modifications in the URL just make sure it is yours.
- Ensure that all URLs and configurations are set without any spaces or errors.
Click on Save and verify that the status indicates SSO was saved successfully.
Configure Attributs & Claims in Azure.
In the Attributs & Claims section, click Edit to configure the following settings:
- Select Add new Claim
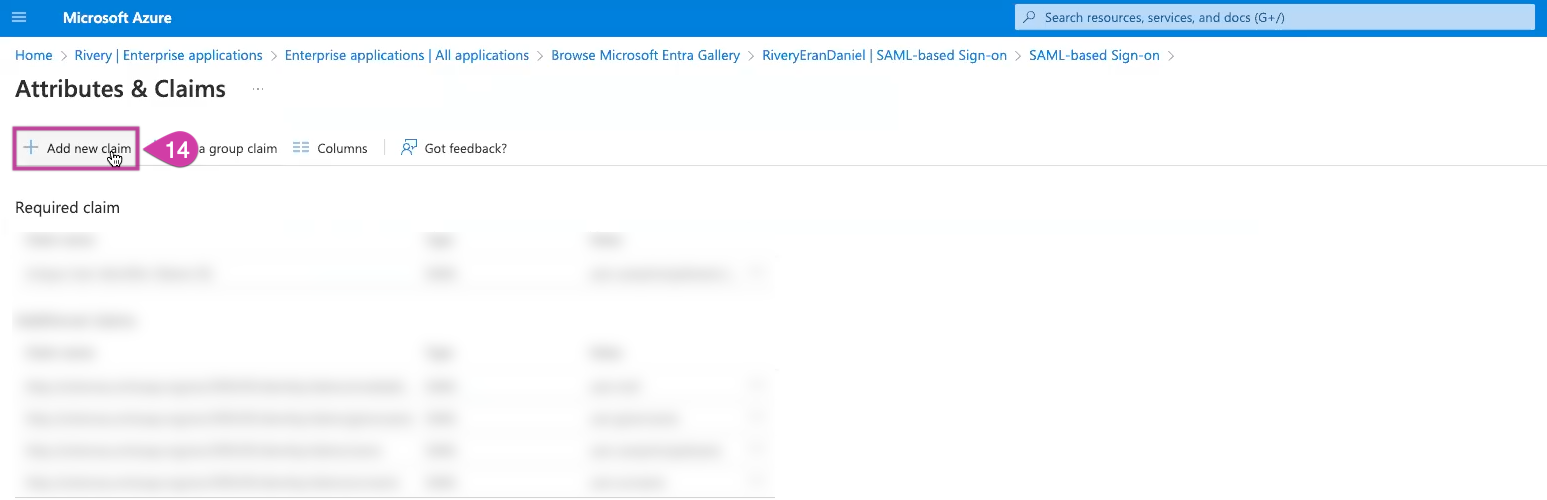
Create a new claim for every row in this table, totaling 6 claims.
Copy the specified parameters while ensuring case sensitivity is maintained.
Name Source Attribute NameID user.userprincipalname email user.mail firstname user.givenname lastname user.surname name user.userprincipalname Unique User Identifier user.userprincipalname
Adding Users to the Application
Under the Manage section in the left panel, click Users and Groups.
Select Add user/group on the main screen.
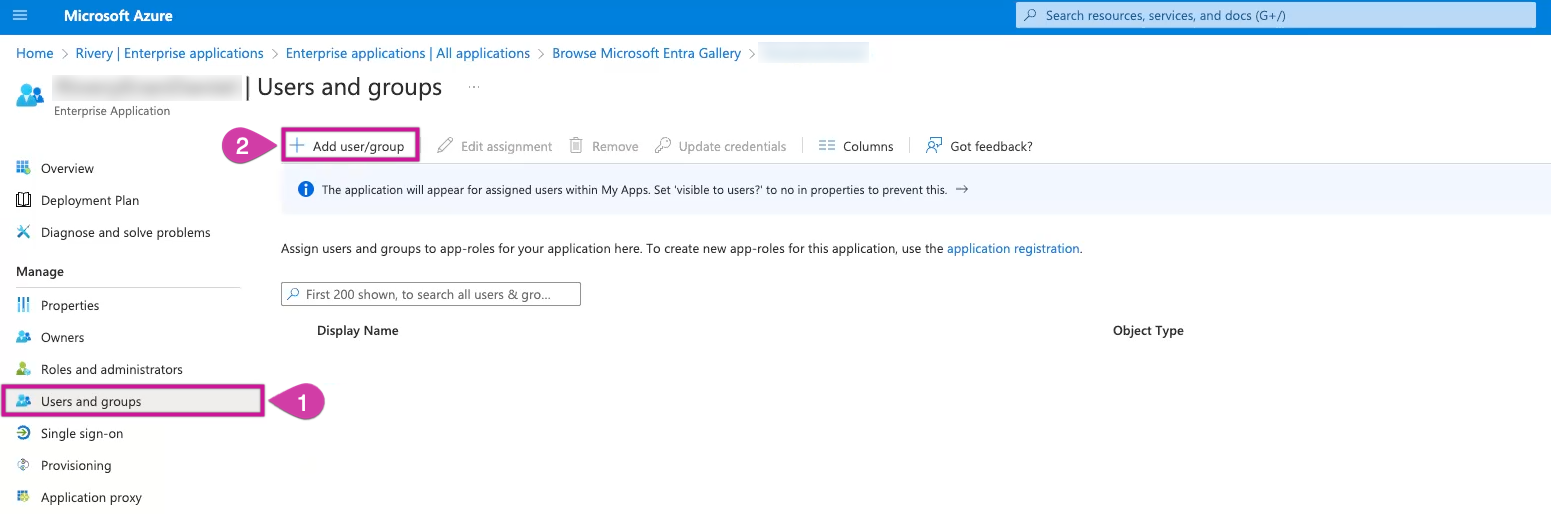
You have the option to achieve maximum automation by syncing with your existing Azure Entra ID groups, or you can manually add individual users using the tab on the left-hand side.
Click on Assign to finalize the assignment process (these users will gain access to Rivery through SSO).
To complete the configuration and establish the connection to Rivery, go to MyApps, find the app you created, and click on it. You will be directed to the Rivery console homepage.
Please Note:
- All users and groups can be provisioned to Rivery.
- After setting up SSO, the default landing URL for your Rivery console will be https://console.rivery.io/home/[account_id]/default_env, indicating that all users have access permissions to the default Environment.
- Ensure that the Username and Last name fields in the Users tab are populated with non-null values.
Was this article helpful?