New Source to Target Experience - A General Overview
- 13 Minutes to read
- Print
- DarkLight
- PDF
New Source to Target Experience - A General Overview
- 13 Minutes to read
- Print
- DarkLight
- PDF
Article summary
Did you find this summary helpful?
Thank you for your feedback!
The new Source to Target experience is currently available in private preview only.
Introduction
The Source to Target Rivers feature in Rivery simplifies the process of building robust data pipelines, allowing users to extract data from a designated source and load it into a target system with ease. This automation facilitates the detection of incoming data structures, and Rivery generates the corresponding target tables and columns for data storage without manual intervention.
This guide focuses on connecting MySQL/PostgreSQL/Oracle to Snowflake/BigQuery using Rivery's Source to Target Rivers functionality. It includes step-by-step instructions for setting up and configuring both the source and target, enabling users to establish seamless data flows between their chosen platforms.
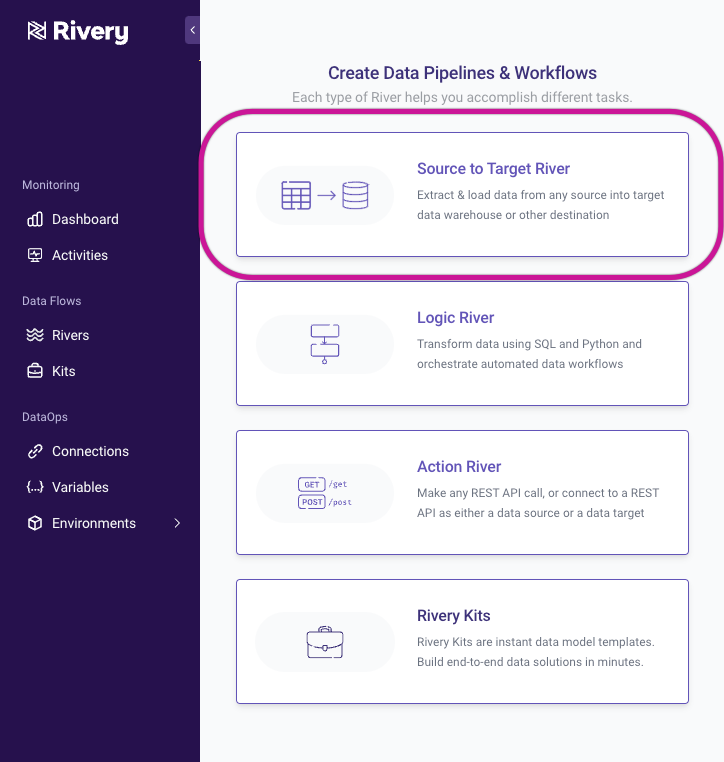
To begin, navigate to the Create River section and select Source to Target River from the available options.
Step 1: Set Up Data Source
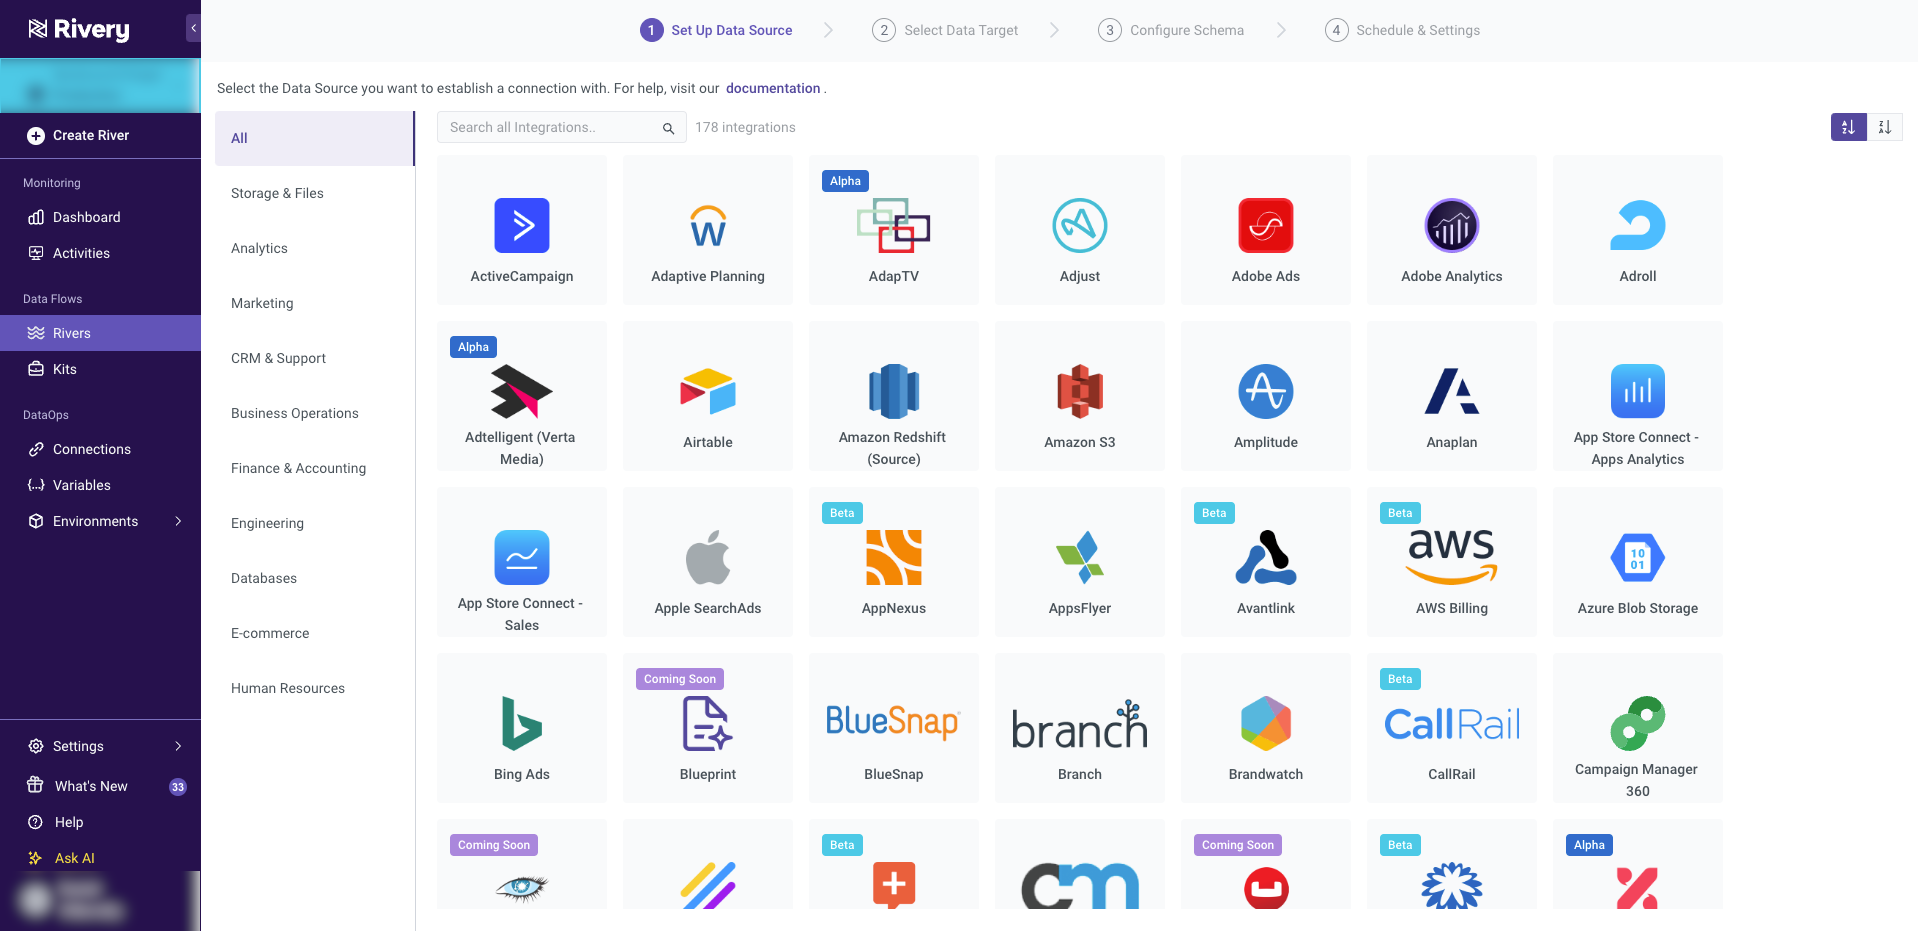
In the Source step, you’ll select the data source you want to ingest data from and customize the ingestion process through various parameters.
Rivery provides a comprehensive list of supported connectors, allowing you to choose the appropriate source for your data needs.
Establishing a Connection
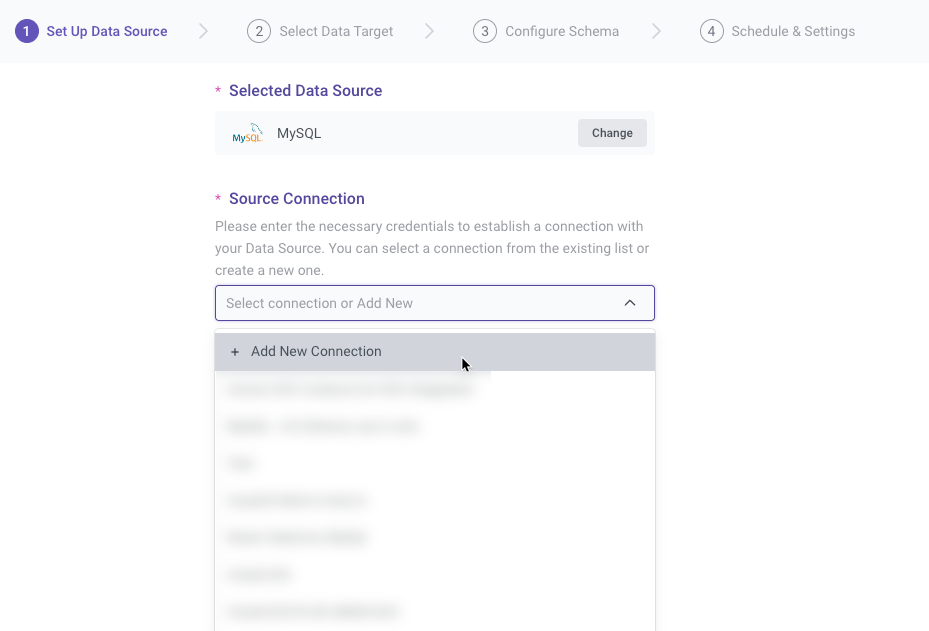
After selecting MySQL/PostgreSQL/Oracle, you must choose or create a connection. If a connection to the source has already been established via the 'Connections' tab, it will be available in the dropdown menu. Otherwise, you can create a new connection on the spot by selecting Add New Connection.
Please Note:
It is recommended to perform a test connection to ensure the connection is valid for a successful River.
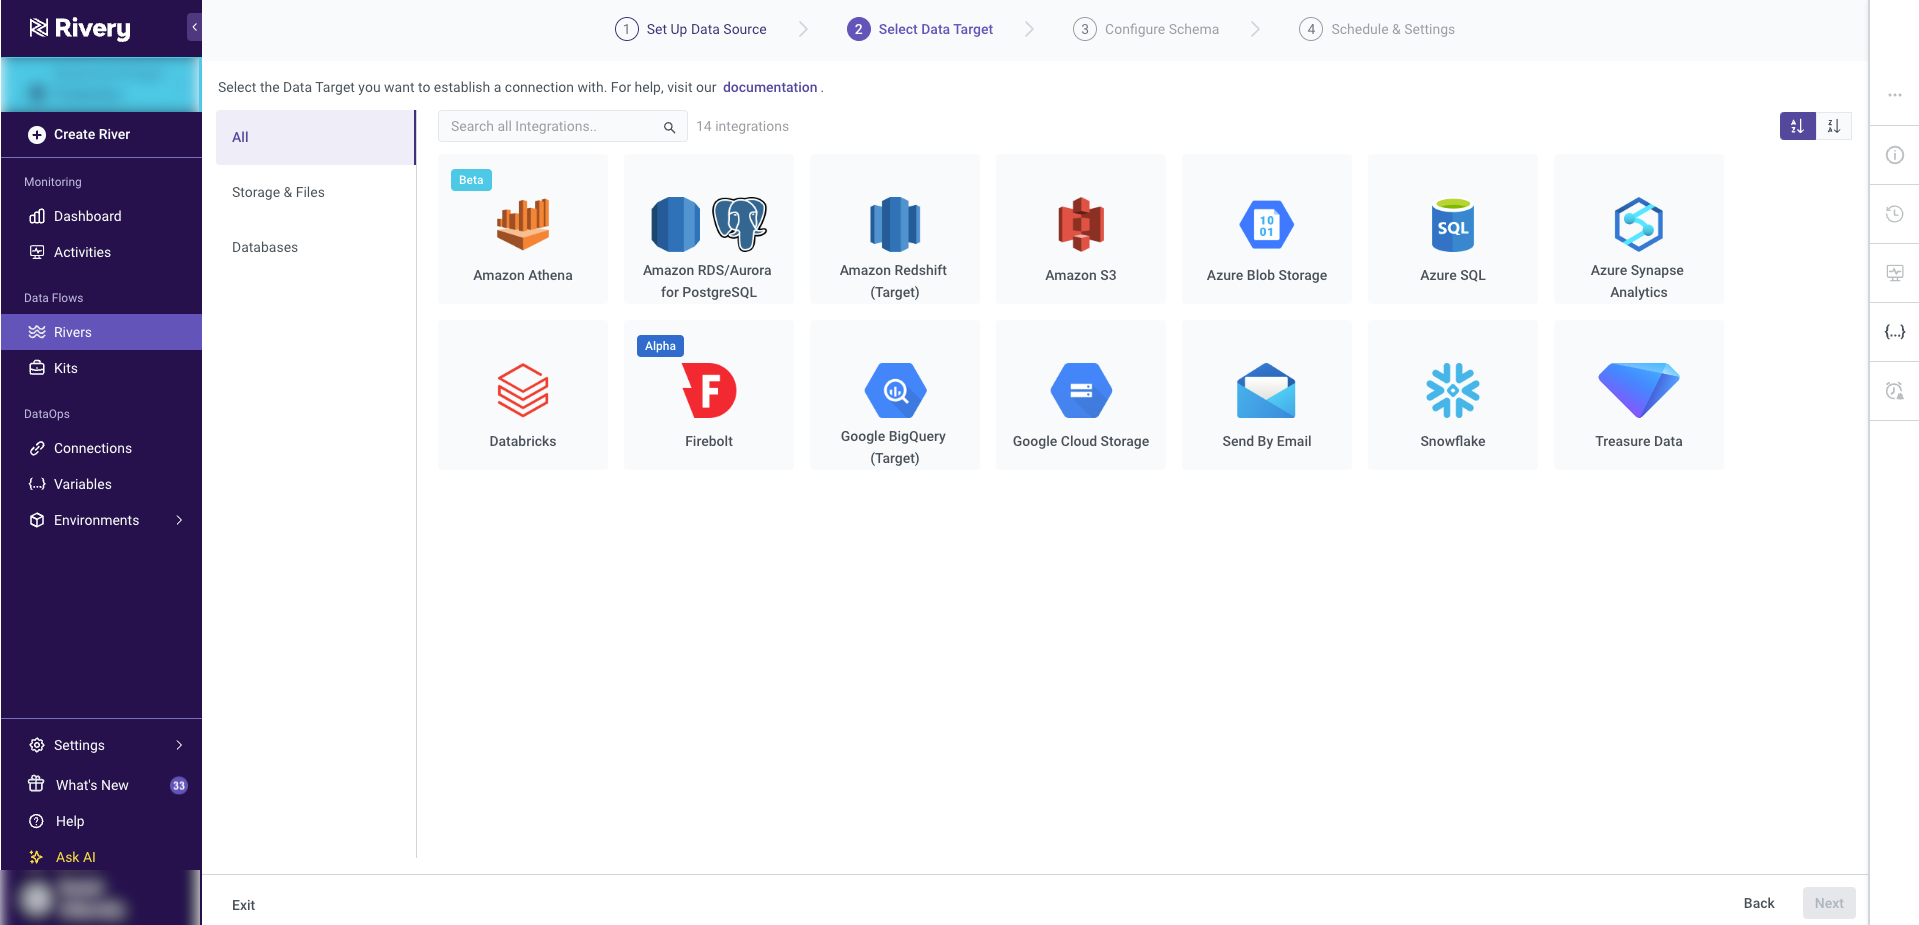
Step 2: Select Data Target
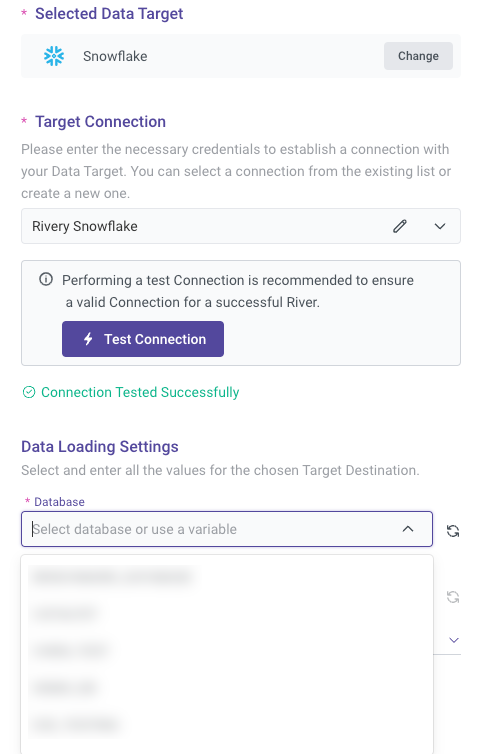
In the Target tab, select the Snowflake destination where the source data will be loaded. Ensure that the appropriate Snowflake instance is chosen to match the data integration requirements. This step configures the destination for the data flow, ensuring that the source data is accurately directed to the correct Snowflake environment for further processing or analysis.
Establishing a Target Connection
Similar to the Source tab, you can either select an existing Target connection or create a new one. If the Target is a cloud data warehouse, you will need to specify the database, schema, and target table where the data will be loaded.
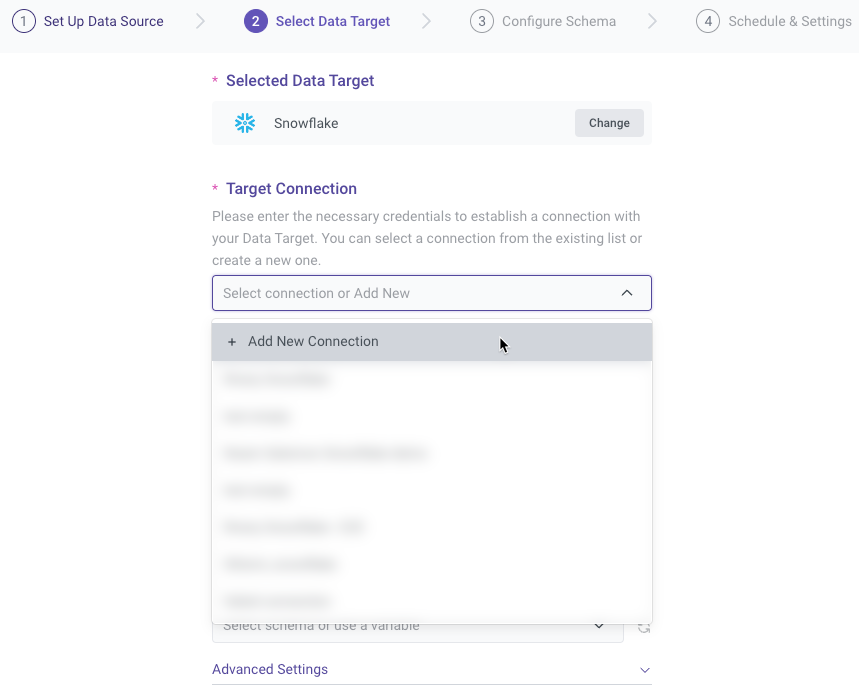
Data Loading Settings
You'll have to define a database, schema, and target table. This is where the data pulled from your selected source will land.
Rivery will automatically detect available databases and schemas for you to choose.
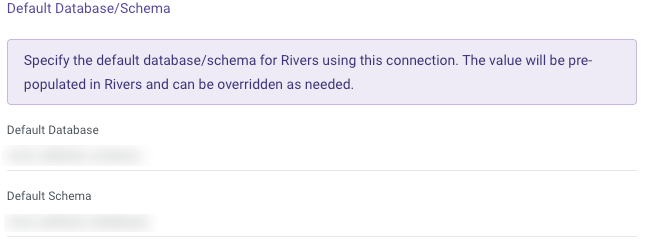
Please Note:
In Snowflake and BigQuery, the connection form includes a "Default Pre-Populated Values" option. This allows you to specify the values you want to work with, and the connection will automatically remember and use these as the default.
This simplifies the setup process for the target, saving time and effort.
Here's an example from Snowflake connection form:
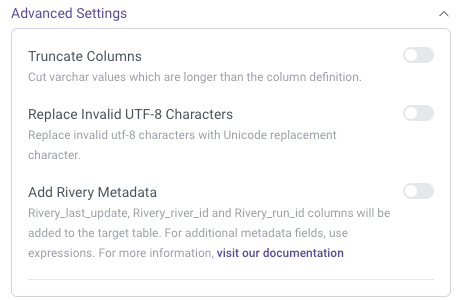
Advanced Settings
Rivery offers a variety of advanced settings specific to Snowflake, allowing for more precise data management and customization. Below is a detailed explanation of each setting:
Truncate Columns:
Ensures that anyVARCHARvalues exceeding the column's defined length are automatically truncated. This prevents data overflow and maintains consistency with the column definitions.Replace Invalid UTF-8 Characters:
Automatically replaces invalid UTF-8 characters with the Unicode replacement character. This ensures that invalid or corrupted characters do not interfere with data processing.Add Rivery Metadata:
When enabled, additional metadata columns are added to the target table in Snowflake. These columns include:Rivery_last_update: Tracks the timestamp of the most recent update.Rivery_river_id: Identifies the specific river responsible for the data load.Rivery_run_id: Captures the unique ID of each individual run of the river.
To include more metadata fields beyond the default ones, custom expressions can be used.
Custom File Zone:
Allows users to specify a custom file zone for staging files before they are loaded into Snowflake. This is useful for managing file storage and ensuring the proper handling of large data files.
These advanced settings provide greater control over how data is processed and stored in Snowflake, ensuring data integrity, compatibility, and enhanced metadata tracking.
Step 3: Configure Schema
At this point, it's time to choose an extraction mode that fits your requirements.
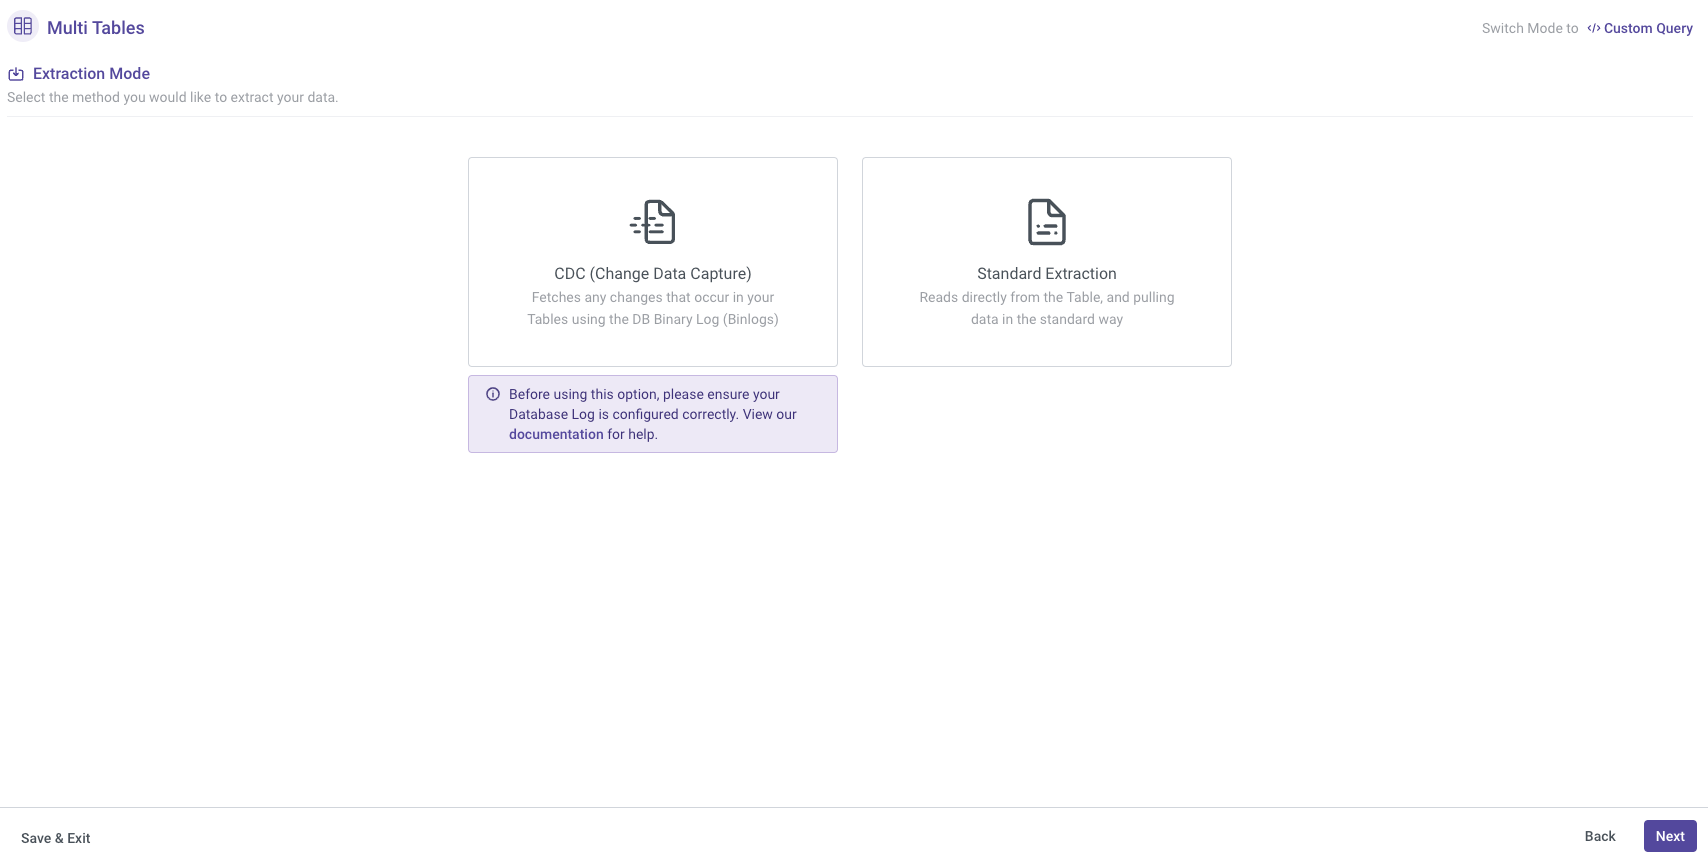
Extraction Mode
Rivery provides various extraction modes depending on the selected source. When using a source like an RDBMS (Relational Database Management System), you will typically have two options for extracting data:
- CDC
- Standard Extraction
Please Note:
To change the extraction mode after making a selection, use the "Extraction Mode" button on the left-hand side and choose the desired mode.
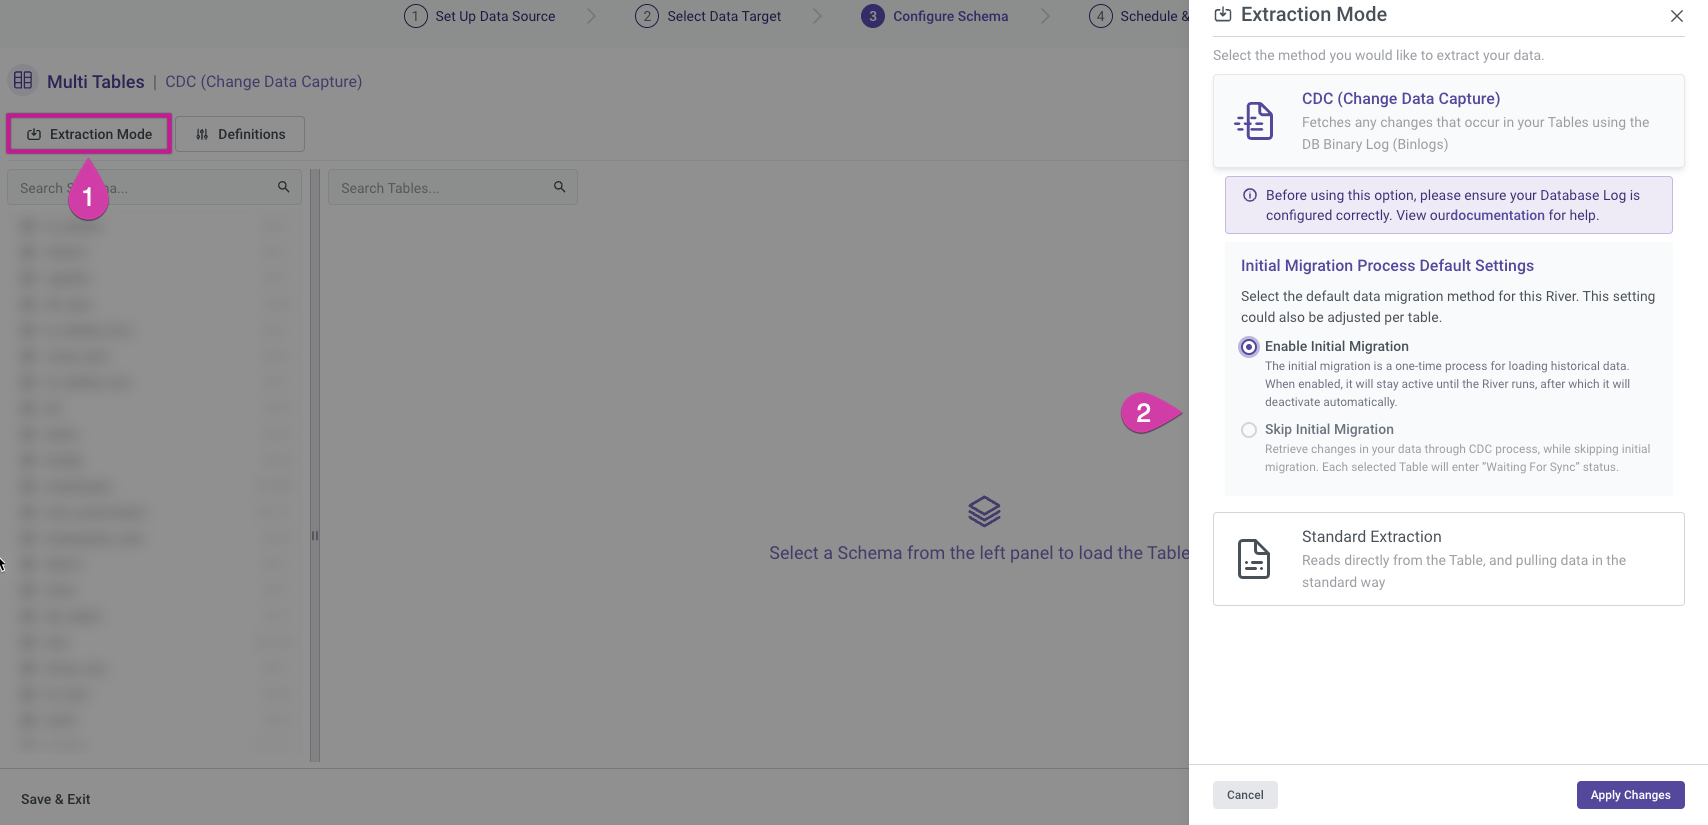
Change Data Capture
This mode tracks and extracts only the data that has changed since the last extraction, making it efficient for high-volume data sources with frequent updates.
Rivery's Change Data Capture (CDC) extraction mode works by constantly monitoring the logs or records generated by the source database and then capturing changes made to the source data. This change data is then collected, transformed, and loaded into the target database, ensuring the target is always in sync with the source. CDC extraction provides real-time data replication and ensures minimal data loss by providing low latency data transfer.
For more details, refer to our Database River Modes document.
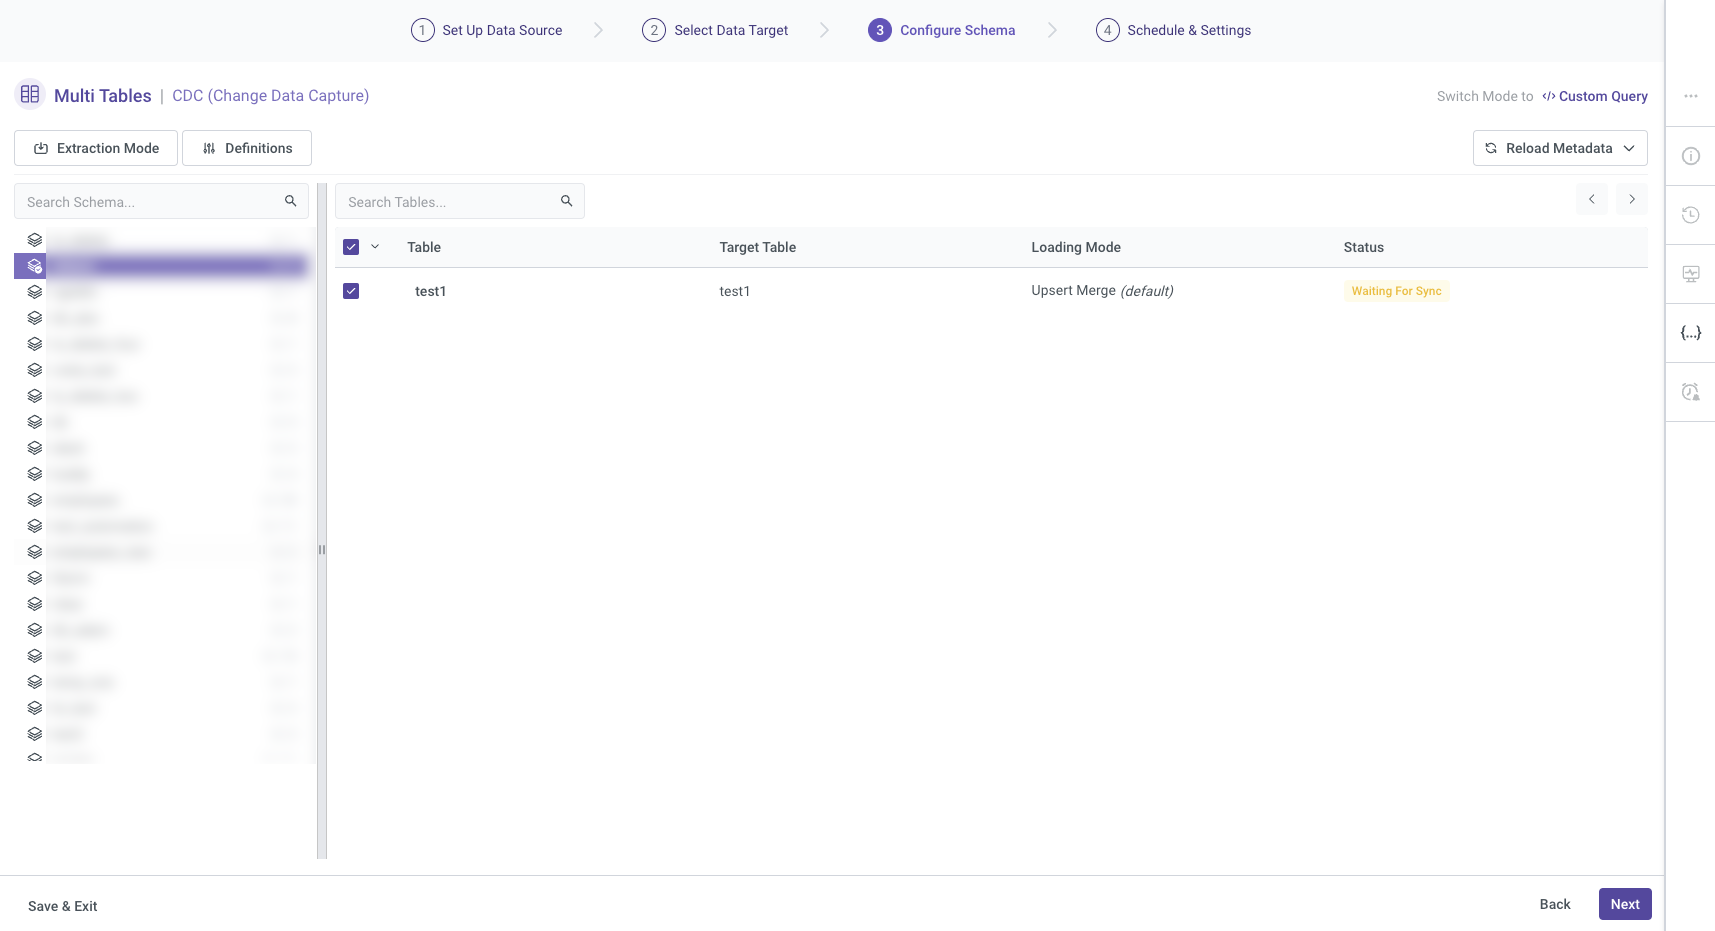
Please Note:
The schema in the image below is blurred, but you can find its location on the left-hand side of the screen.
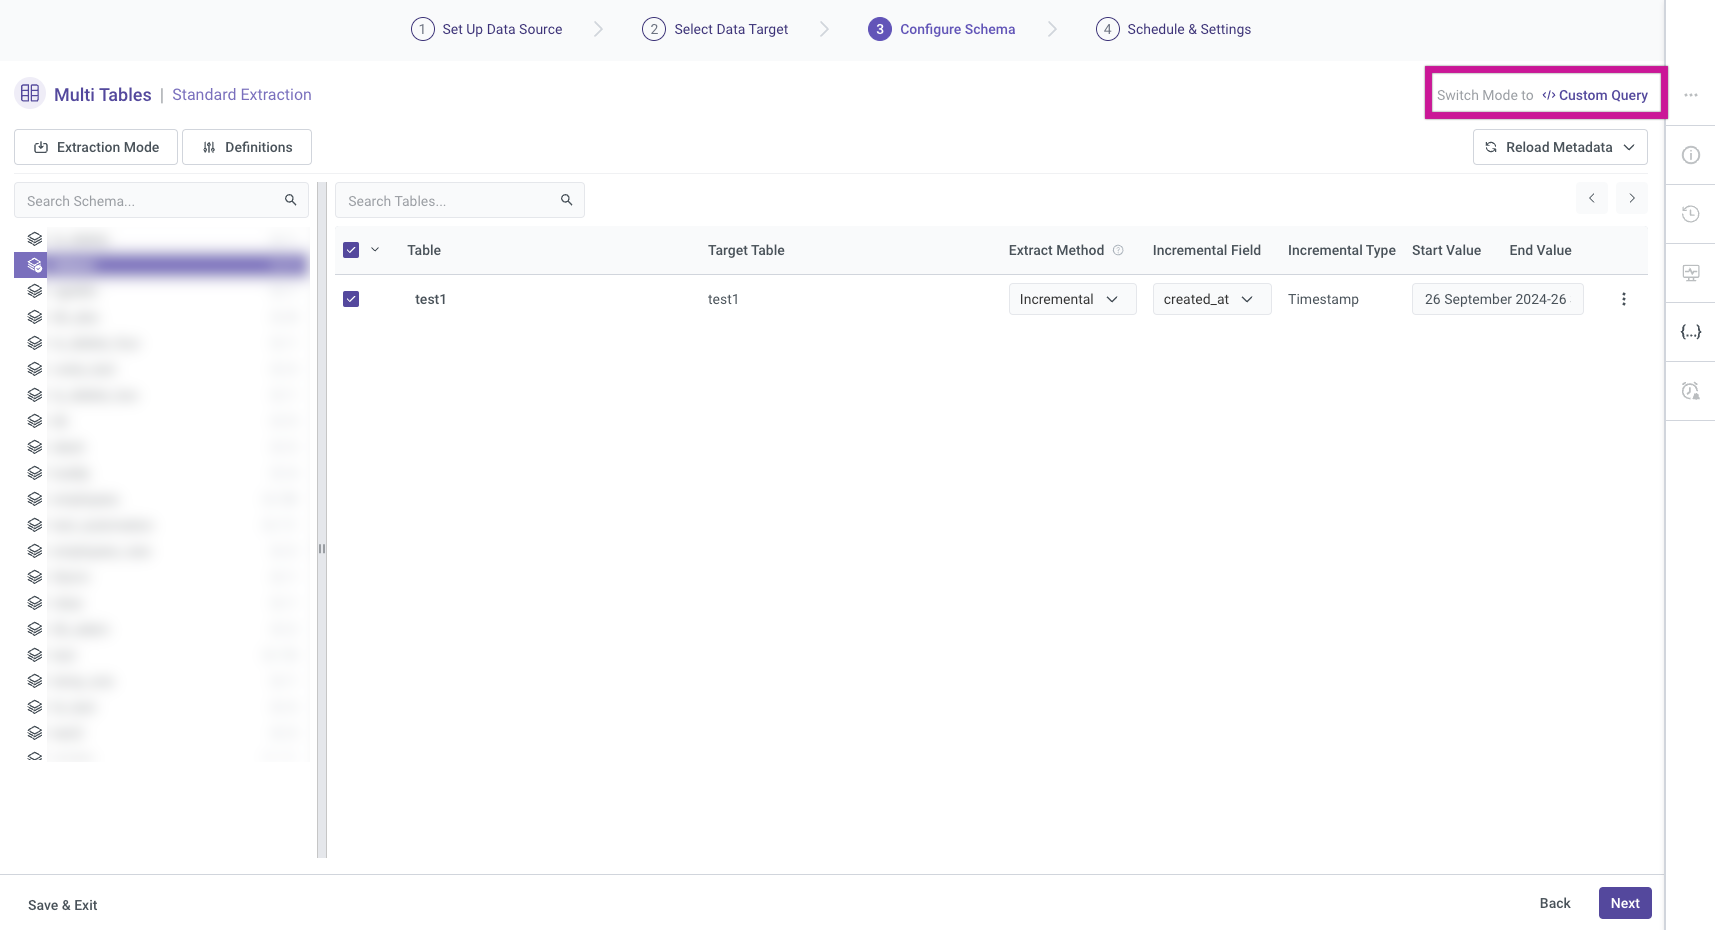
Standard Extraction
This mode allows you to map and transform data from multiple tables into a unified schema before loading it into the destination. The process involves establishing relationships between the tables to ensure that data is consistently linked and loaded. The Multi-Tables River mode in Rivery relies primarily on SQL-based queries for performing data transformations. This mode can be configured to run on a defined schedule or triggered manually for execution.
For more details, refer to our Database River Modes document.
Next, please select the table you wish to work on. The selected table's name will be reflected in the Target configuration. You can also choose the extraction method, and if you opt for the Incremental extraction method, you'll have the option to configure its settings accordingly.
Please Note:
The schema in the image below is blurred, but you can find its location on the left-hand side of the screen.
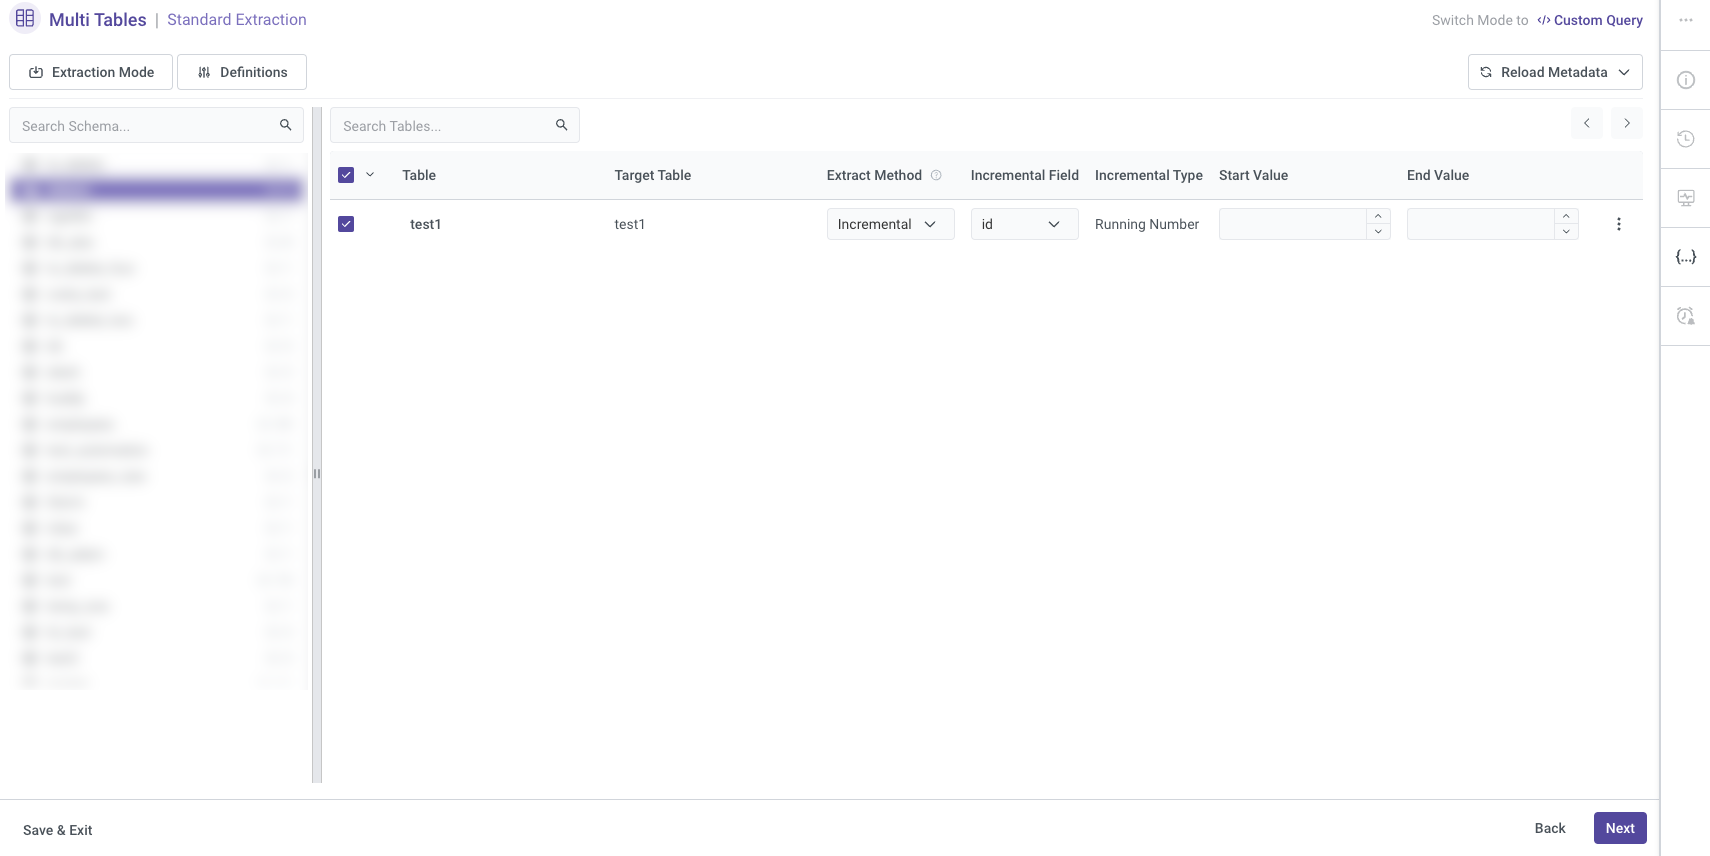
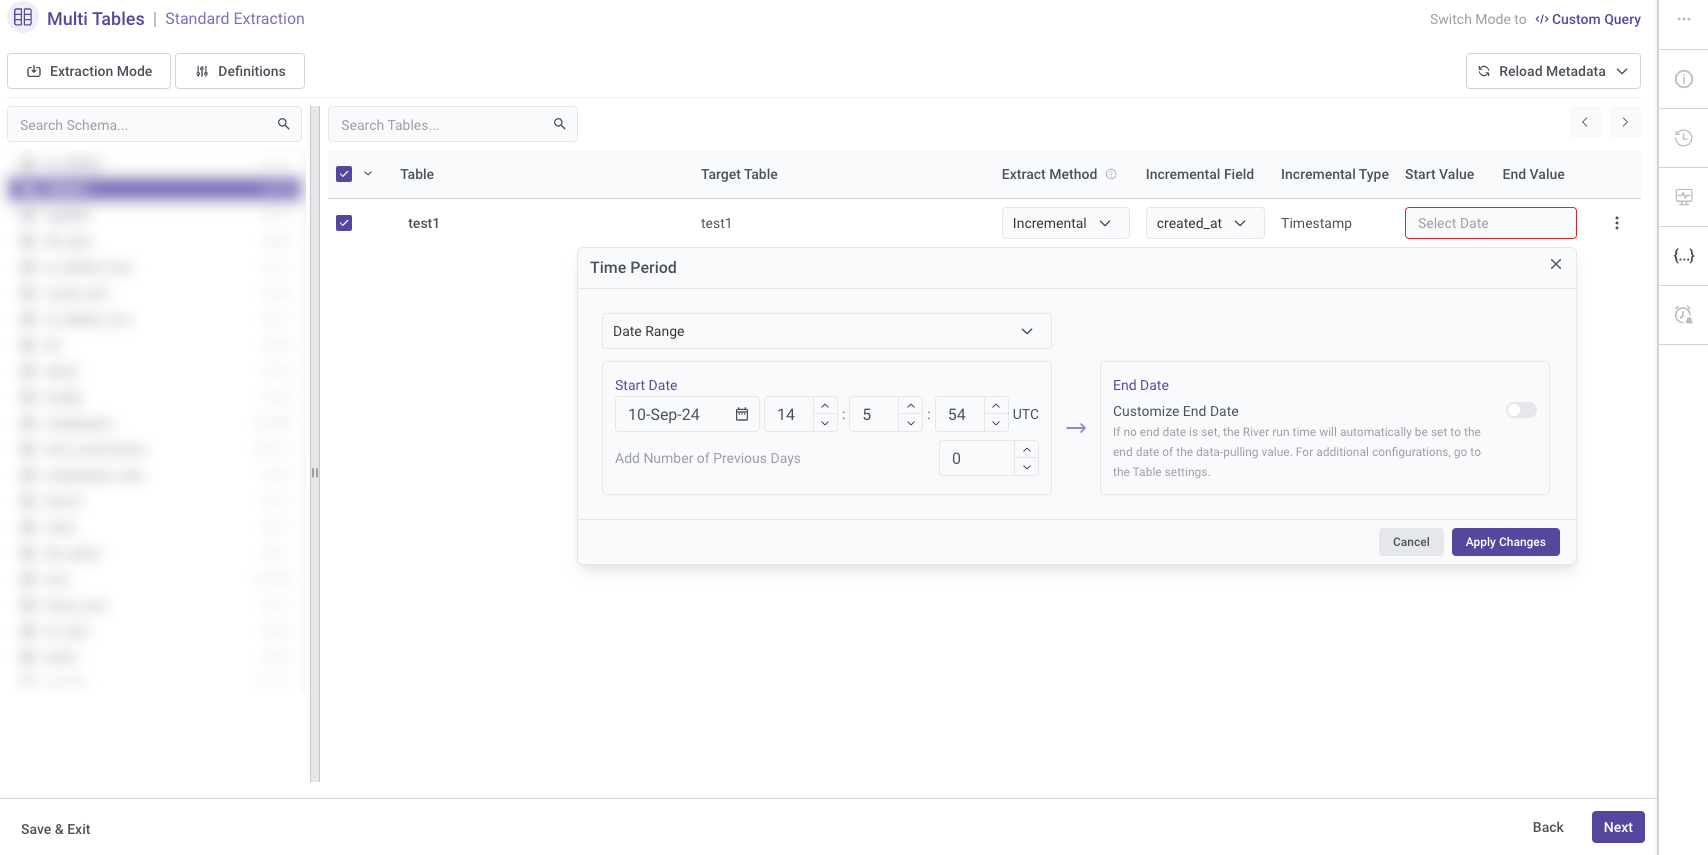
If you opt to use the "Created_at" option in the incremental field, you must specify both a Start Date and an End Date. These dates define the time range for data extraction, ensuring that only records created within this period are included in the incremental load. This approach helps control the data flow and ensures accuracy in capturing new or updated entries.
Please Note:
Start Date and End Date Configuration:
- Start Date: Specify the beginning of the time range from which you want to pull data.
- End Date: Set this to an empty value if you want the data extraction to continue up to the current time at the moment the river runs.
Automatic Date Updates:
- After each river run, the Start Date will be automatically updated to match the previous End Date. The End Date will be set to empty, enabling the next run to extract data from the end point of the previous run.
Time Zone Offset:
- If the End Date is left empty, you need to select the appropriate time zone offset. This ensures that the data extraction is aligned with the correct local time when the river is executed.
Days Back:
- Use the "Days Back" field to specify a number of days prior to the provided Start Date. This allows Rivery to pull data from a historical point relative to the Start Date.
Important Note:
- The Start Date will not be updated if a river run fails. To alter this behavior, go to More Options and check the box to advance the Start Date even in the event of a failed river run. Please note that this option is not recommended as it may lead to inconsistencies in data extraction.
For more details on selecting time periods, refer to our Source to Target River - General Overview
document.
Definitions
These settings apply to all selected tables, allowing you to modify schema definitions on both the Source and Target sides.
Advanced Source Definitions – The options available will depend on the selected Extraction Mode.
Advanced Target Definitions – You can customize the loading modes as needed. The available choices will vary based on the selected target, with each target providing its own set of supported loading modes.
For more details on loading modes, refer to the Targets documentation.
Be sure to click "Apply Changes" to save your modifications.
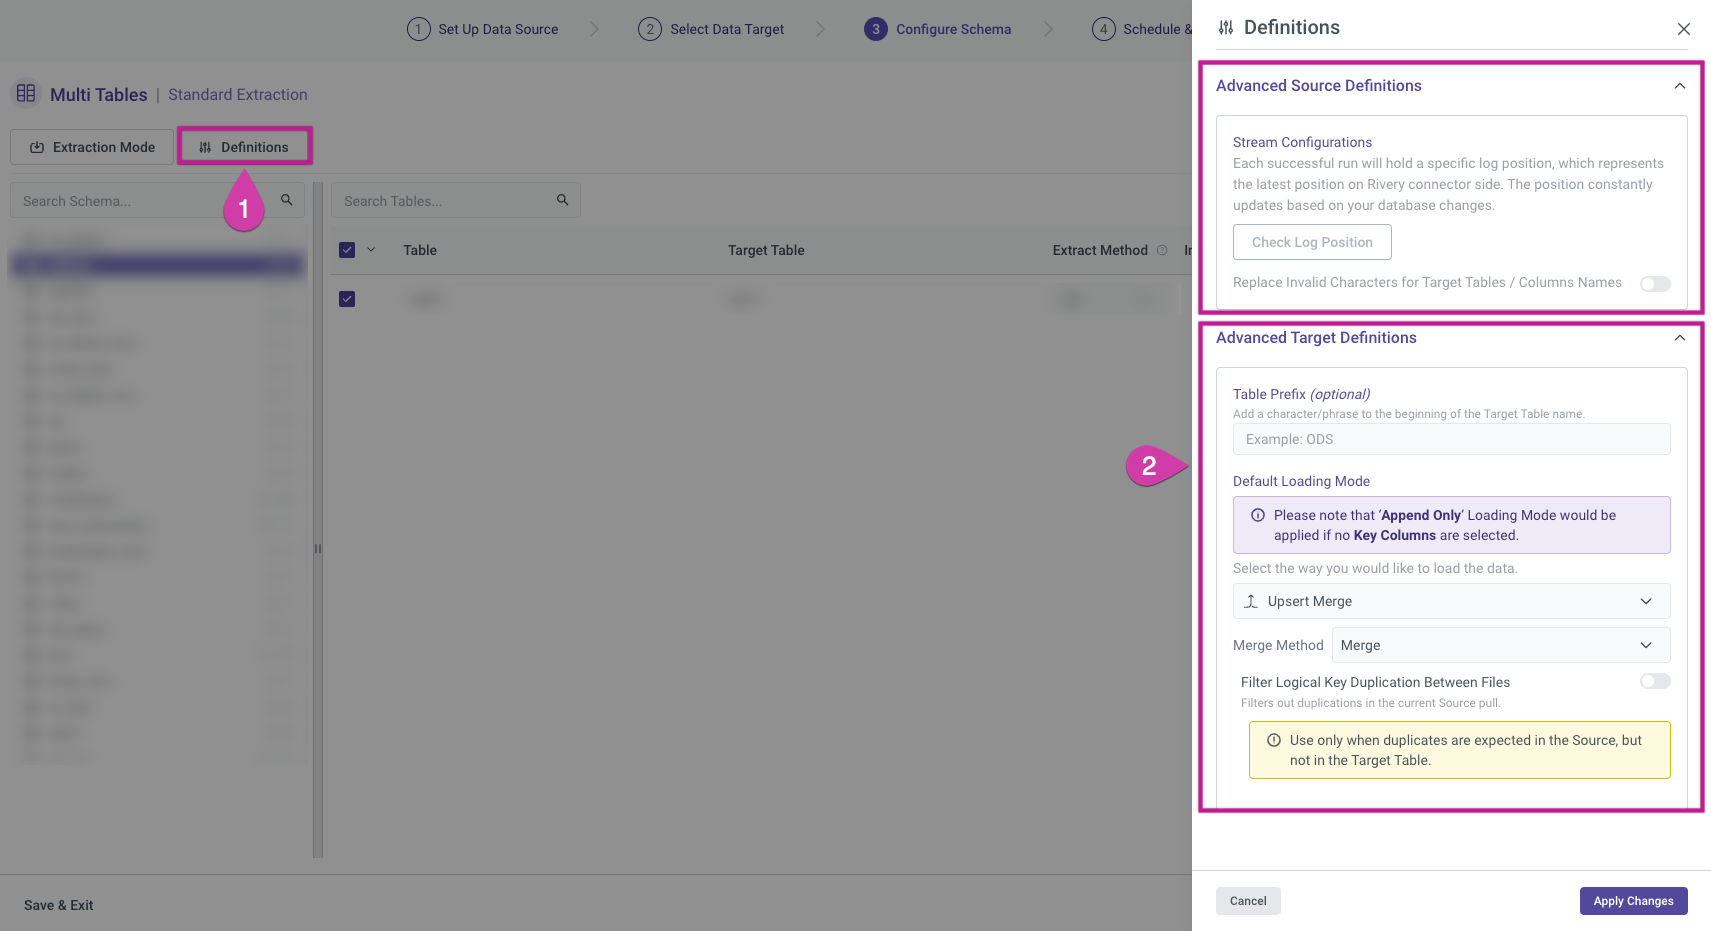
Table Settings Screen
Upon selecting a specific table, a Settings screen will appear, providing 3 key options for configuration:
- Mapping
- Table Source Settings
- Table Target Settings
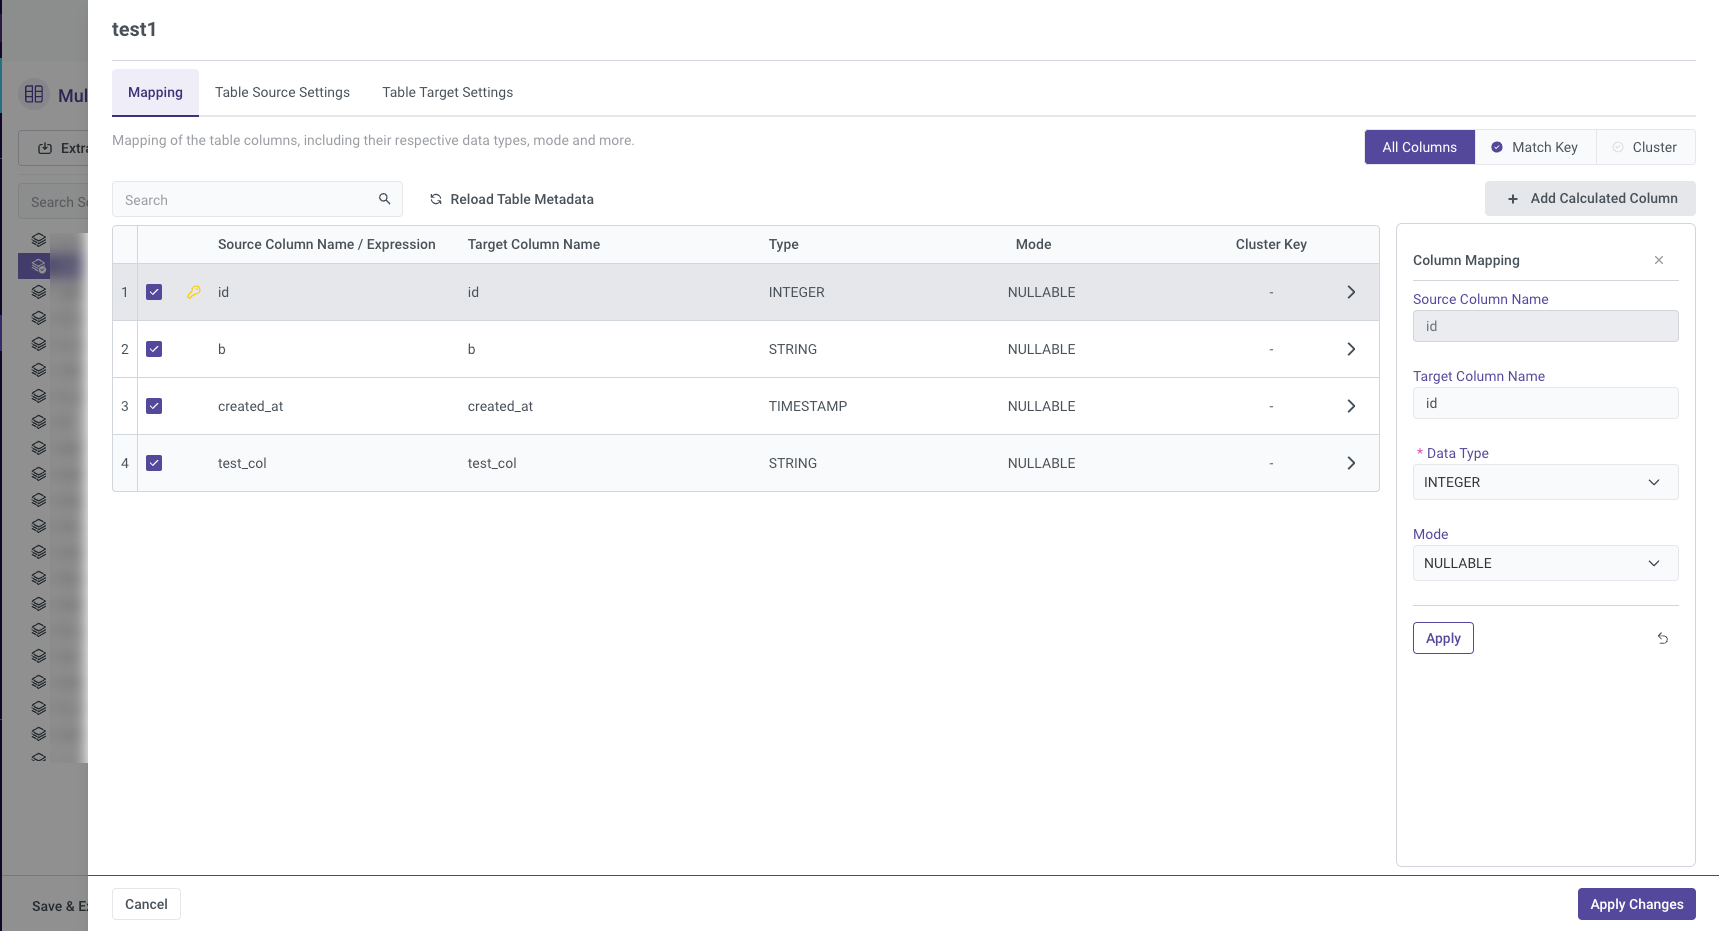
Mapping
All Columns Tab
In the "All Columns" tab under the Mapping section, both the Source and Target columns are displayed along with their respective data Type and Mode. To modify any of these settings, click the arrow icon next to the column you wish to edit, make your changes, and ensure that you click "Apply Changes" after each modification to save them.
You can also add a Calculated Column, a feature that allows for advanced customizations. Calculated columns enable you to apply expressions, including mathematical and string operations, to the data from the Source. This can be useful for tailoring the output to specific business needs. For example, you could use functions to concatenate fields, perform arithmetic calculations, or transform data types.
More details on how to use this feature are available in the Targets documentation (Note: This documentation is based on an earlier version of the UI, but the functionality remains unchanged).
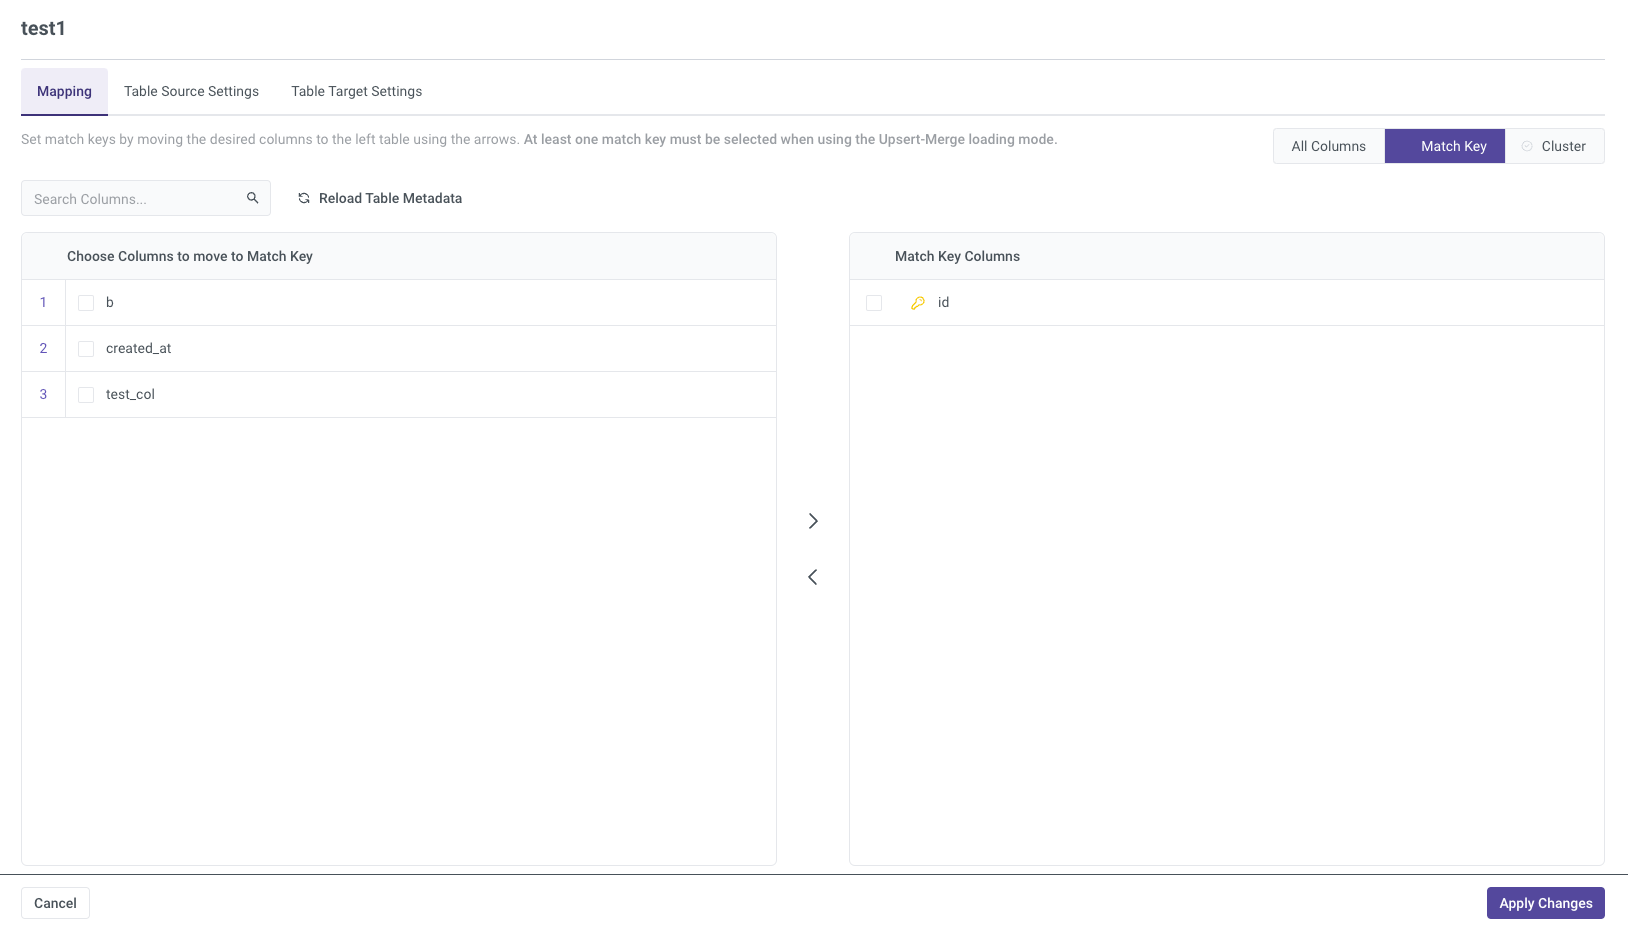
Match Key
The Match Key section allows you to define keys for matching records during data loads. You can select the relevant columns and move them to the left table using the arrow buttons. This is especially critical when using the Upsert-Merge loading mode, as at least one match key is required to identify and merge rows correctly during upserts.
Cluster
In the Cluster Key section, you can organize data more efficiently by moving the desired columns to the left table, similar to the match key configuration. Cluster keys are arranged in descending order and are used to optimize performance, particularly for querying and organizing large datasets.
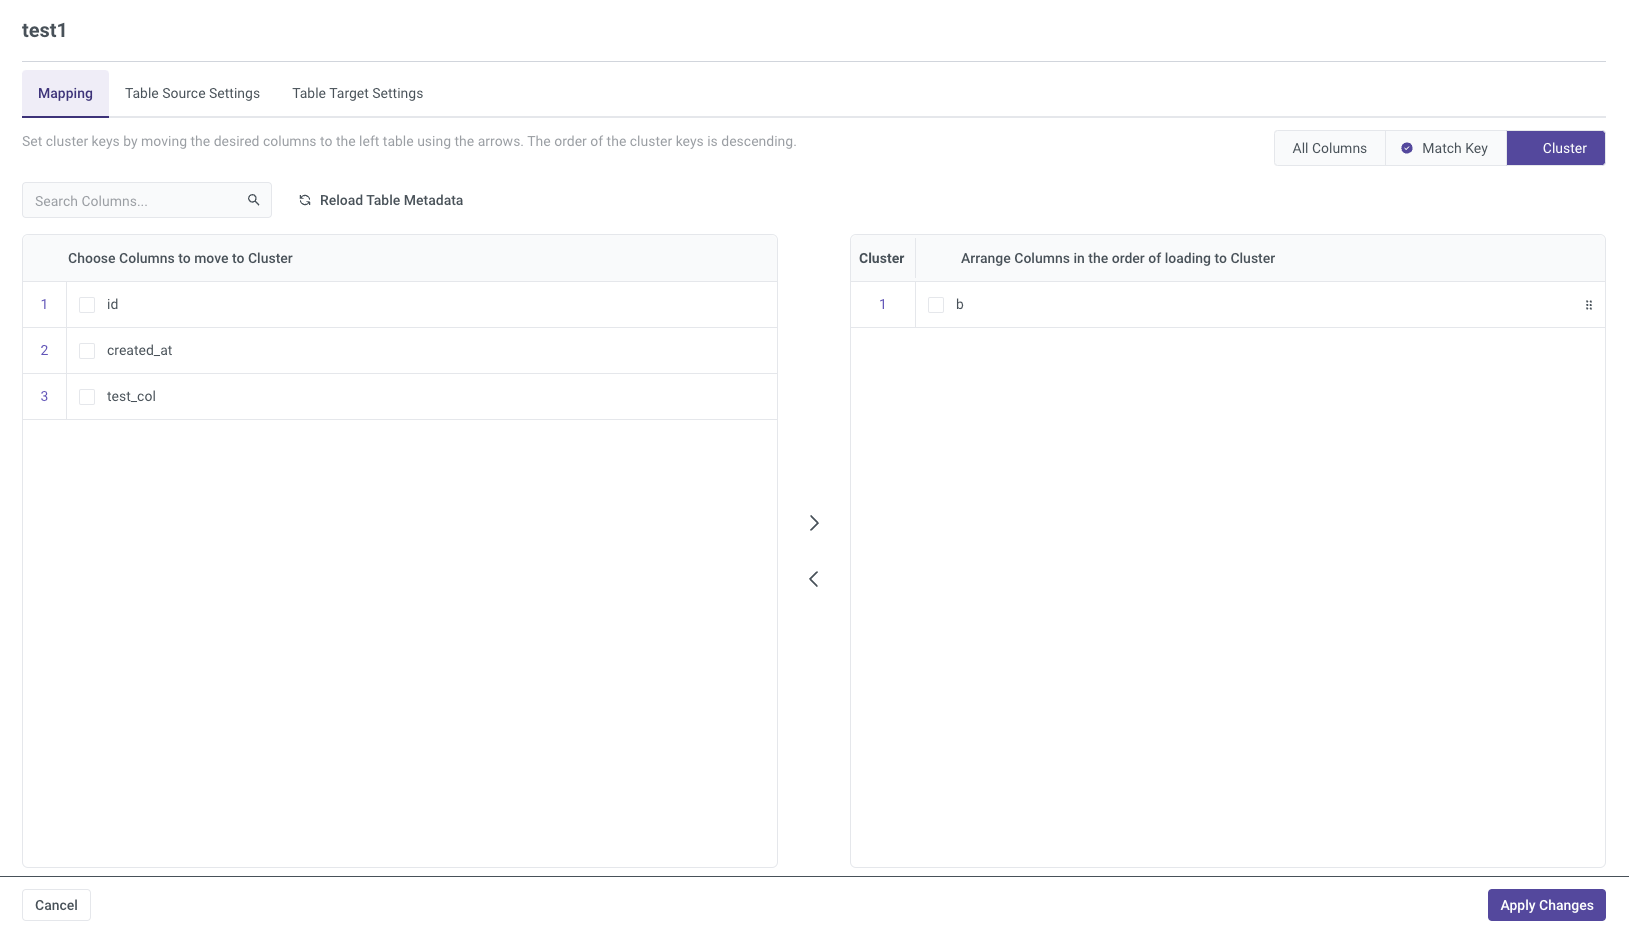
Table Source Settings
The Table Source Settings section allows you to define how data is extracted from the source. You can choose between Incremental or All data extraction methods, and configure Advanced Settings such as:
- Update Incremental Date Range on Failures: Determines if the date range should be updated even when an extraction fails.
- Interval Chunk Size: Defines the size of data chunks for extraction.
- Filter Expression: Enter a filter expression to control which data gets extracted.
These options provide flexibility in data extraction and handling errors to ensure accurate and efficient data loading.
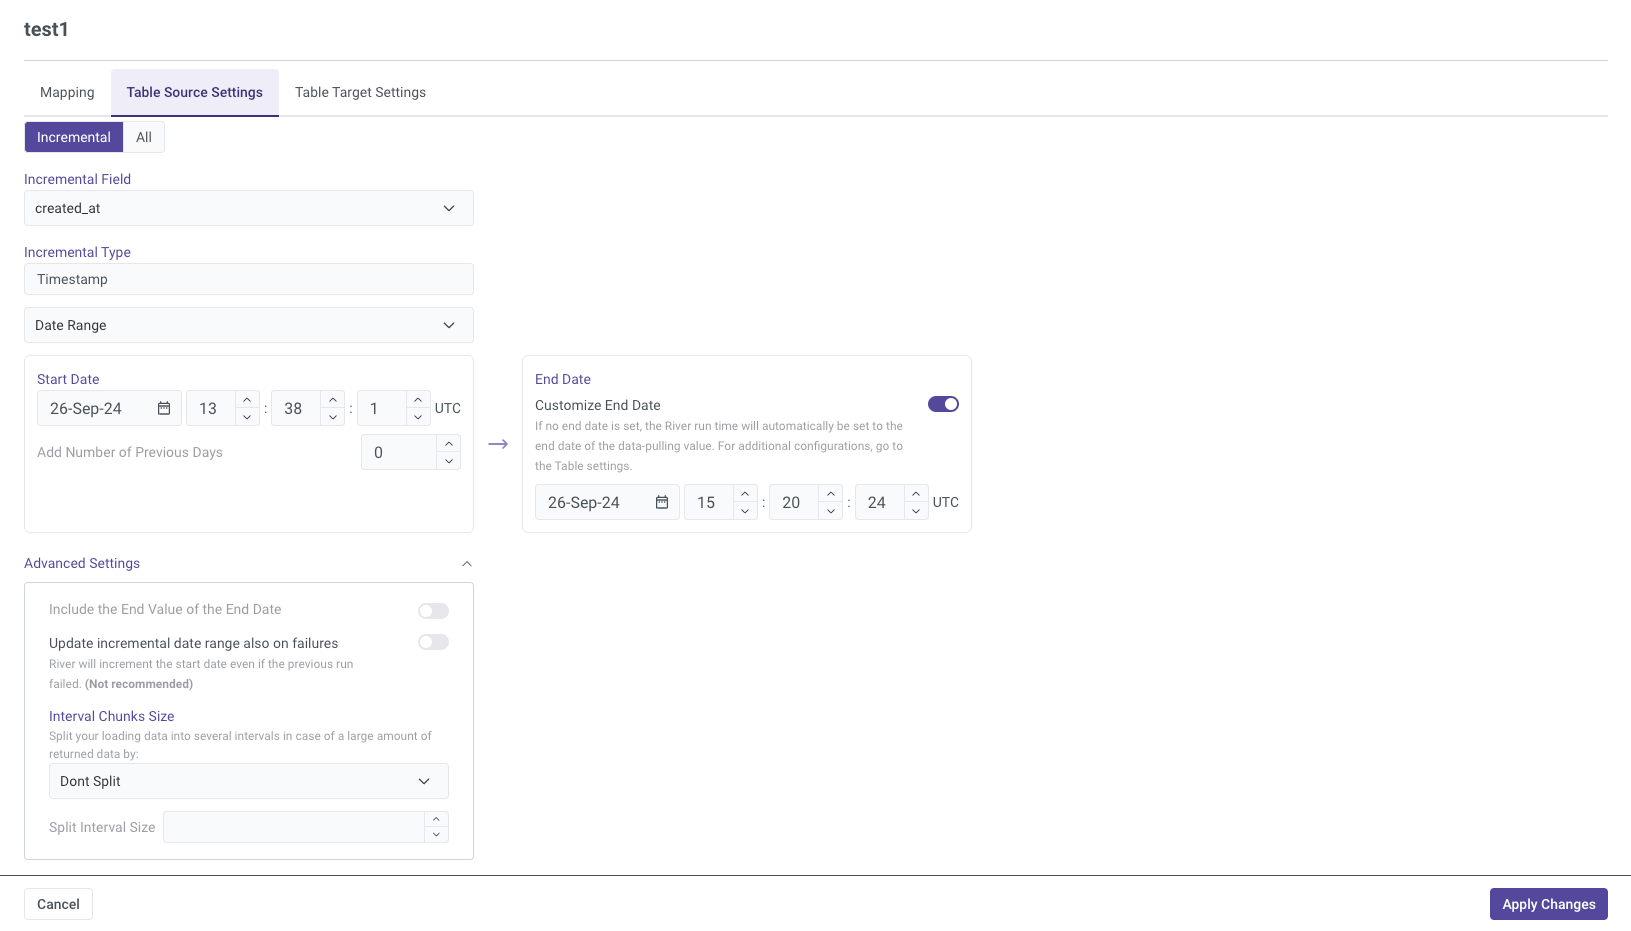
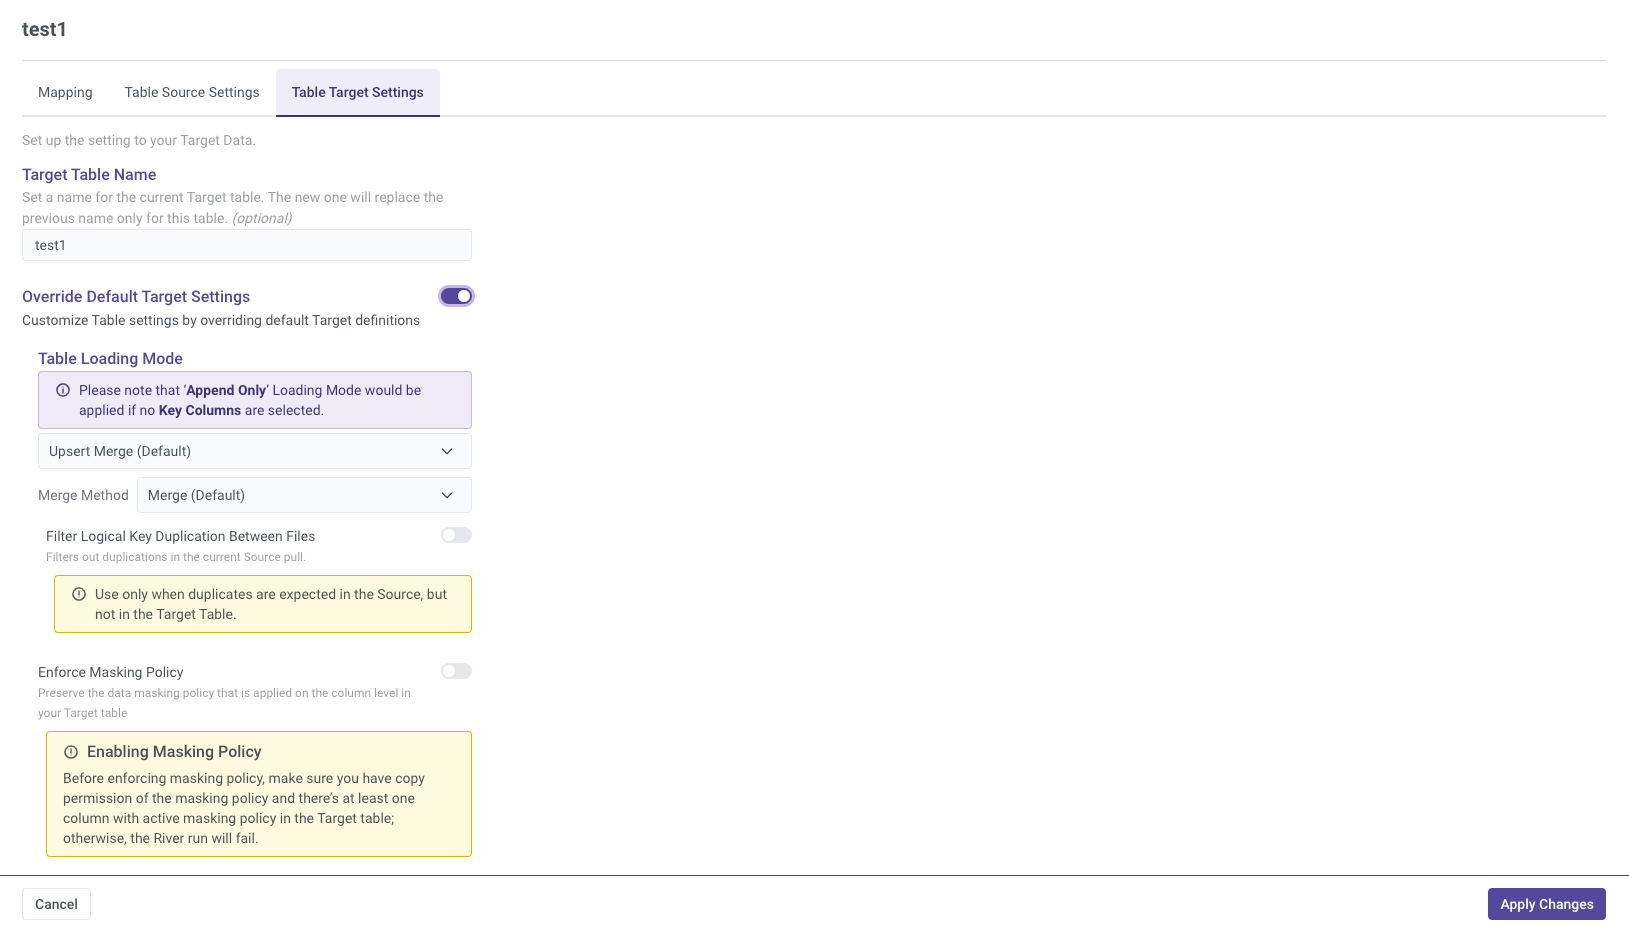
Table Target Settings
Please Note:
This example is specific to Snowflake. Each Target has its own unique settings.
In the Table Target Settings, you can override the default target configuration to customize how the data is stored in the target system. Options include:
- Filter Logical Key Duplication Between Files: Ensures that duplicate logical keys across files are filtered out.
- Enforce Masking Policy: Applies masking to sensitive data fields as per policy.
- Support Escape Character: Allows support for escape characters in data to handle special characters.
These options offer greater control over how data is handled and stored in the target.
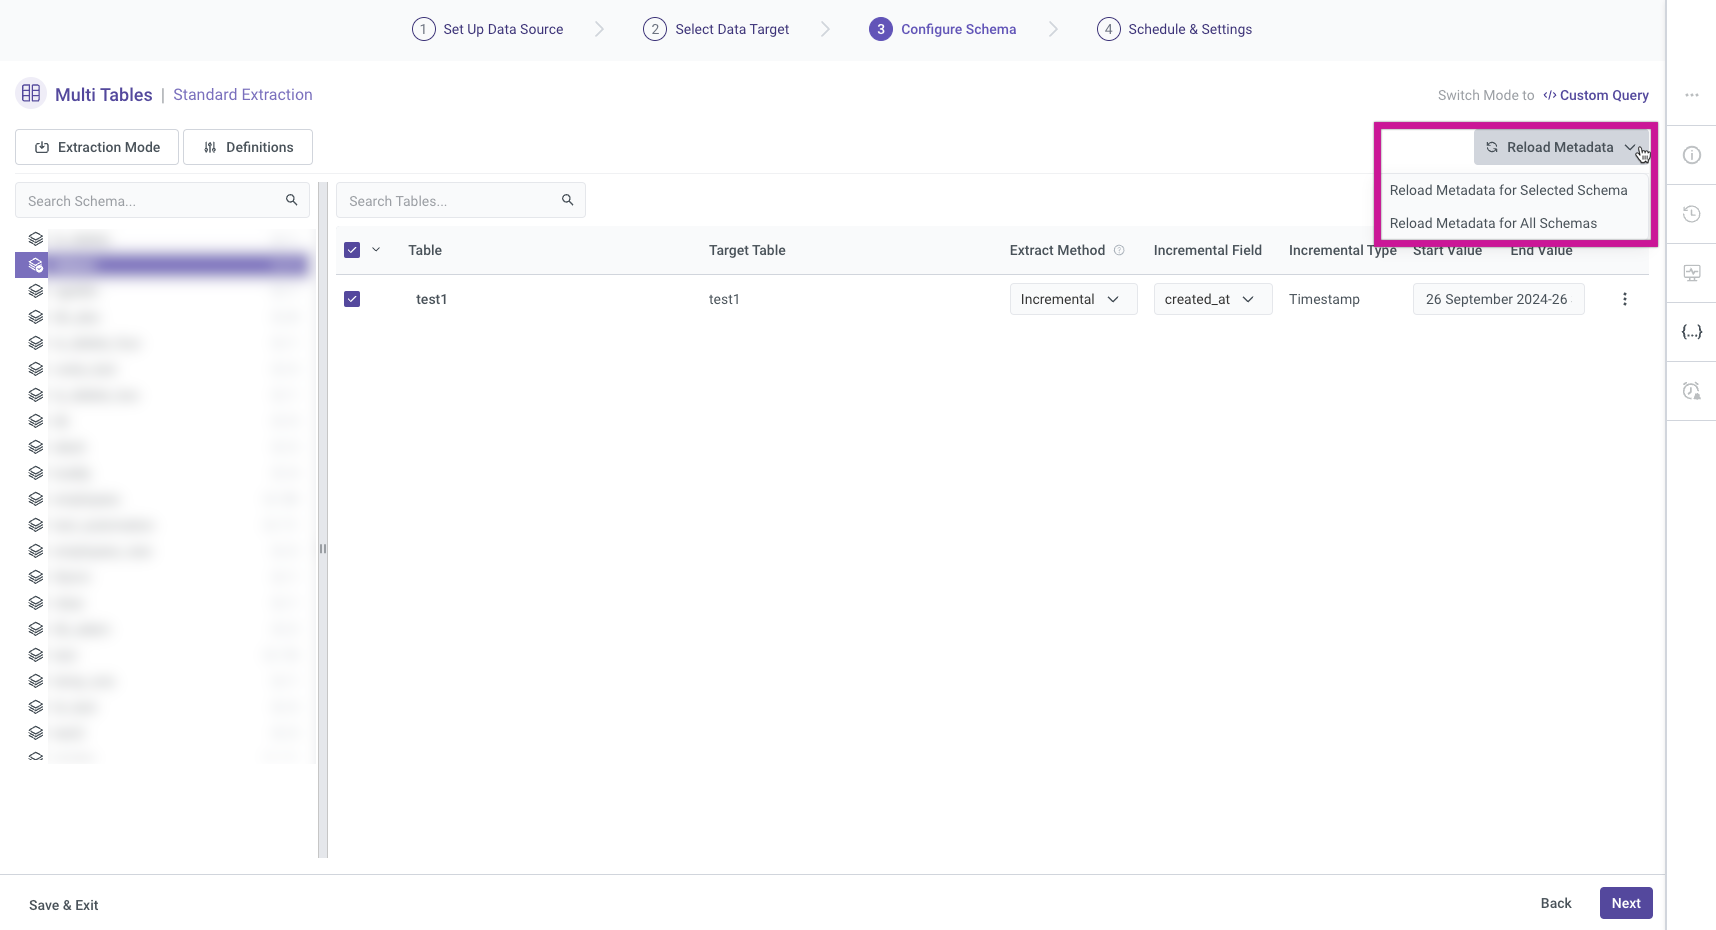
Reload Metadata
The Reload Metadata button provides options for refreshing metadata in Rivery. Users can choose to:
Reload Metadata for Selected Schema: This option allows you to refresh the metadata for a specific schema, ensuring that any recent changes are accurately reflected.
Reload Metadata for All Schemas: This option updates the metadata across all schemas within Rivery, which is useful for comprehensive updates when multiple schemas are involved.
Custom Query Mode
Rivery offers a Custom Query mode that empowers users to load data into the platform using personalized SQL queries. This feature is particularly beneficial for users who require a high level of flexibility and control over the data import process. Key aspects of the Custom Query mode include:
User-defined Queries: Users can write SQL queries to specify the exact data to be loaded and determine the transformations needed.
Data Sources: The Custom Query mode supports loading data from various databases and data warehouses, making it versatile for different data environments.
Automatic Scheduling: Once a custom query is created, users can schedule data loads to occur regularly or trigger them on demand, ensuring real-time access to the latest data.
Important Note:
Switching to Custom Query mode will redirect you to the older version of Rivery that supports this feature, and you won’t be able to return to the previous mode afterward.
For more detailed information on how to use Custom Query mode, please refer to the Database River Modes document.
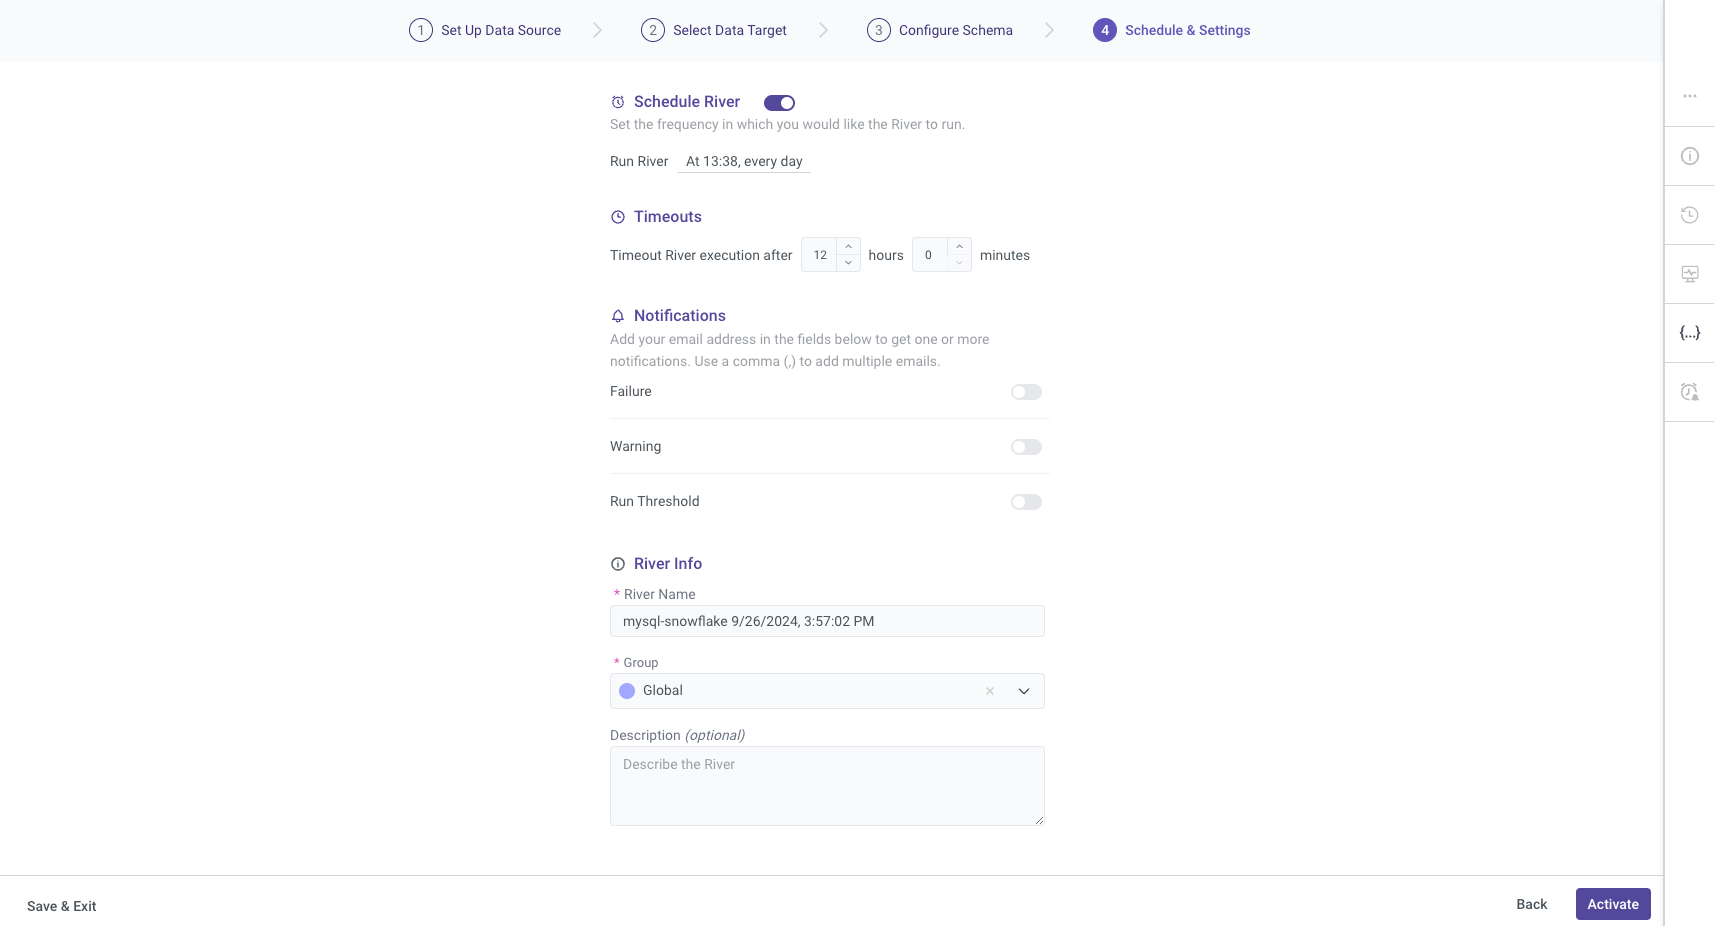
Step 4: Schedule & Settings
Scheduling the River
By default, the River is scheduled to run automatically, which is the recommended setting. However, you have the flexibility to customize the schedule according to your preferences.
Timeout Settings
You can specify timeout settings for River execution. Set a timeout duration to control how long the River will run before automatically terminating. This ensures that prolonged executions do not hinder system performance.
Notifications
To stay informed about the River's execution status, you can enable notifications. Enter your email address in the provided fields to receive one or more notifications. If you wish to add multiple email addresses, separate them with a comma (,).
Additional River Information
You can also include any additional information relevant to the River in this section to enhance clarity and maintain comprehensive documentation.
For more detailed information on how to use Custom Query mode, please refer to the Settings Tab document(Note: This documentation is based on an earlier version of the UI, but the functionality remains unchanged).
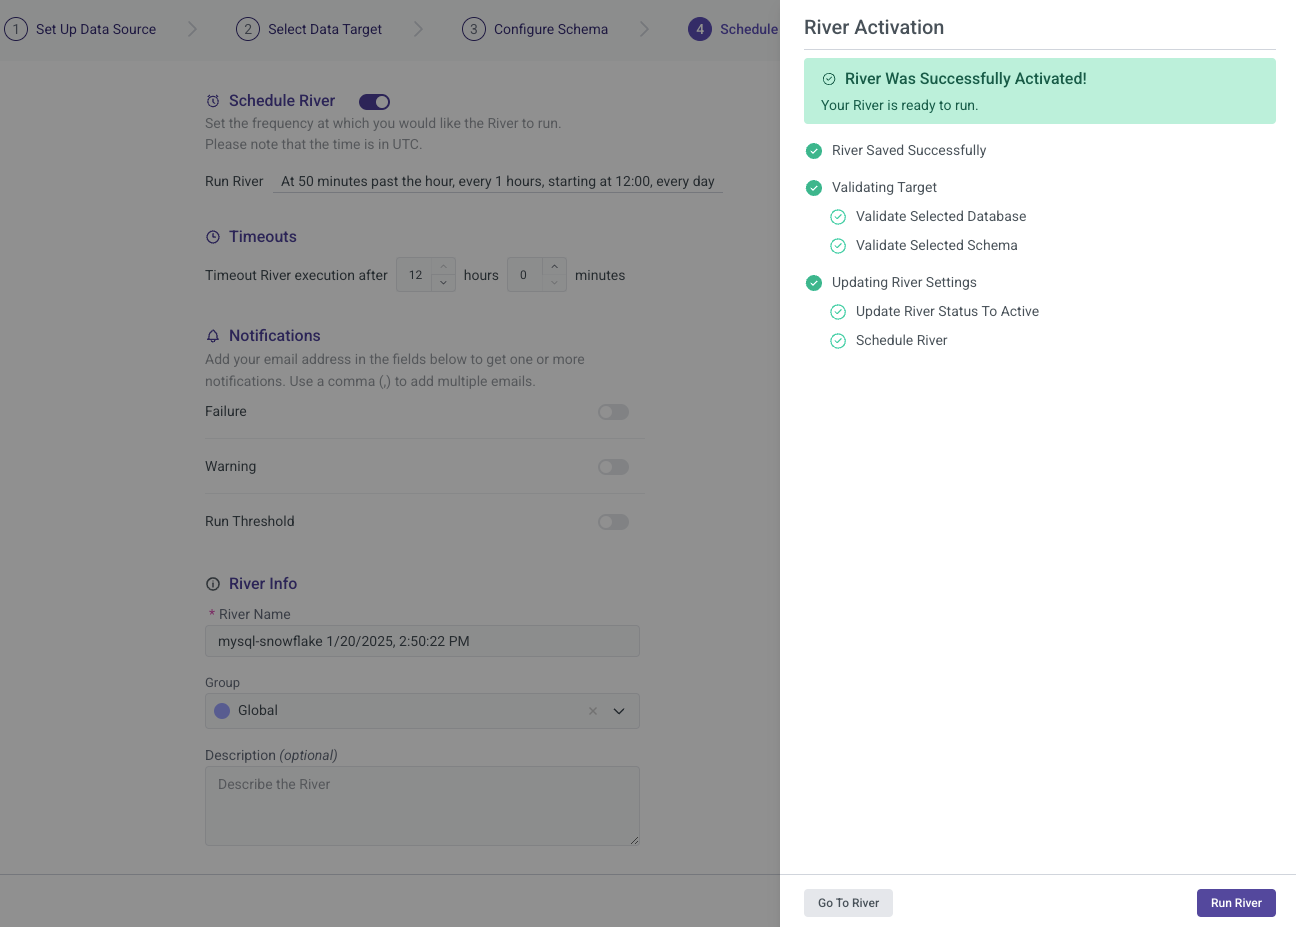
River Activation
Once you have completed all configurations for your river, you can proceed to activate it. This step allows you to verify that everything functions as expected.
- Activation Process: Click the activation button and monitor the status to ensure that the River initializes correctly.
Side Bar Features
Rivery offers an additional sidebar that provides several important options to enhance your user experience. The available options include:
- River Info: Access detailed information about the current river setup and configuration.
- Version History: Review the changes made to the river over time, including updates and modifications.
- Activities: Monitor and track all activities related to the river, such as data extraction and transformations.
- Variables: Manage and configure variables used within your river.
- Scheduling & Notifications: Set up schedules for data runs and receive notifications based on the River's performance and status.
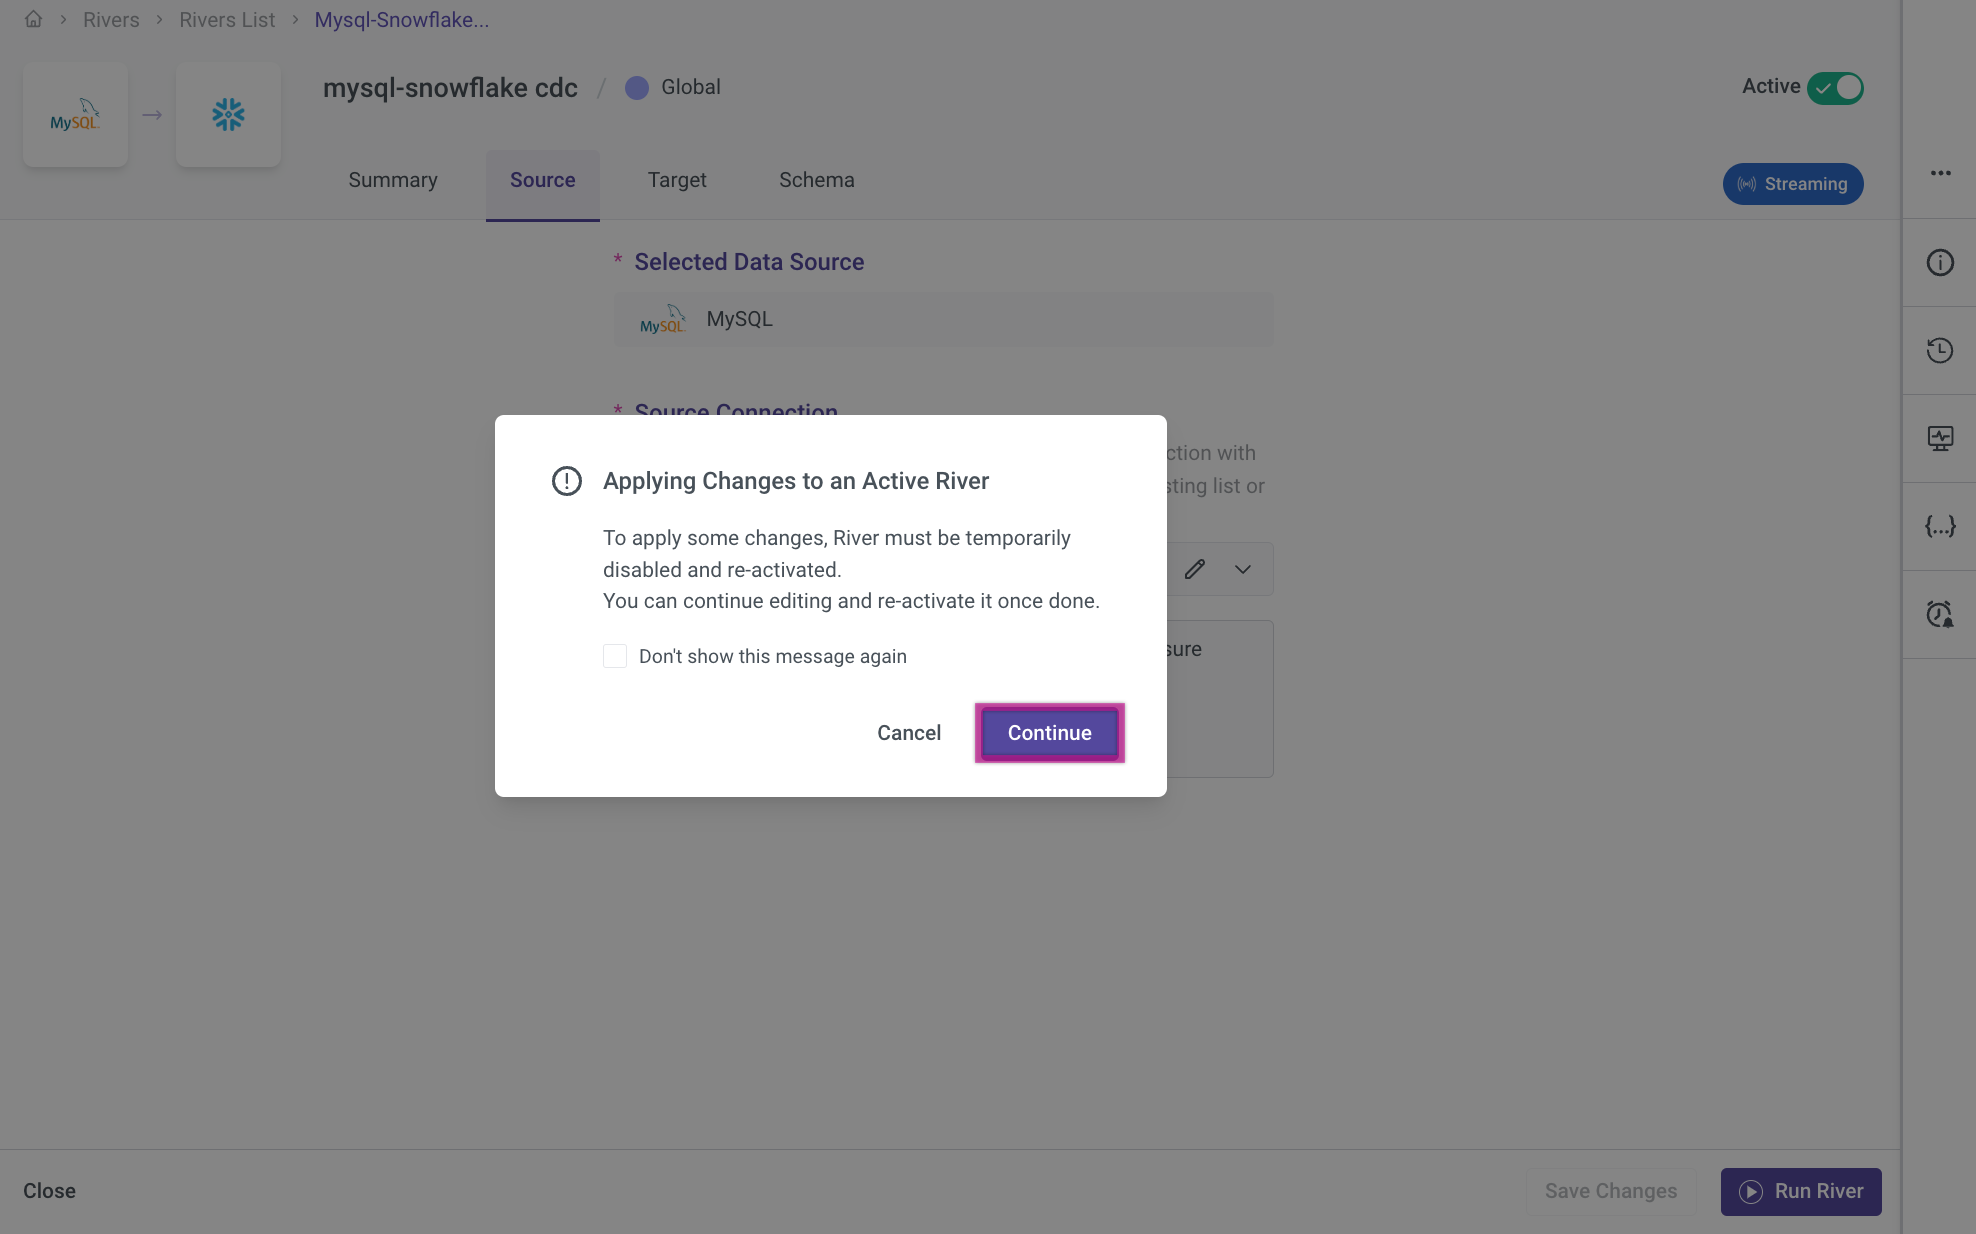
Editing and Managing Rivers
Please Note:
Only applicable to CDC extraction mode.
When making changes to the River, it is necessary to reactivate it to restore full functionality. Reactivation ensures that any updates or modifications are applied correctly, allowing the River to resume processing data as intended. To reactivate the River, review your changes and confirm them by pressing Continue.
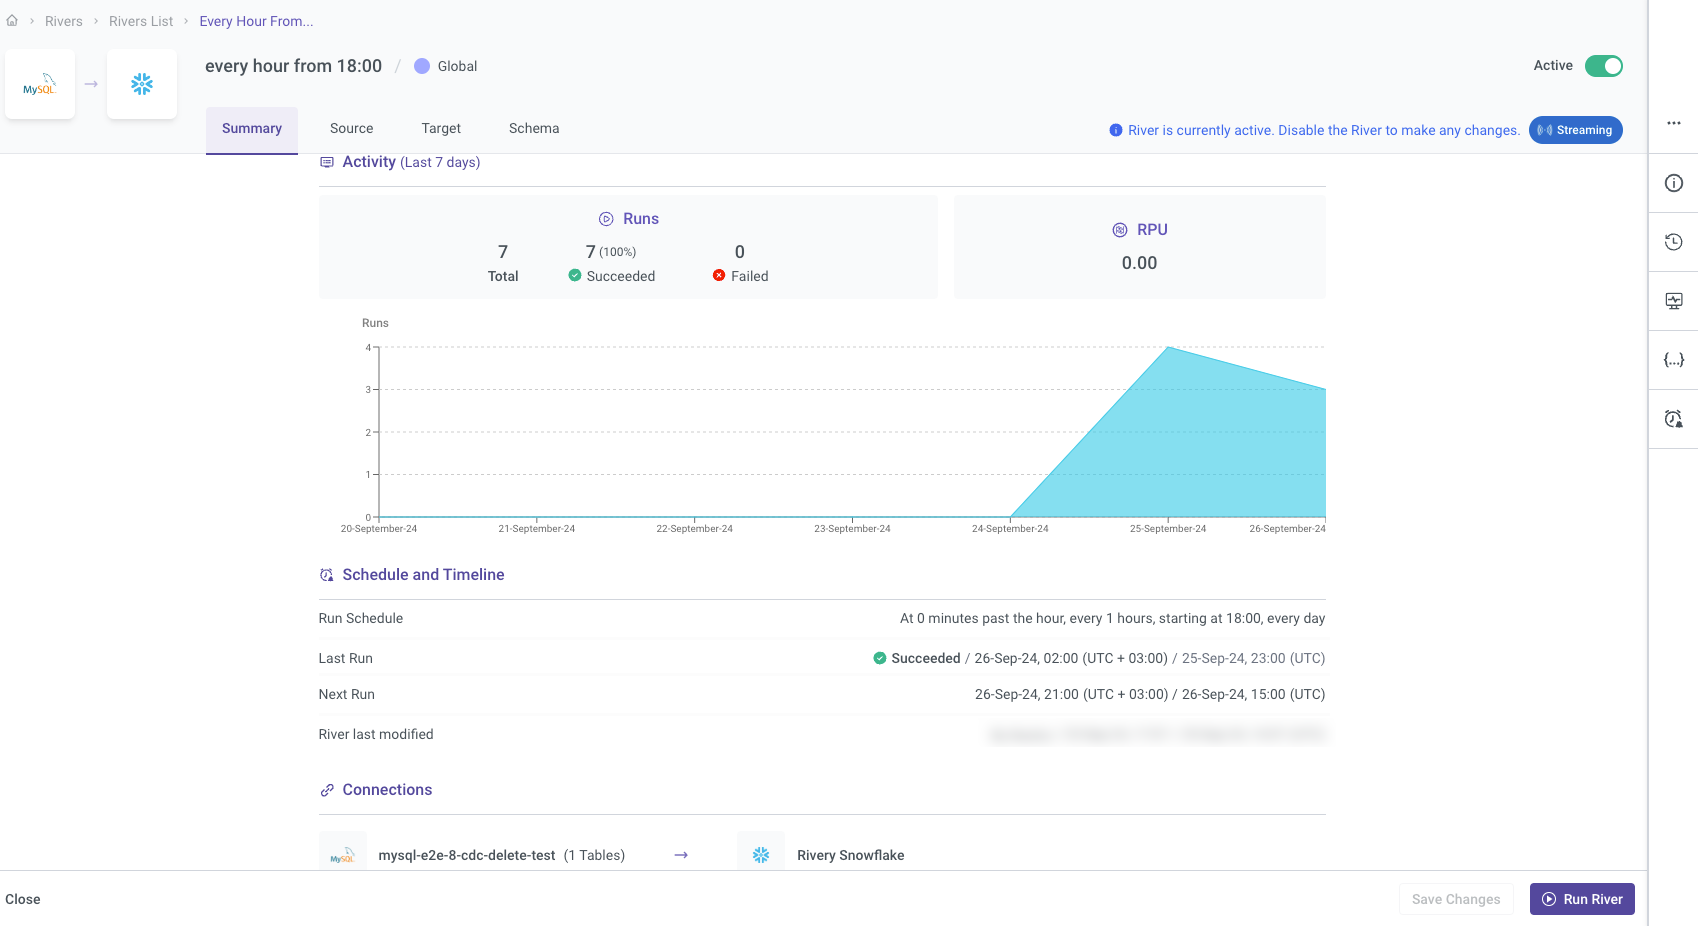
Summary Page
Once a River is saved, you can edit it by navigating to the Rivers tab. When you select a River for editing, the first page displayed is the Summary Page. This page offers a comprehensive overview of the River’s recent activity, performance metrics, and current configuration settings, allowing you to quickly review its status and key operational details.
How to Access the Summary Page:
- Go to the Rivers tab located in the left-hand side menu.
- Select the specific River you wish to edit or review.
- The Summary Page will automatically open, displaying essential information about the River's current state and recent activity.
Please Note:
The functionality of the Source, Target, and Schema tabs is identical to that used when creating a new River.
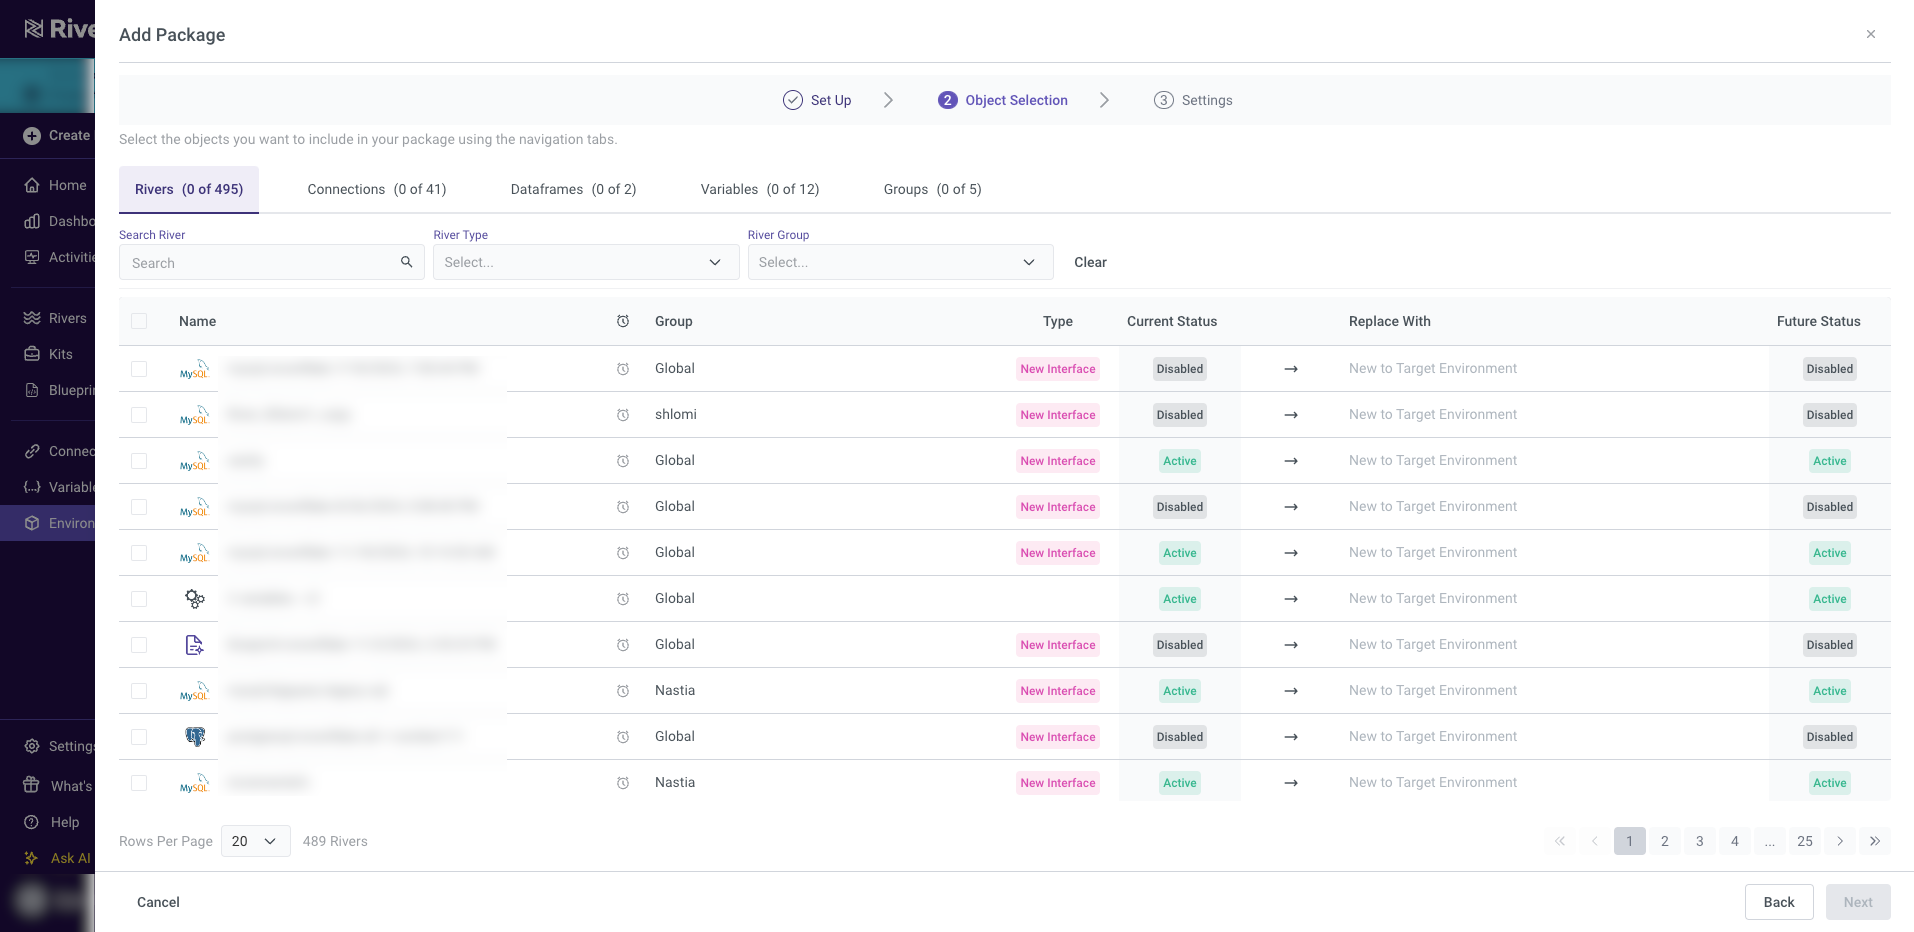
Deployments
Deploying configurations from one environment to another is supported for Rivers created using the new Source to Target experience. The deployment process includes the following details:
River Type and Status:
- The River type will be indicated in the relevant column.
- The current status of the Source Environment and the intended status of the Target Environment will be displayed.
Original Status Retention:
- Rivers created with the new Source to Target experience will retain their original status upon deployment to the Target Environment.
- CDC Rivers: These will be deployed with a status of "Disabled."
Existing Rivers in the Target Environment:
- If a River already exists in the Target Environment, only the changes will be updated without altering the River's existing status. For example:
- Active Rivers will remain active, and their validation state will not be reset.
Recommendation: While the process avoids re-validation, it is strongly recommended that users manually re-activate the Rivers to ensure proper functionality and integration in the Target Environment.
- If a River already exists in the Target Environment, only the changes will be updated without altering the River's existing status. For example:
Was this article helpful?