- 5 Minutes to read
- Print
- DarkLight
- PDF
An Overview of Variable Looping in Action Rivers
- 5 Minutes to read
- Print
- DarkLight
- PDF
Introduction
The Variable Looping feature revolutionizes the way variables are handled within the REST Action River, offering a seamless and efficient method of iteration. Rather than iterating over Source to Target Rivers for each individual endpoint, this capability enables you to loop directly within the Action itself, iterating over a list of parameter values.
This feature grants greater flexibility in dealing with various scenarios where a varying set of parameters needs to be processed. For instance, when an API endpoint accepts different values for a specific parameter, users can efficiently use Variable Looping to handle all potential cases. This greatly improves load time efficiency and reduces resource consumption.
This document provides a detailed set of instructions for effectively using Variable Loops within a REST Action River. It walks you through the process step-by-step, providing guidance on how to work with this feature.
Configuration Overview
Our objective is to build a Logic River that fetches animal names from an external API and stores them in a Target data warehouse. We will use API Ninjas and Rivery to orchestrate this process through 3 primary steps:
Step 1: Action River - Establish the Loop:
Create a loop that iterates through the values obtained from the API response. Inside the loop, make secondary API calls using each value as a parameter to retrieve the corresponding information.Step 2: Source to Target River - Loading the Data Into a Target:
Retrieve data from the previously created Action River. Then, load the collected information into a data warehouse.Step 3: Logic River - Trigger All Rivers and Obtain the Desired Outcome:
This step marks the conclusion of the entire process, where all previous steps come into play. After its completion, you will gain access to the results of the API call and the iterated values within your warehouse.In this step, you will:
- Execute a query to extract information from the Target and save it in a variable.
- Employ the loop created in an Action River to iterate over the variable containing all relevant information.
Step-by-Step Guide to Variable Looping
The process will be categorized into 3 primary steps. It is crucial to carefully follow each detail as there are several subsequent steps that must be executed correctly to ensure everything functions properly:
Step 1: Action River - Establish the Loop
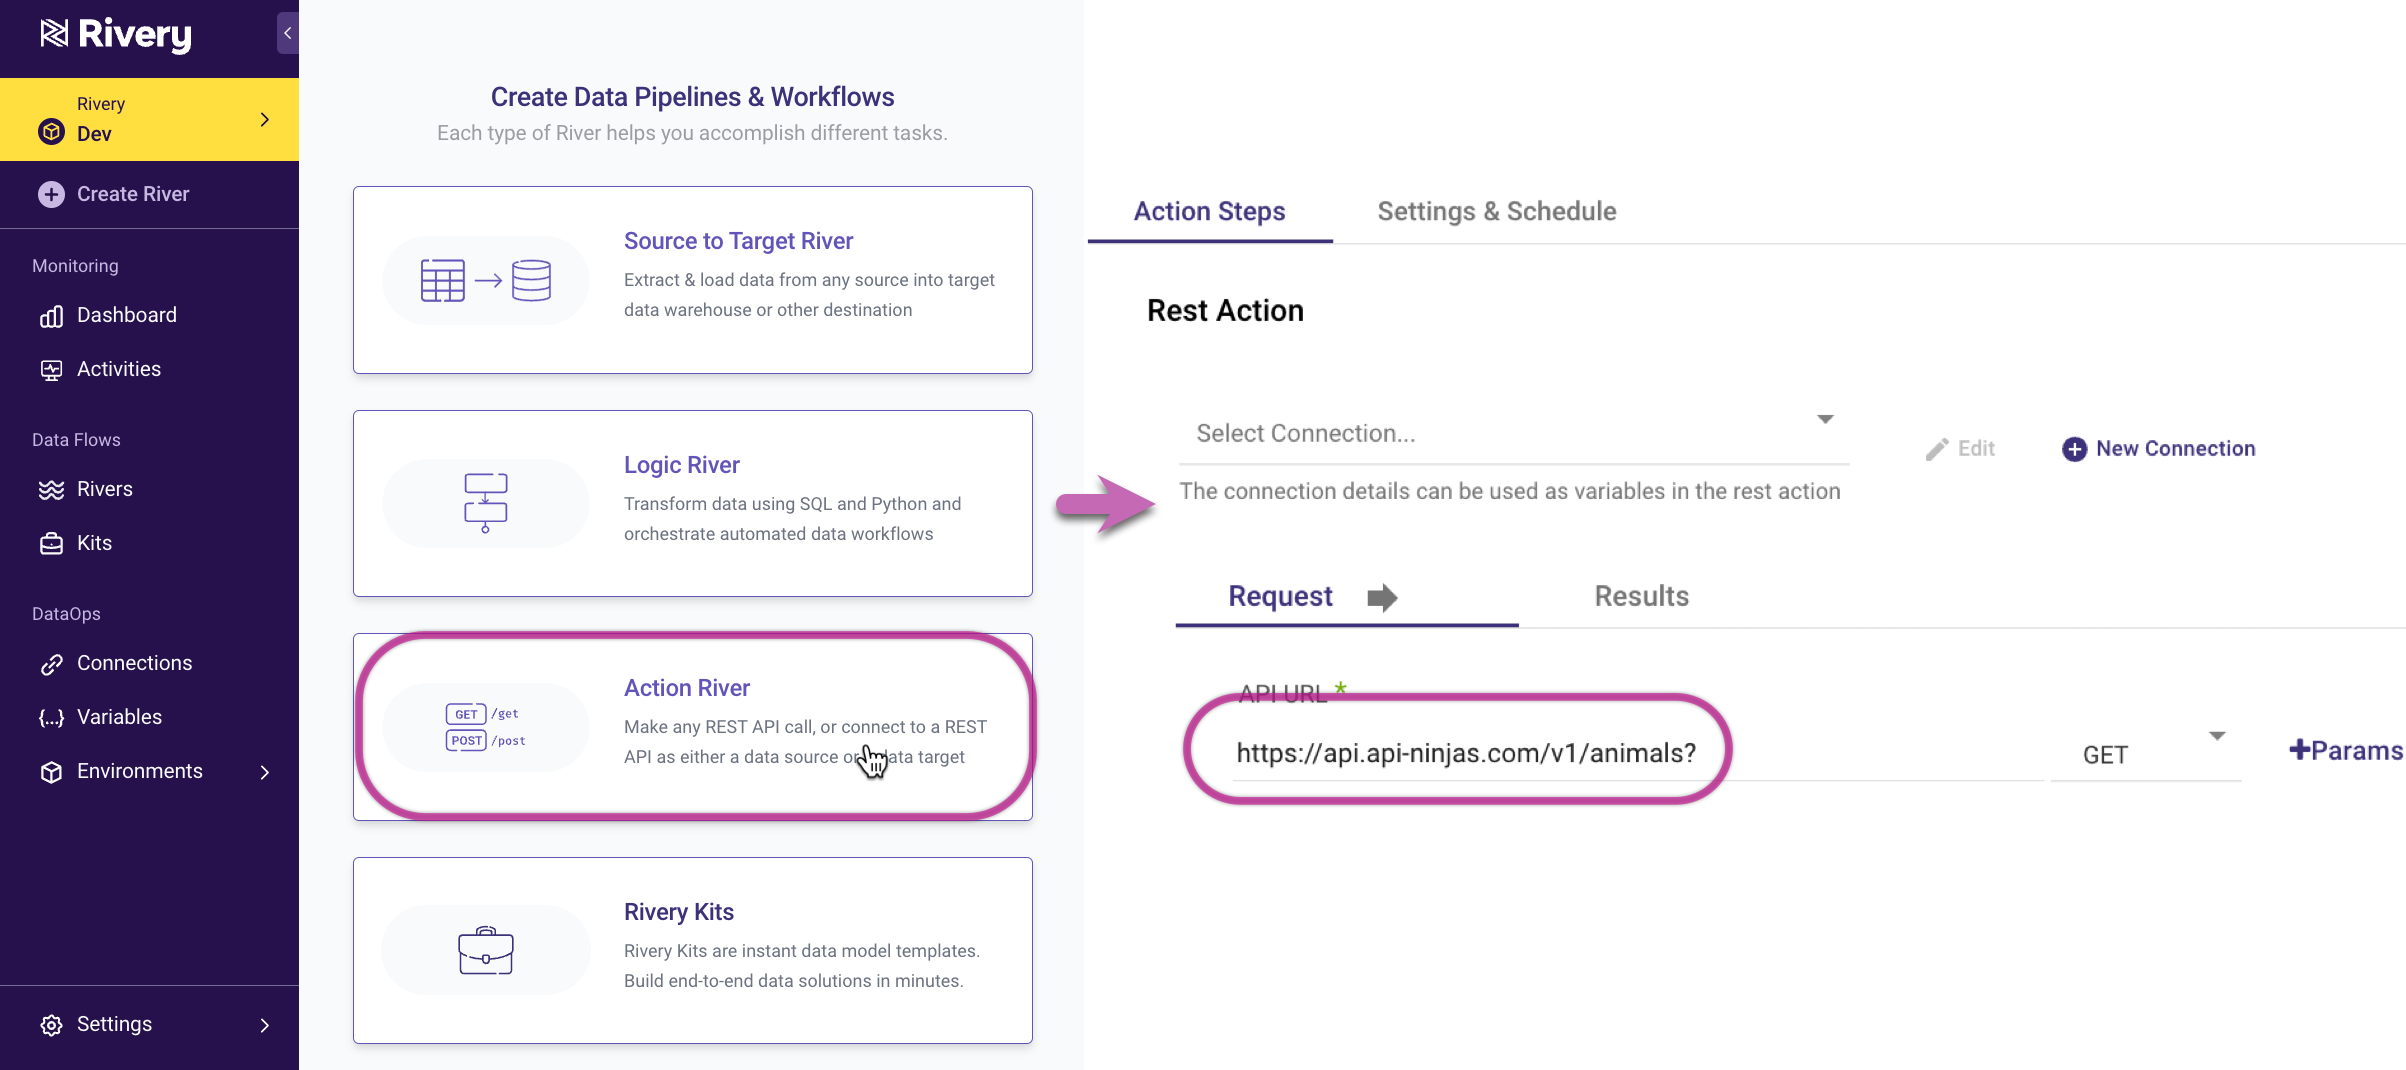
- Begin by creating an Action River, where you'll specify the desired Get call and insert the API URL.
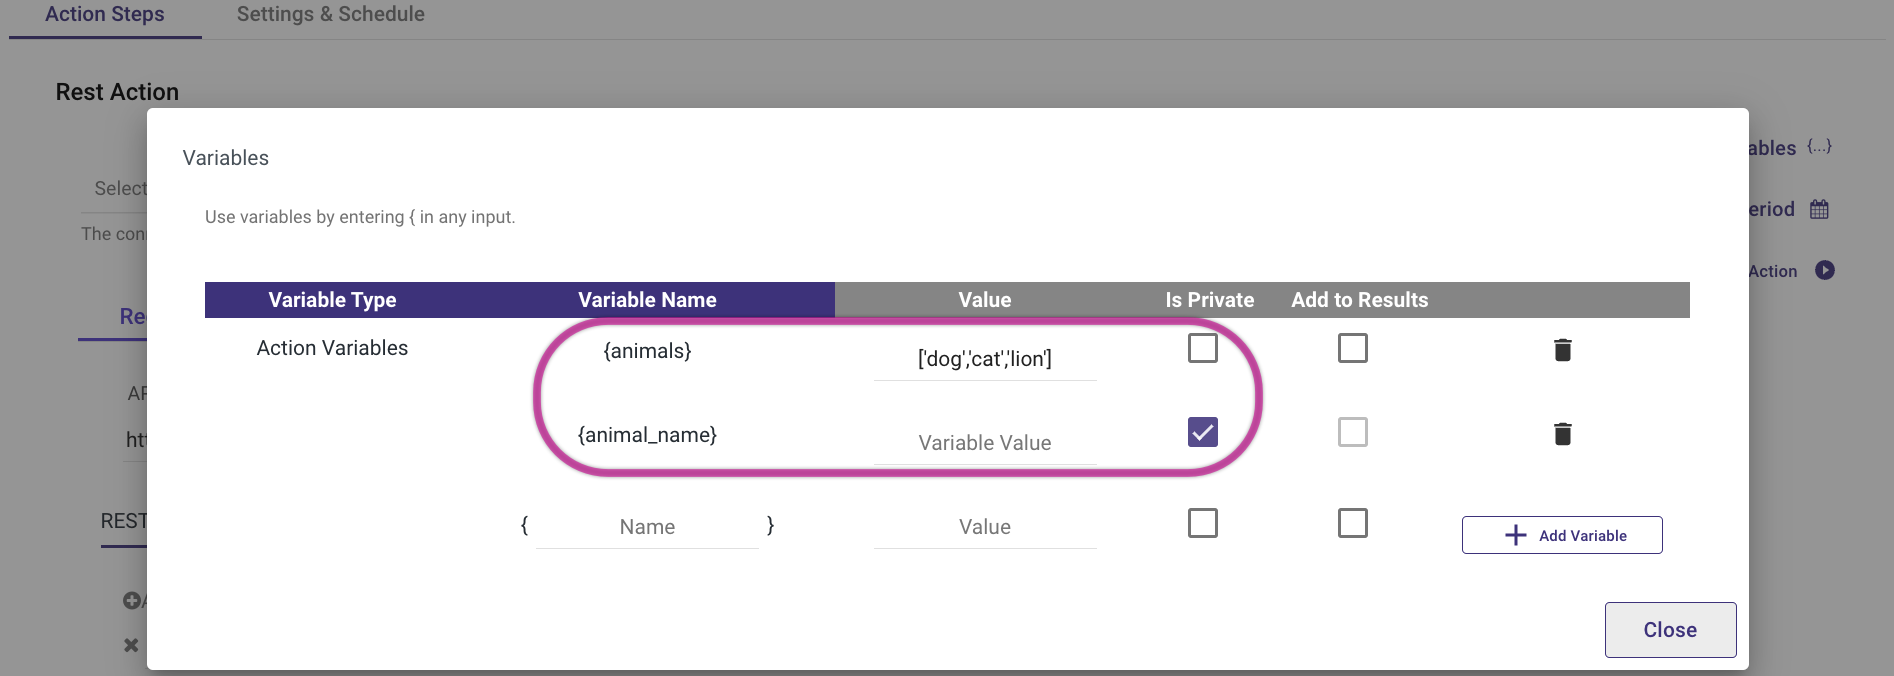
- Next, create 2 variables - one for the iteration process and another to store the values during each iteration. It is vital to mark the variable that stores the values as "Is Private".
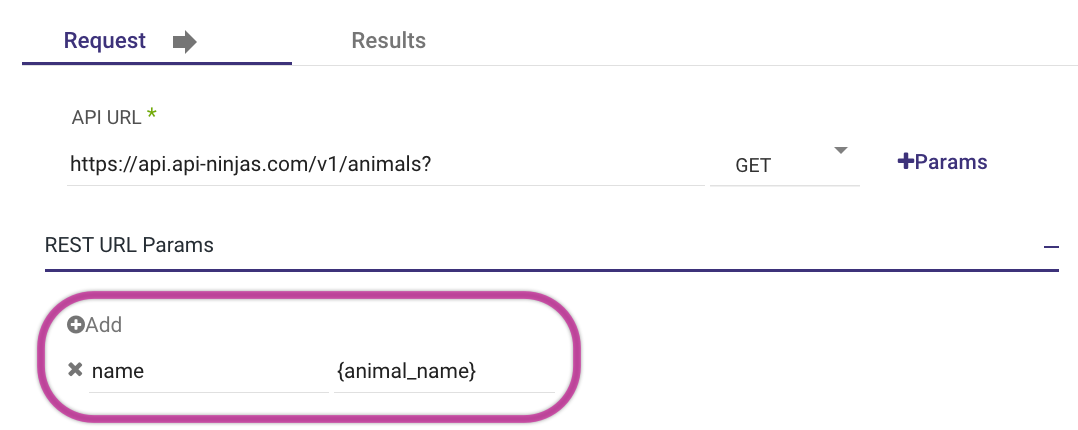
- Add the parameter that needs to be related to the previously created iterated variable.
Please note:- When the "Add" button is clicked under "REST URL Params," the specified parameter will automatically be appended to the URL, eliminating the need for manual inclusion.
This process is not visible to the user, but behind the scenes, the parameter is added to the URL in the following format:
https://api.api-ninjas.com/v1/animals?name={animal_name}
- When the "Add" button is clicked under "REST URL Params," the specified parameter will automatically be appended to the URL, eliminating the need for manual inclusion.
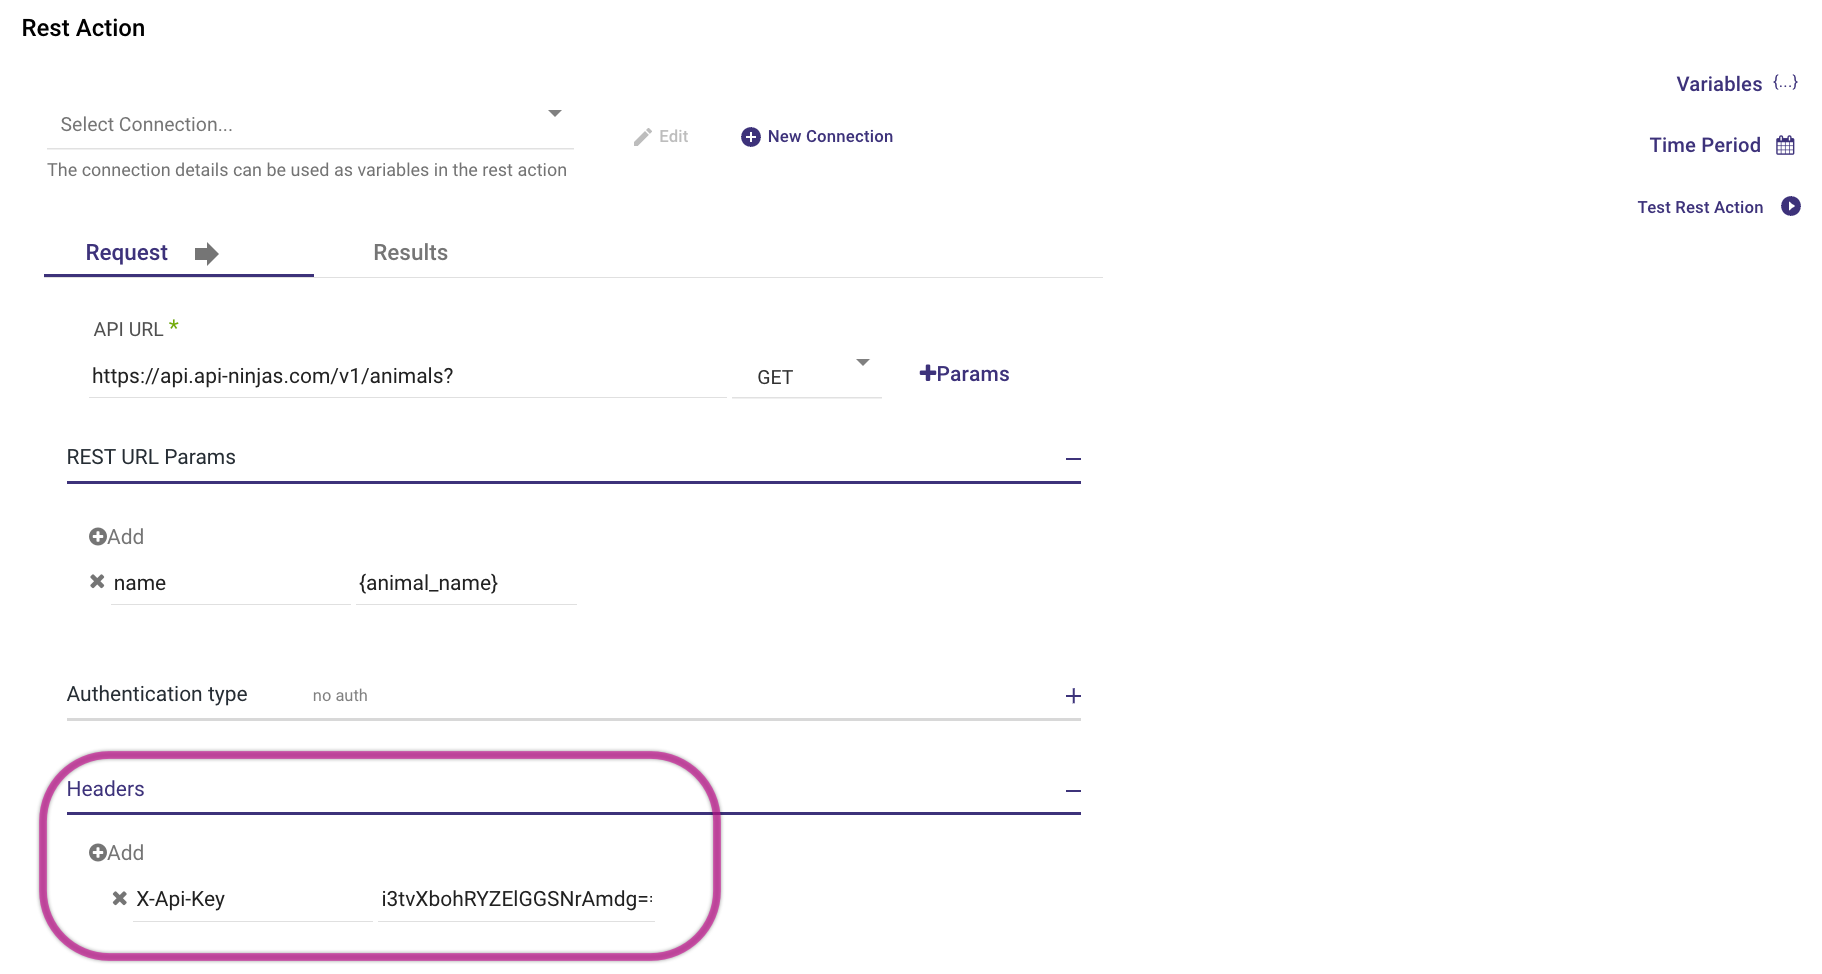
Proceed with the authentication of your GET request according to your API.
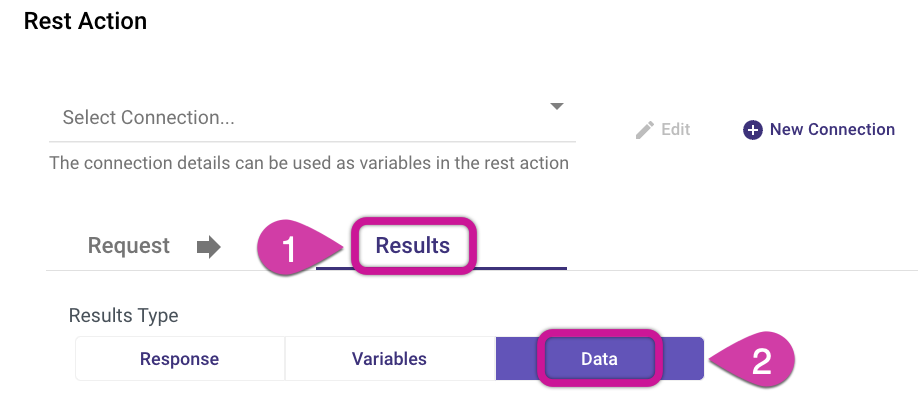
Move on to the "Result" tab, and make sure it's set to "Data".
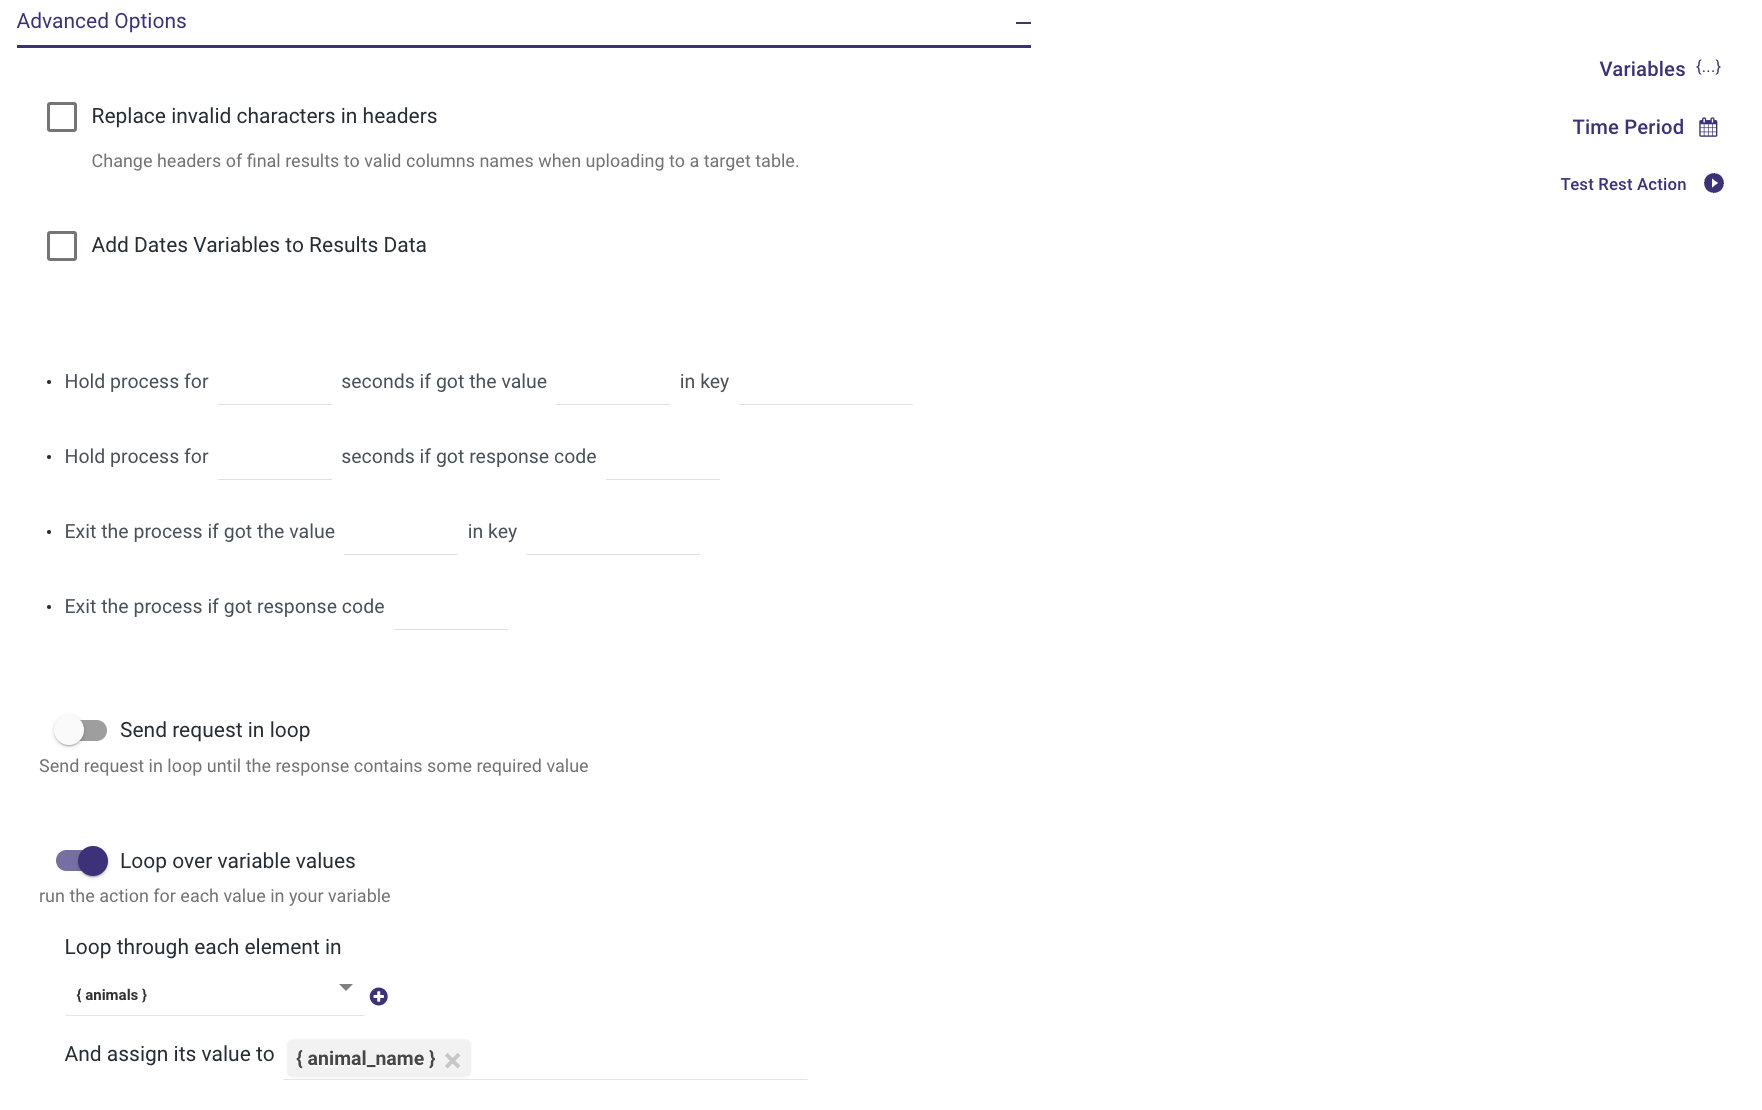
Scroll down and expand the "Advanced Options".
Toggle the "Loop Over Variables Values" option to true.
Insert the variable you created earlier, which you wish to iterate over, and specify where to store the values extracted during the iteration process.
- Provide a suitable name for the Action River and save it.
Step 2: Source to Targer River - Loading the Data Into a Target
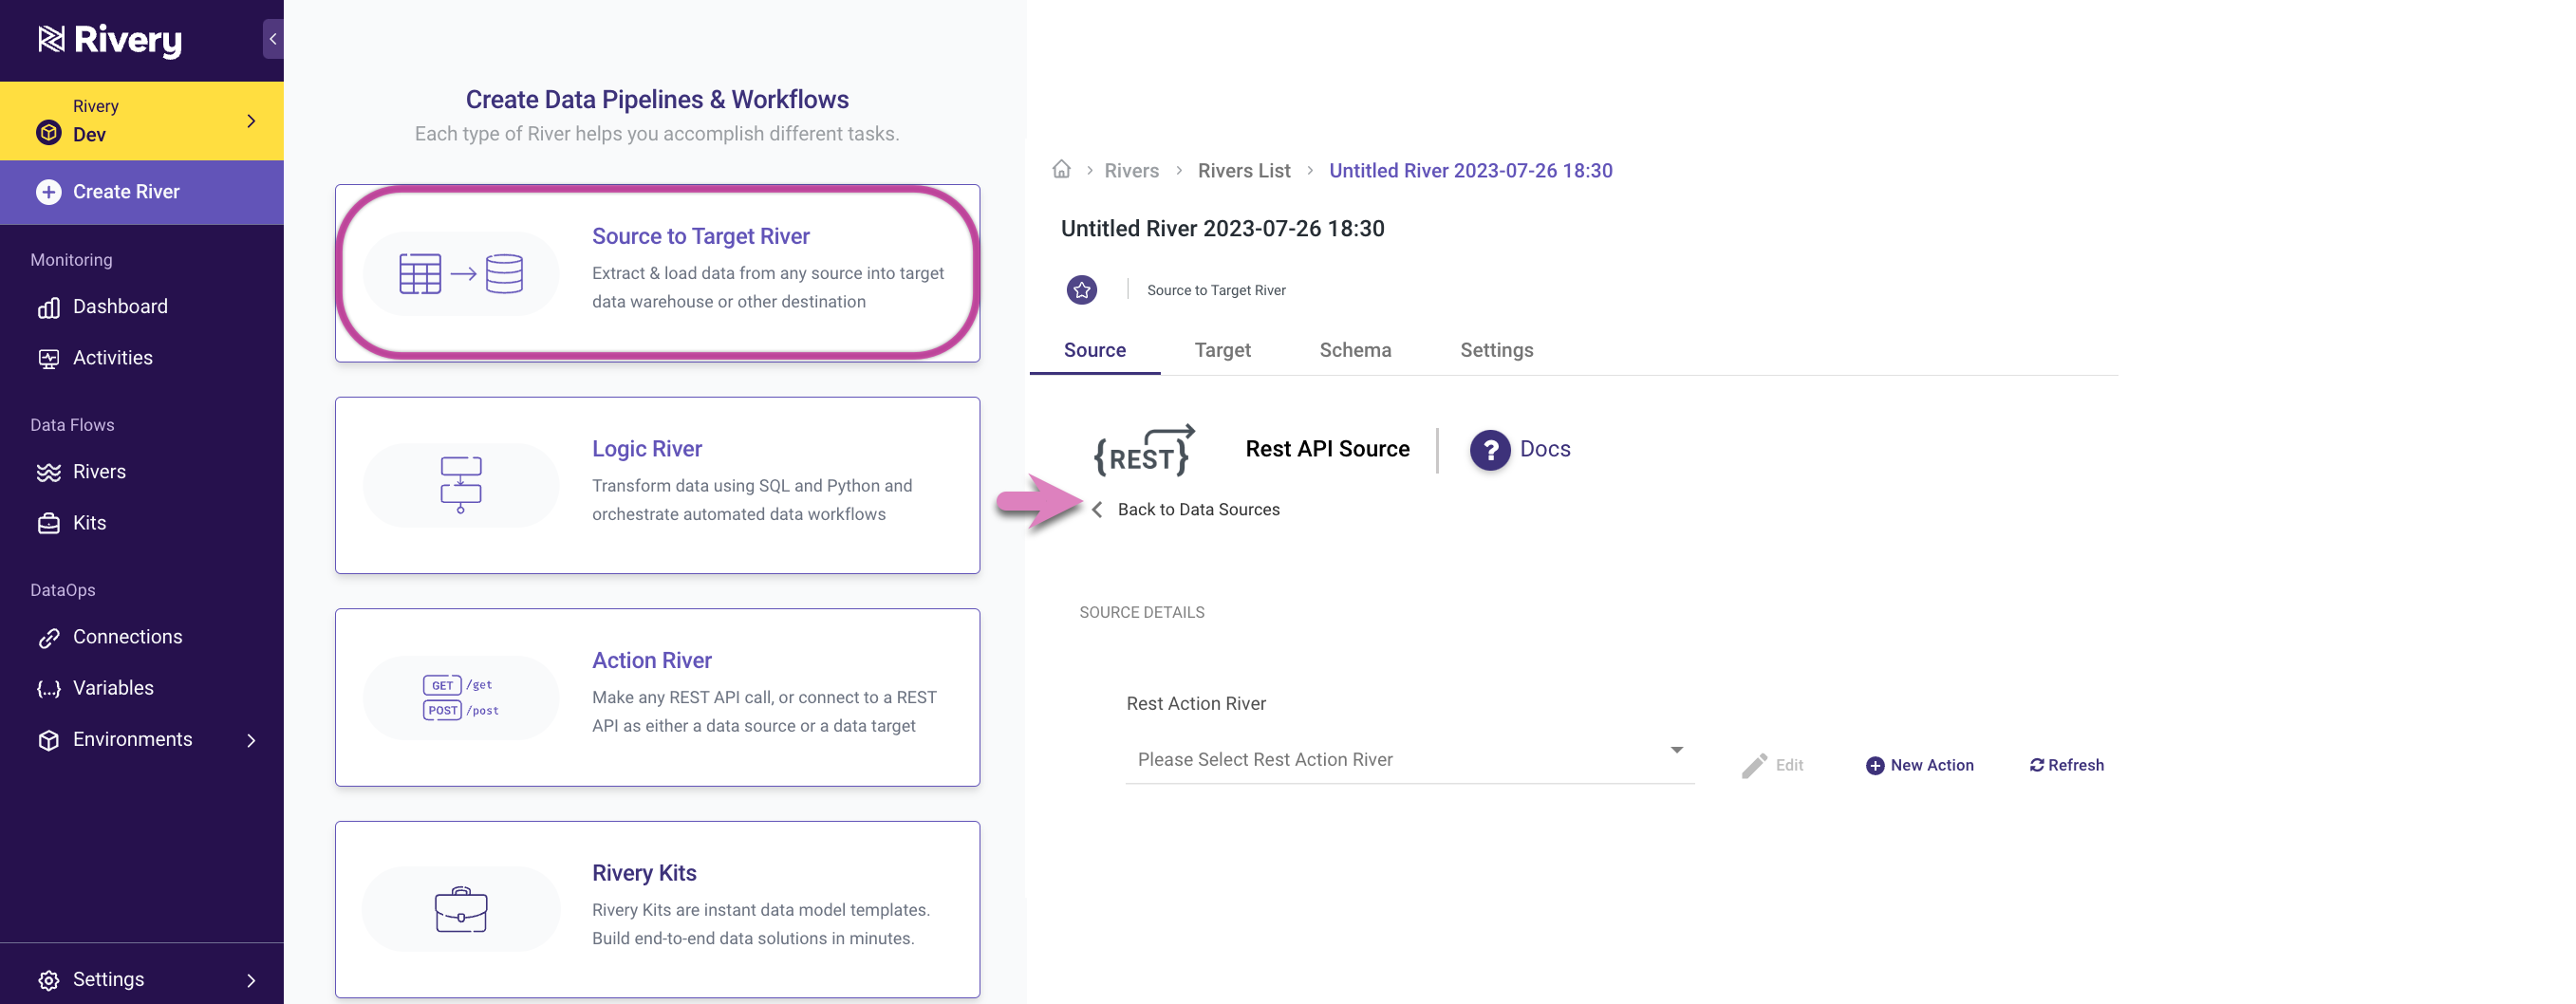
Now, proceed to create a Source to Target River, using Rest as the Source.
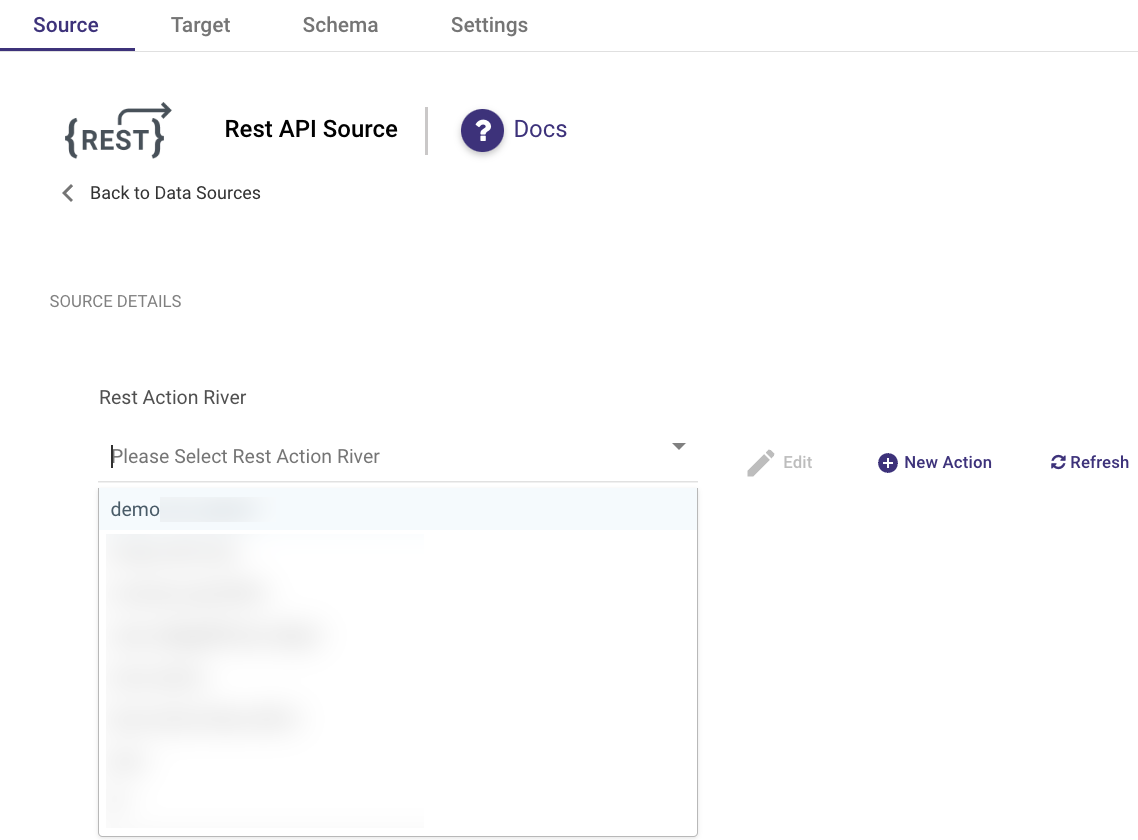
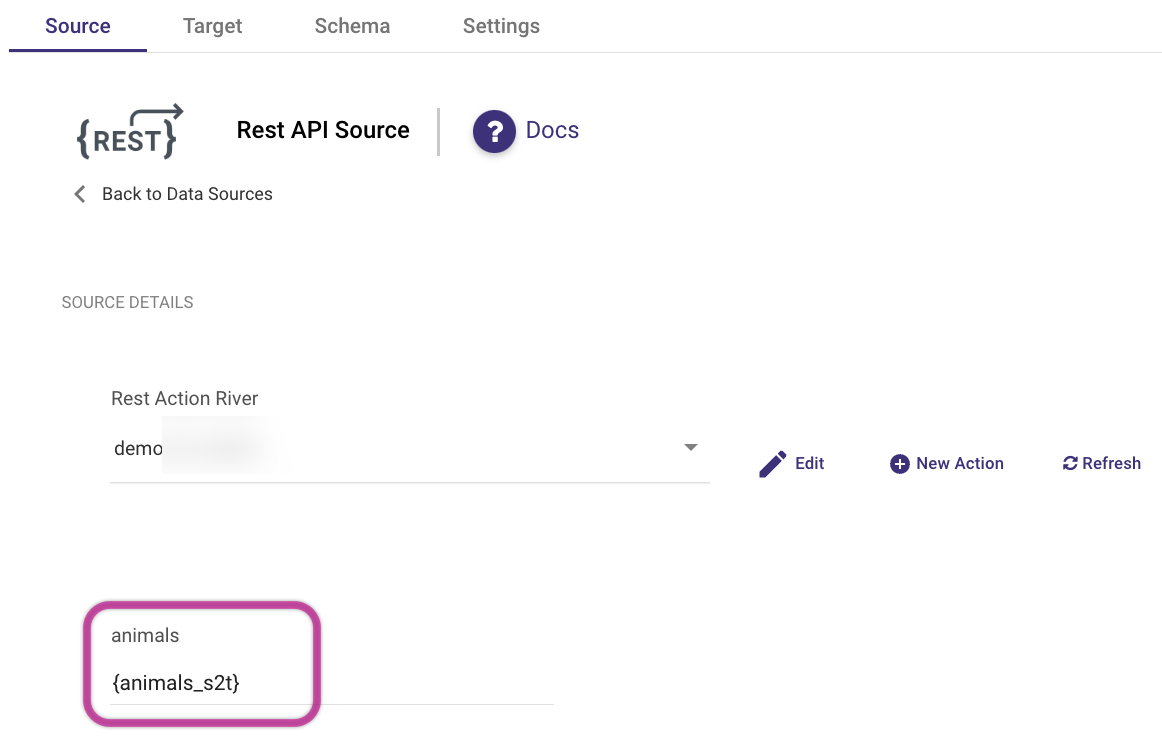
From the list of available Action Rivers, select the one you just created.
Create a Source to Target variable.
Ensure that this variable has an initial value populated in square brackets with single quotes. This initial value is necessary for the mapping process to function correctly.
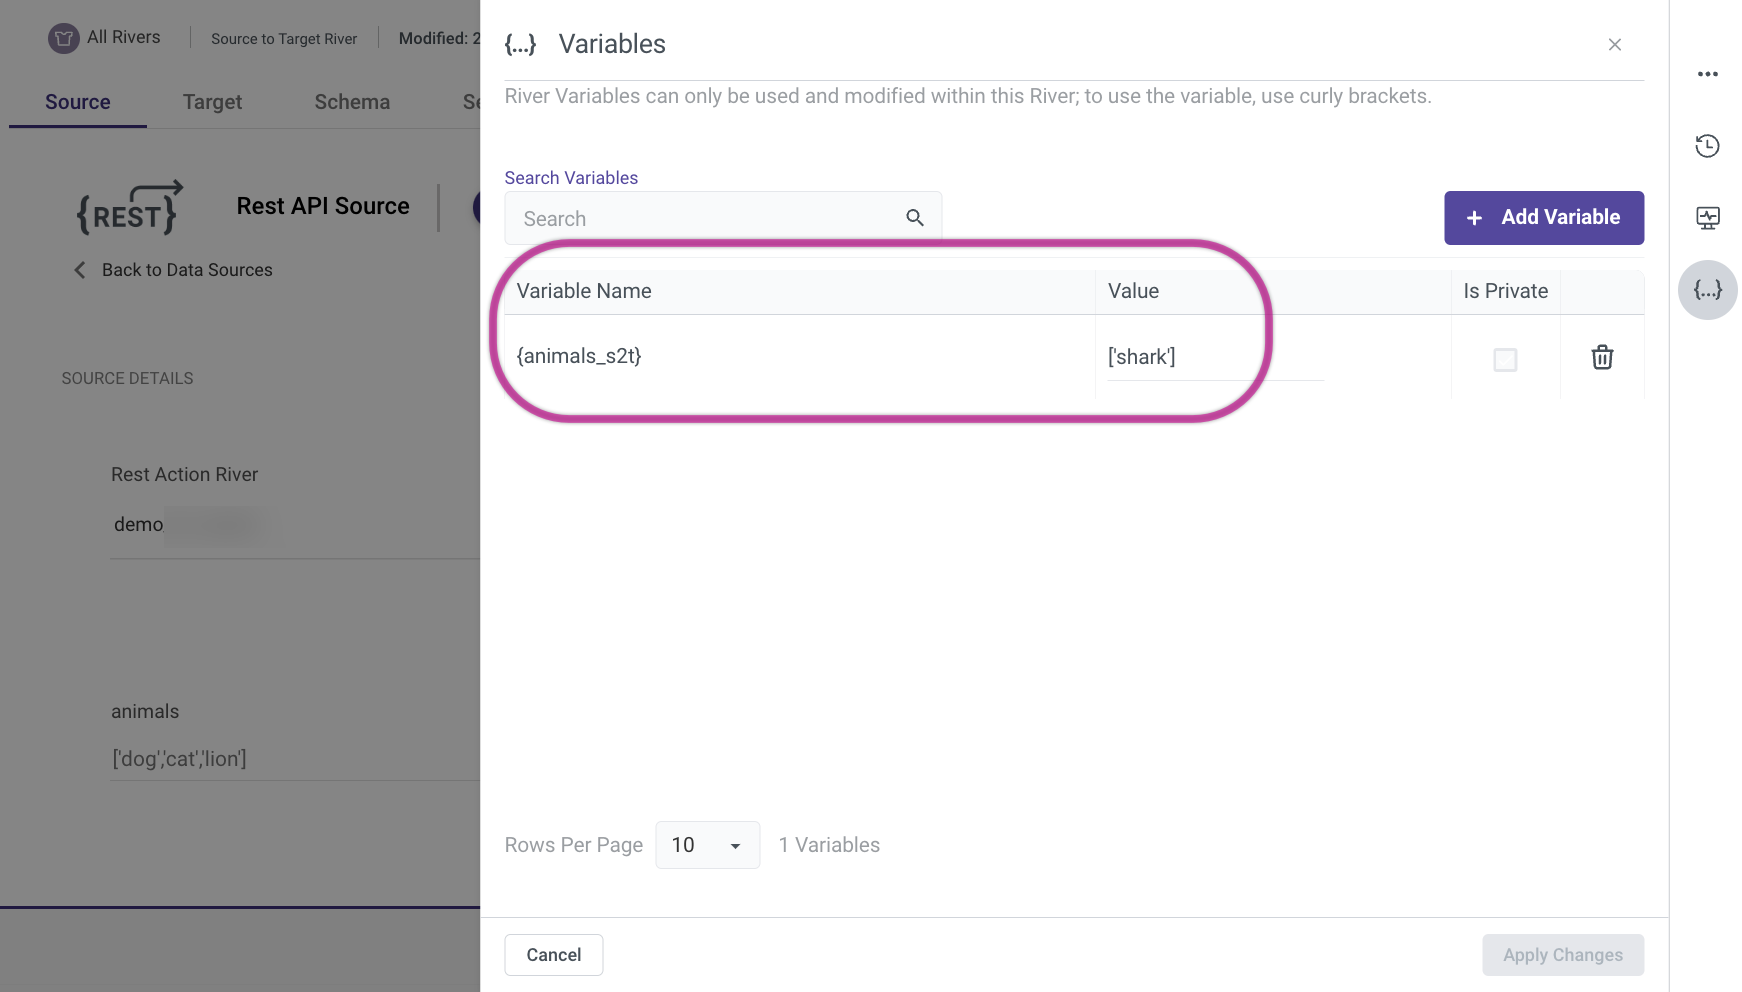
Insert the varialbe as the value for the iterated variable from the Action River.
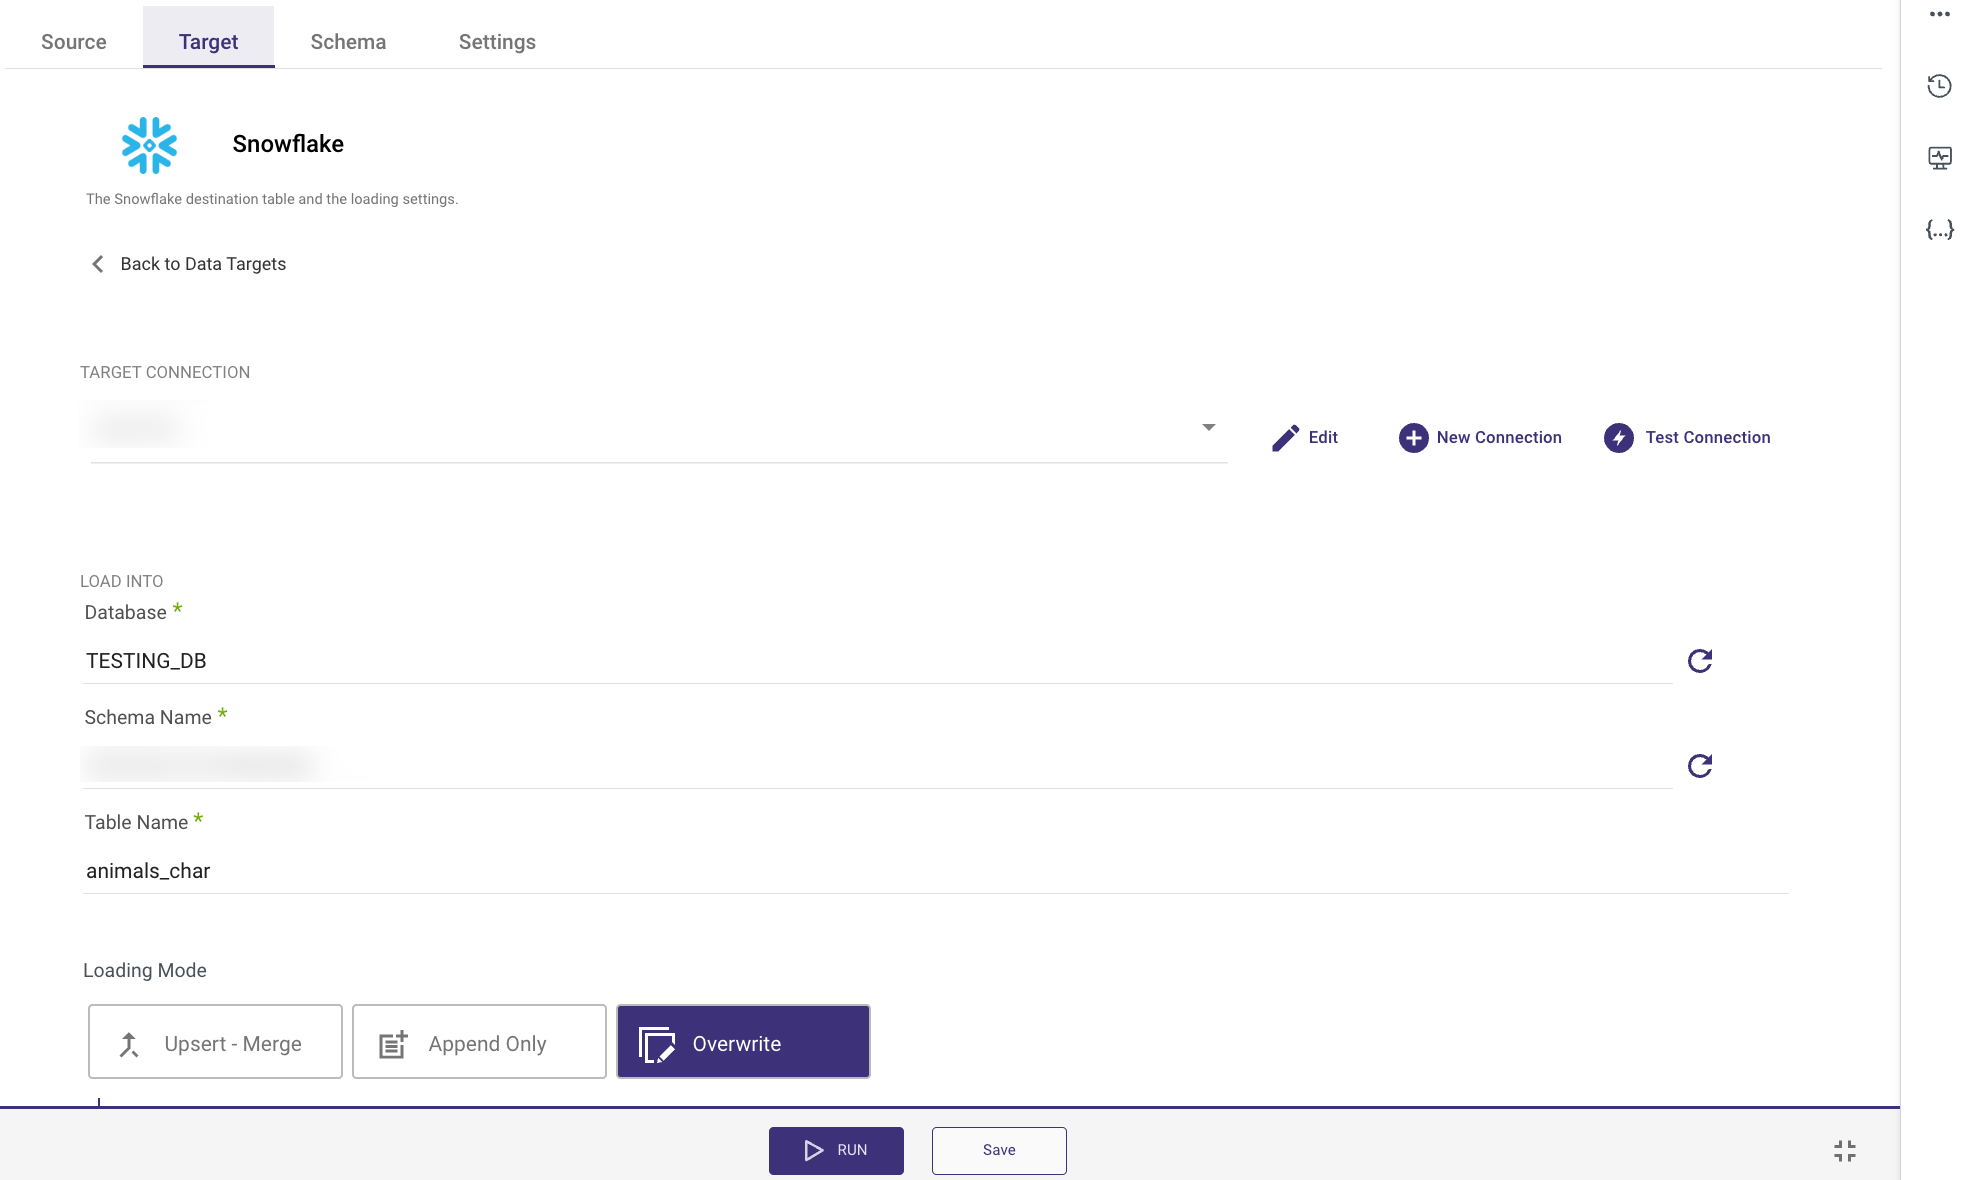
Specify your desired Target for the mapping.
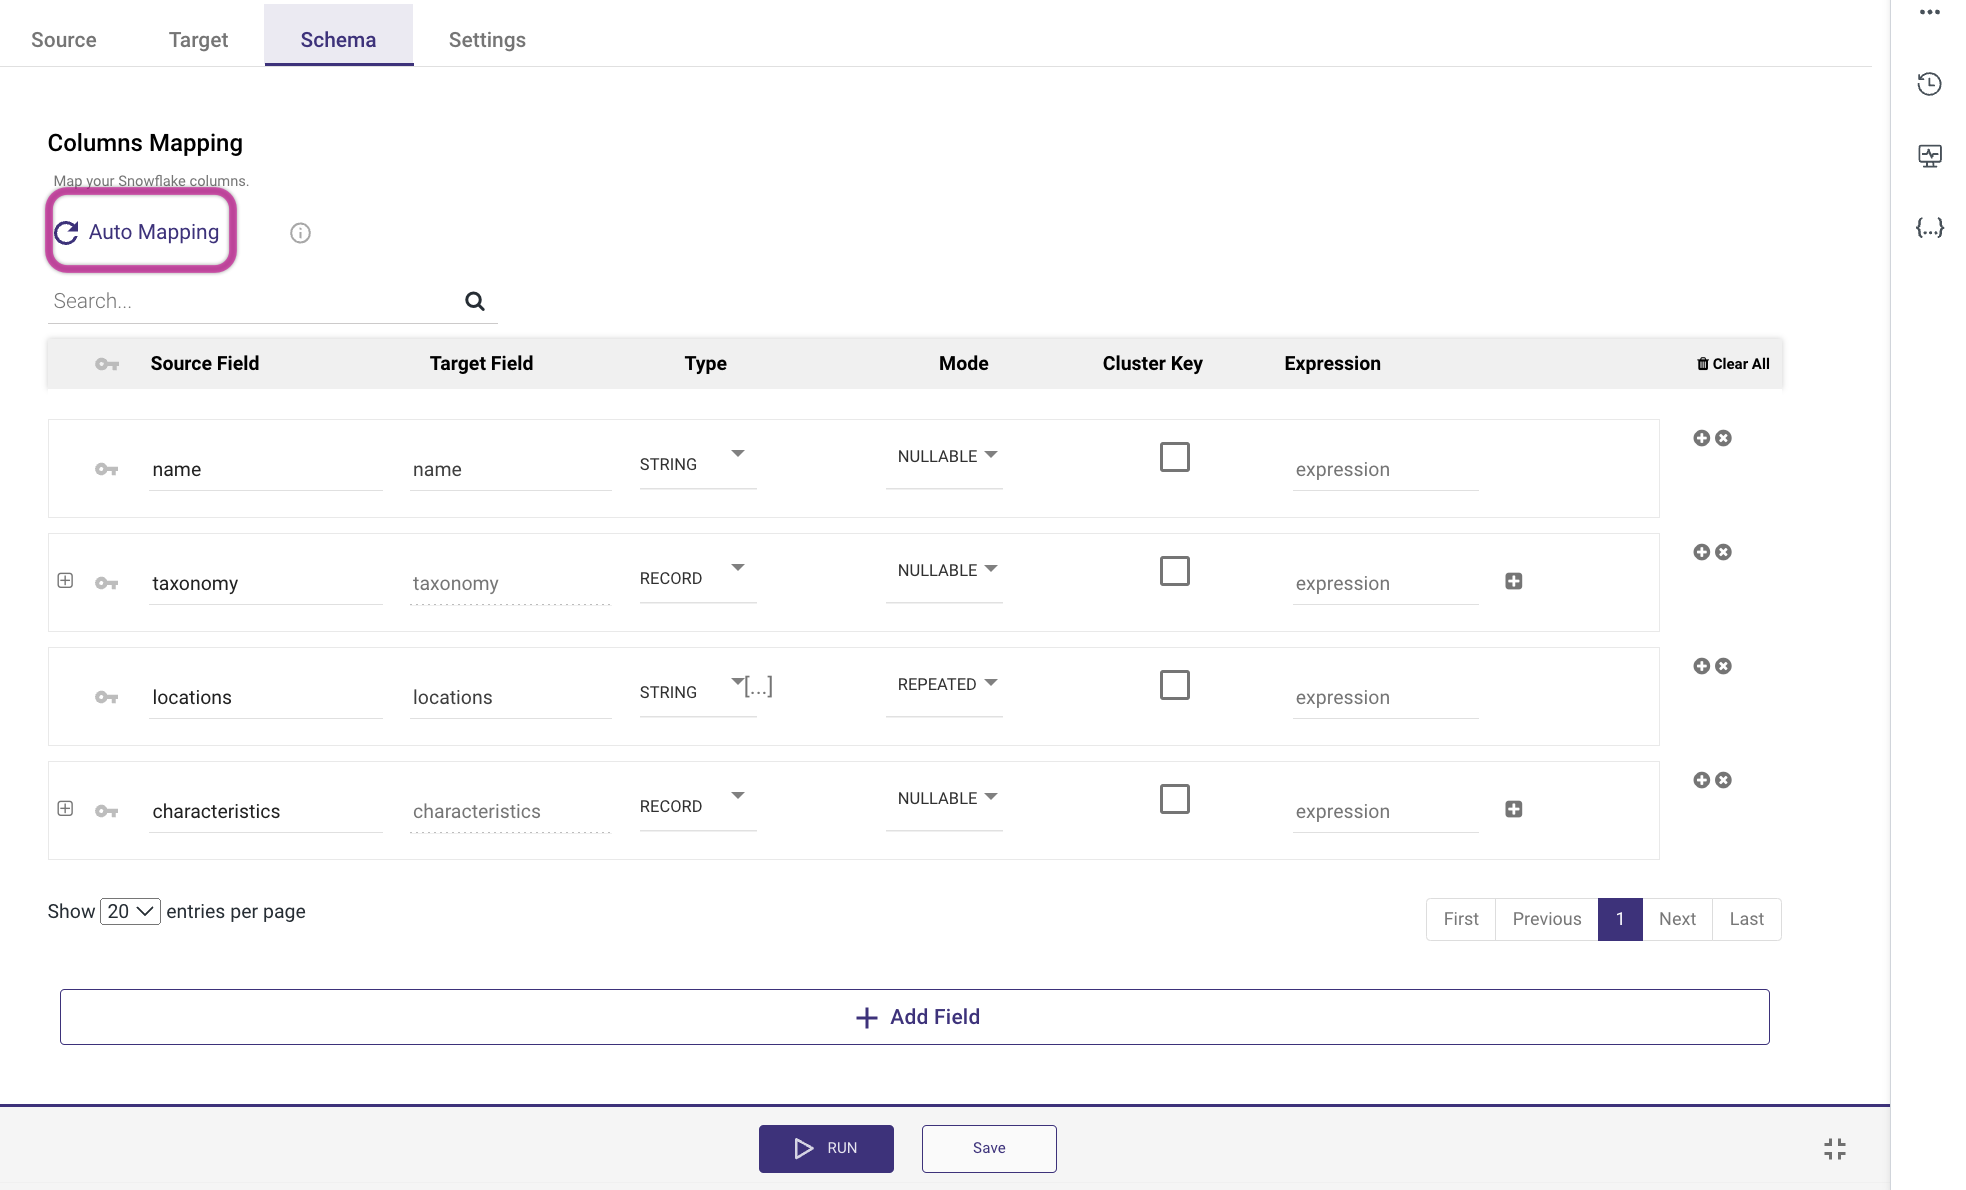
Navigate to the Schema tab and click on Auto mapping.
Provide a suitable name for the Action River and save it.
Step 3: Logic River - Trigger All Rivers and Obtain the Desired Outcome
Create a Logic River and execute a query on it to retrieve data from your target, which will then be assigned to a variable.
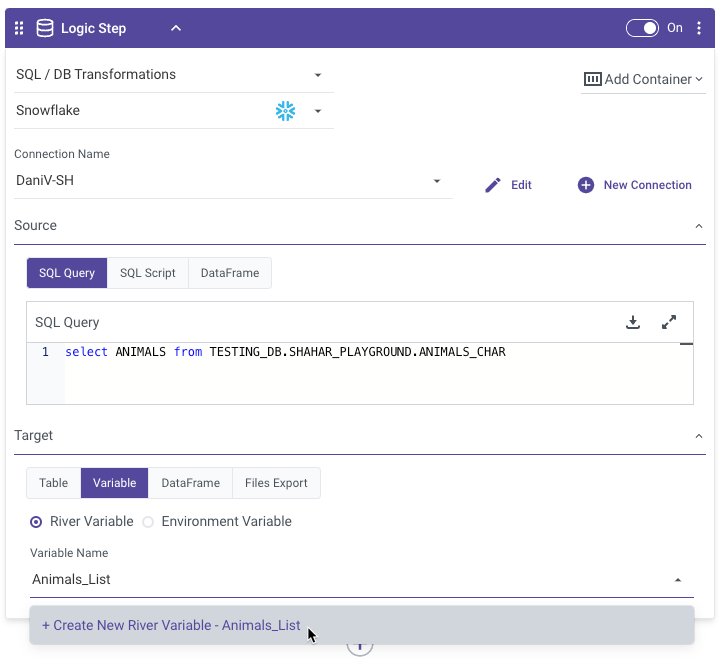
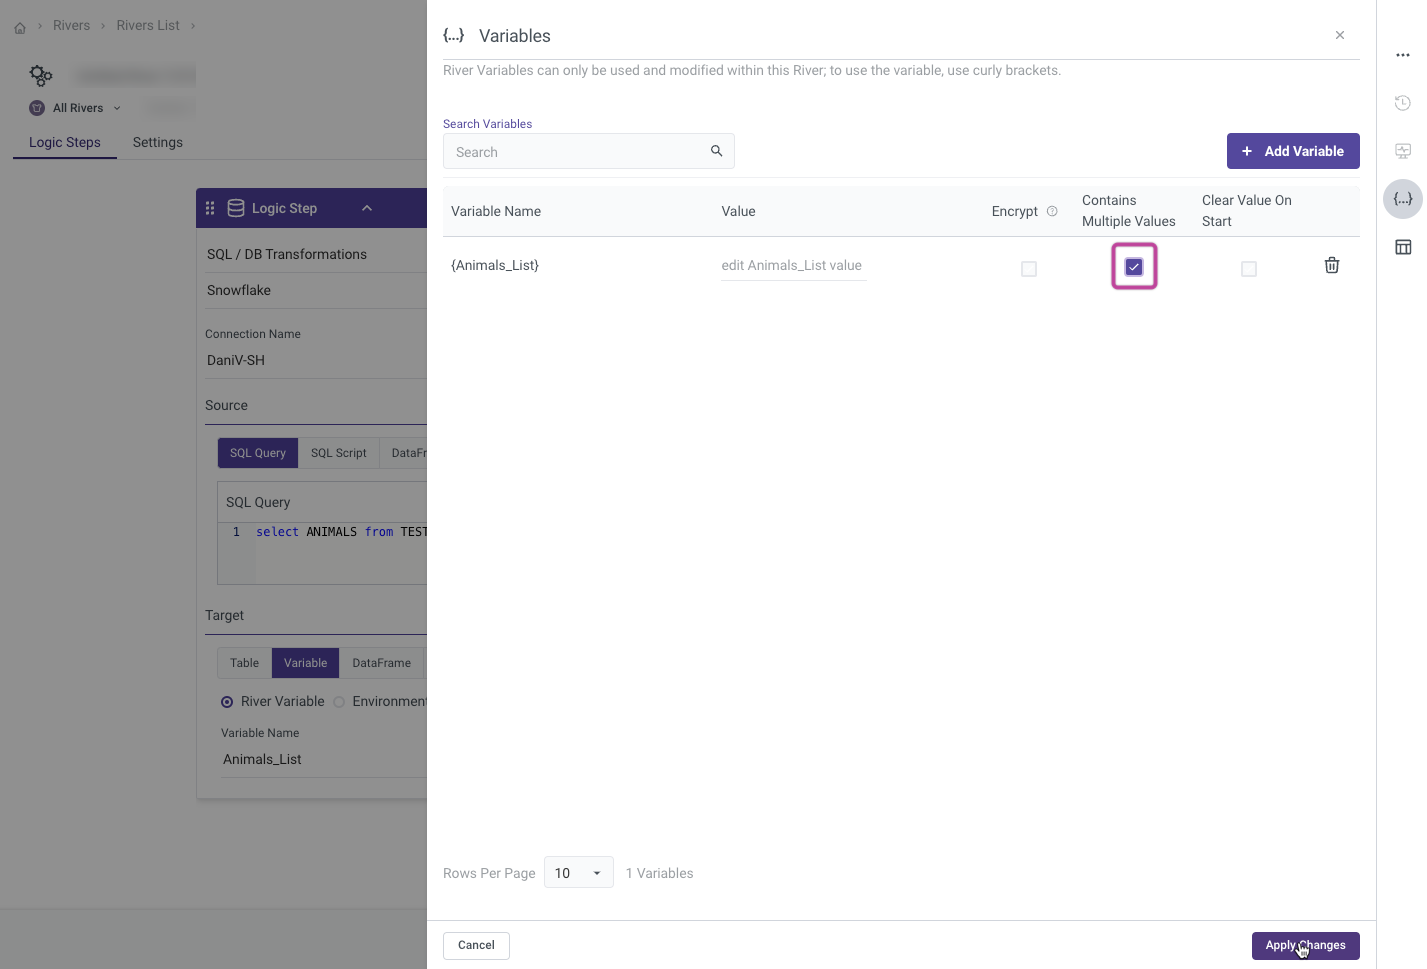
Navigate to the Variables tab, create a varialbe and ensure that the "Contains Multiple Values" checkbox is selected to configure the variable as capable of holding multiple values.
Include an additional step that initiates the Source to Target River.
Take the variable created earlier and assign it to a variable from the Source to Target River for iteration. Be sure to enclose the variable in curly brackets within the Value field.
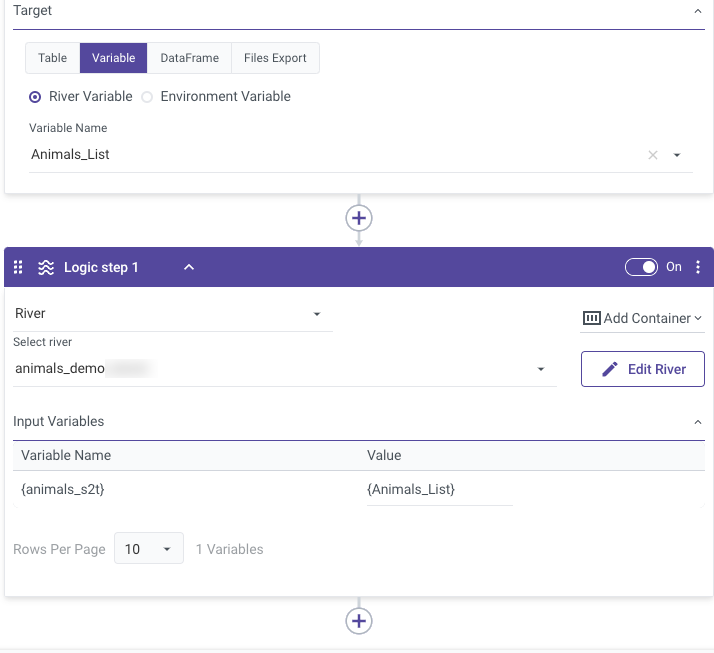
Once completed, you should be able to observe the results of the API call and the iterated values in your data destination warehouse.
For an in-depth use case example, please consult our document titled Variable Looping in Action Rivers: An Example Use Case.
Limitations
Only 1 Parameter: The API URL is restricted to accepting a single parameter that can be iterated over.
Add a Variable to Results: When employing variable looping, the generated variables from the variable tab cannot be included in the Results section, consequently requiring the "Add to Results" checkbox to remain unchecked.
Action Rivers with Time Periods: When incorporating particular time periods in an Action River and utilizing it in the Source to Target River as a Rest as a Source, dividing the data loading procedure into multiple intervals is not feasible.
Nested Arrays: Rivery's looping functionality is not compatible with nested arrays, as it only allows iteration over single-level arrays.
Maximum Character Limit: There is a maximum character limit of 20,000 for each parameter. If the input exceeds this limit, it will be truncated, resulting in an error.
Please note that these limitations are specific to the current configuration and may be subject to change or improvement in future updates.

