Airtable Walkthrough
- 1 Minute to read
- Print
- DarkLight
- PDF
Airtable Walkthrough
- 1 Minute to read
- Print
- DarkLight
- PDF
Article summary
Did you find this summary helpful?
Thank you for your feedback!
Introduction
This document provides you with step-by-step instructions and valuable tips to ensure a smooth and efficient integration process.
Prerequisite
An established Airtable connection.
Pulling Data from Airtable using Rivery
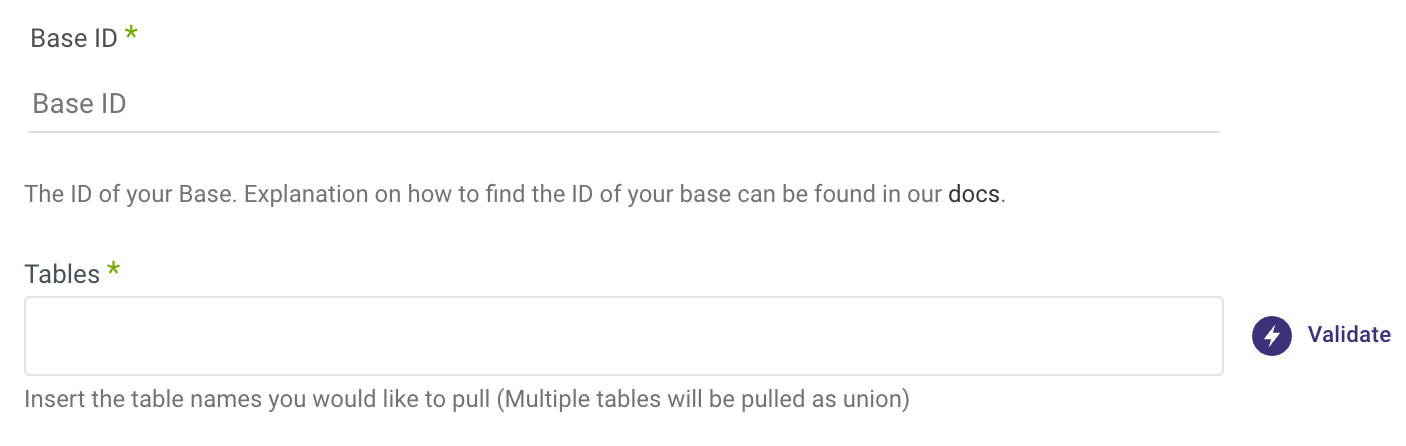
Configuring Data Retrieval
- Enter the ID of the Base from which data is to be pulled.
- Specify the names of the tables to pull data from.
Please Note:
- Selecting multiple tables results in a joint table combining fields and data.
- If tables have a common field name with different data types, the field might be excluded.
- Use this feature for tables with identical structures across different tabs (e.g., monthly reports across different months).
- Validate your settings to ensure accuracy.
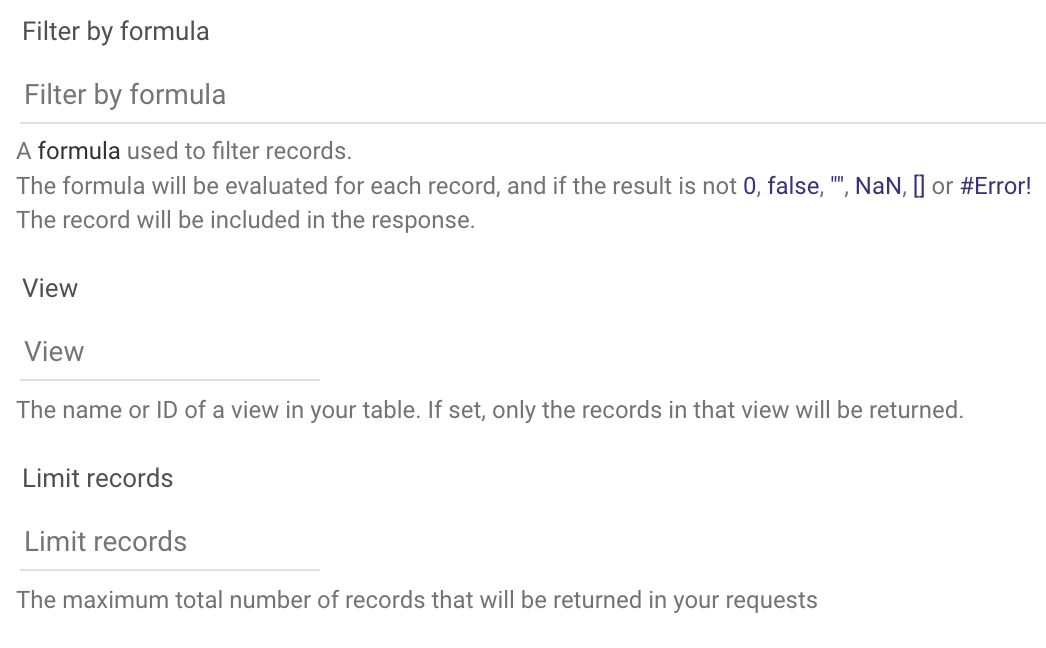
Fields for Filtering (Optional)
Filter By Formula
Use an Airtable formula for advanced filtering.
View
Specify a view in your table to return records from that view only.
Limit Records
Set a maximum number of records to fetch.
Auto Mapping
Rivery will automatically configure your Schema based on the selected tables.
Customize which fields to fetch, add new fields, or remove unwanted fields.
Four metadata fields included: Base ID, Table Name, Record ID, and Created Time.
Sorting the Data
After Auto Mapping, a table with fields and their types will be displayed.
Sort the returned data by selecting columns and specifying the order (ascending/descending).

Was this article helpful?