Amazon S3 as a Source Walkthrough
- 6 Minutes to read
- Print
- DarkLight
- PDF
Amazon S3 as a Source Walkthrough
- 6 Minutes to read
- Print
- DarkLight
- PDF
Article summary
Did you find this summary helpful?
Thank you for your feedback!
Introduction
Rivery offers a seamless solution for connecting to Amazon S3 and effortlessly pulling data into your preferred Target, enabling you to unlock valuable insights from your datasets.
This document will guide you through the process, from creating a new River in Rivery to choosing extraction modes and managing your data storage. By the end of this guide, you will have a clear understanding of how to effectively harness Rivery's capabilities to pull data from Amazon S3 and integrate it seamlessly into your data ecosystem.
Prerequisite
Before you begin the process of pulling data from Amazon S3 using Rivery, it's important to ensure that you have a configured Amazon S3 connection. Once this prerequisite is met, you can follow the step-by-step instructions outlined in this document to set up and execute a data extraction River.
Extracting Data from Amazon S3 to Your Chosen Target
Let's begin the journey of pulling data from Amazon S3 using Rivery and explore the various steps and considerations involved in this process:
Create a New River:
From the top right corner of the Rivery screen, select "Create River."Choose River Type:
Select "Source to Target" as the River type.Locate "Amazon S3" in the list of available data sources under the "Storage" section.
Click on Amazon S3.
Provide a name for your River.
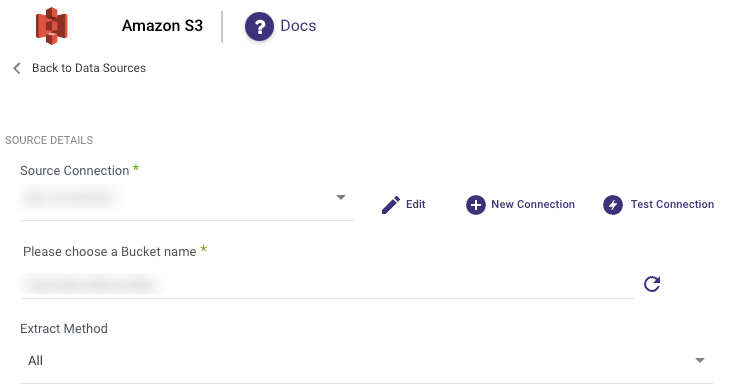
Under "Source Connection," select an existing connection or create a new one.
Select Bucket:
Choose the desired bucket name from the list of available buckets.Choose Extract Method.
Extract Methods:
All
This method loads all data from a Source into the Target database, replacing all existing data in the Target database regardless of time periods. . It is useful when the Source data is complete and up-to-date, and you want to create a fresh copy of the source data in the target database.
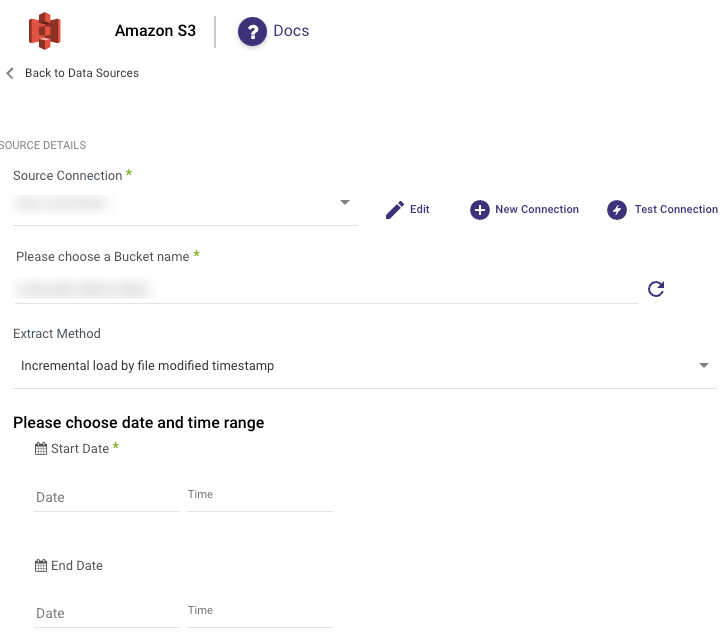
Incremental Load by File Modified Timestamp
Incremental Load by File Modified Timestamp allows you to control the date range of your data.
Please Note:
- Start Date is mandatory.
- In the case of a modified timestamp load, the next Start Date is calculated by adding 1 millisecond to the last file date. This method ensures that the last file is not reloaded in the next run, yet it captures any newly added data.
- Data can be retrieved for the date range specified between the start and end dates.
- If you leave the End Date blank, the data will be pulled at the current time of the river's run.
- Dates timezone: UTC time.
- Utilize the "Last Days Back For Each Run" option to extend the starting date and retrieve data from a specified number of days before the selected start date.
Incremental Run: By Template
Templates allow you to run over folders and load files in the order in which they were created.
Simply choose a template type (Timestamp or Epoc time) and a data date range.
Timestamp Template - Utilize {} and the appropriate timestamp components to establish the folder format.
Epoch Time Template - Incorporate {e} (for epoch) or {ee} (for epoch in milliseconds) fields to define the folder structure for running by epoch time. Enter the desired starting value and an optional ending value.
This approach applies to the entire library and is not applicable to individual files.
Please Note:
- Start Date is mandatory.
- When the template load includes days and hours, the Start Date for the next run is determined by adding 1 hour to the last file date, as hours serve as the minimal differentiator. This ensures that the last file is not loaded again on the subsequent run, while also preventing the omission of any new data.
- Data can be retrieved for the date range specified between the start and end dates.
- If you leave the End Date blank, the data will be pulled at the current time of the river's run.
- Dates timezone: UTC time.
- Interval Chunk Size - Utilize this field when you intend to retrieve data over extended timeframes.
- The "Load Last Folder" checkbox, when enabled, loads the folder most recently accessed. We do not recommend using this option for daily folder creation due to the possibility of loading incomplete folders.

Dropdown with More Options
The start date will not advance if a River run is unsuccessful. To advance the start date even if the run fails, click "More Options" and check the corresponding box (not recommended).
Continuing with the overall procedure:
File Path Prefix and Pattern:
For the chosen extract methods, specify the file path prefix and file pattern to filter by.Select After-Pull Action:
- Retain the original location.
- Transfer to the archive path: Select the container name and specify the optional archived folder path.
- Delete.
Pick Number of files to pull (Leave empty for all).
Select the desired file type: CSV, Excel, JSON, or Other .
Please Note:
For each type, you have the choice to incorporate a compressed file; be sure to mark the "Is Compressed" checkbox.
In the case of using .zip files and if you're utilizing the Custom File Zone, the process entails Rivery initially ingesting the files through its Default file zone, following which the files are forwarded to your designated Custom File Zone.
File Types
CSV
CSV allows you to select the Delimiter, Quote character, and Newline Delimiter according to your preference.
Excel
In Excel, you have the ability to specify the sheet by its position, using a comma separator for multiple sheets.
Typically, the initial row serves as the header, but you have the flexibility to opt for different rows. If this scenario applies and your dataset begins after that particular row, please configure the "start loading rows from row number" to the subsequent row following the header.
An empty list signifies that all sheets will be included.
Toward the bottom of this section, you'll find the option to perform an "Auto Mapping" which allows you to visualize your file's structure.
JSON
Please note that the supported JSON format is jsonlines format only.
Other
When opting for "Other" files, Rivery accepts them in their original state, without any data transformation, and limits your Target selection to Storage exclusively.
- The only remaining step is to navigate to the Target tab and choose a Target warehouse.
"Is Compressed" Checkbox
For each file type, you can choose to include a compressed version by selecting the "Is Compressed" checkbox.
When referencing a file within another file, be sure to add the correct file extension in the prefix field; otherwise, Rivery won't be able to identify the correct file.
If two files share the same name, one compressed and one not, marking a file as compressed during execution could cause Rivery to select the uncompressed version, leading to an error.
To avoid this, it's recommended to use a prefix with the file format or provide the full file name along with its format.
Limitations:
For large datasets, a suffix such as "000", "001", etc., will be added for every 5 gigabytes of data.
The maximum mapping field size is restricted to 9.2 billion characters.
Direct load cases do not include the capability to delete files after they are pulled; this is because the data is transferred directly from the customer's Source to the Target without any intermediate file deletion capability.
The Path structure should be as follows: my_bucket/folder1/folder2/file.csv*
Here's the breakdown:- Bucket: my_bucket
- PREFIX: folder1/folder2/file.csv
- FILENAME: *
Was this article helpful?