- 2 Minutes to read
- Print
- DarkLight
- PDF
Brandwatch Walkthrough
- 2 Minutes to read
- Print
- DarkLight
- PDF
A Guide for getting data from Brandwatch Connection to Rivery.
Prerequisites
How to pull data from Brandwatch using Rivery
First, select 'Create New River ' from the top right of the Rivery screen.

Choose 'Data Source to Target' as your river type.
In the 'General Info' tab, name your river, describe it, and choose a group.
Next, navigate to the 'Source' tab.
Find Brandwatch in the list of data sources and select it. (under Marketing)

Under Source Connection, select the connection you created, or create a new one
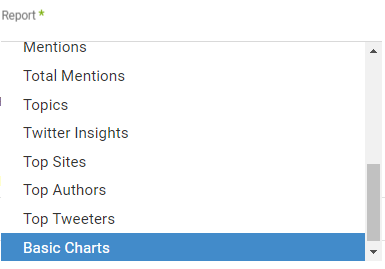
Next, Select a type of report:

All reports can be filtered by Projects. Leave this input empty to pull data for all available projects under your Brandwatch connection.
Queries / Queries Groups Filter:
.png)
Some reports can be filtered by Queries / Queries Groups. After selecting the filter type (by Query ID or by Query Group ID) and filtering desired Projects, click the Queries / Queries Group input to get a list of all available Queries / Queries Groups. Leave this input empty to get data for all queries.
When the 'Skip Errors' checkbox is enabled, the river will raise a warning when it fails to get data for some queries and will continue to the next ones. Otherwise, the river will fail if getting an error for a certain query.
Basic Charts Report:
As well as retrieving pages of Mentions, you can also create charts out of them. Select an Aggregate field and a Dimension field for charts data report (required). You can find here more information about aggregates and dimensions fields.
You can select a second dimension in the Dimension 2 input or leave this input empty to get data for one dimension only.

Reports' Time Period:
Select the Time Period of the report:

All the reports support two kinds of the time period:
- Date Range
- Pulls data in the date range between the start and end date provided, including the end date.
- You must select a start date.
- Leaving the end date empty will pull data according to the current time of the river's run.
- Select a timezone offset to send dates considering the offset.
- Use the "Last Days Back For Each Run" to expend the start date and pull data a given number of days back before the chosen start date.
- Predefined date - A date range defined by Rivery:
- Day - Yesterday.
- Week (From Monday to Sunday) - Week to date, Previous week, Previous week to date.
- Month - Month to date, Previous month, Previous month to date.
- Year - Year to date.
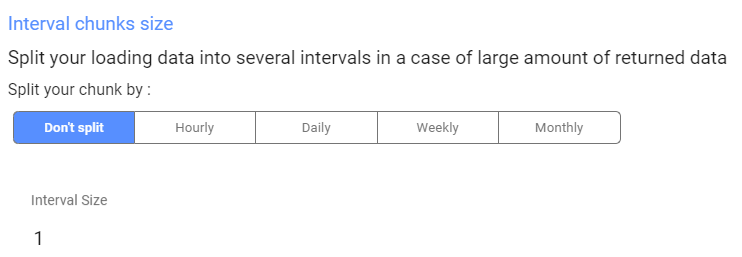
Interval Chunks
Rivery can run over the increment using chunks, in order to make the loading more efficient and more precise. You can choose from:
- Don't Split - Rivery will pull the data from the chosen start date to the end date in one bulk.
- Daily - The run will be chunked daily from the start to the end date.
- Monthly - The run will be chunked monthly from the start to the end date.
- Yearly (Less Recommended) - The run will be chunked yearly from the start to the end date.
Interval Size - Set the size of each interval.
For example - setting the Interval Size to 4 with a Daily Interval Chunk will split the date period into 4 days chunks. Running from the 01/01/2020 until the 08/01/2020 will be split to two intervals: from the 01/01/2020 until the 04/01/2020 and from the 05/01/2020 until the 08/01/2020.


