DoubleClick Campaign Manager Walkthrough
- 8 Minutes to read
- Print
- DarkLight
- PDF
DoubleClick Campaign Manager Walkthrough
- 8 Minutes to read
- Print
- DarkLight
- PDF
Article summary
Did you find this summary helpful?
Thank you for your feedback!
DoubleClick API version 4 is currently supported
DoubleClick source in Rivery can be executed in one of the following options:

Create a new report
Run an existing report
Create a new report
General inputs, available in all Doubleclick reports
Make sure that ‘create a new report’ is selected.
Profile - Select a profile in the Profile input. After Clicking on the input a list with all available profiles will be shown. Profile is a mandatory input in DoubleClick.
Keep report - Decides either to keep that report in DoubleClick reporting system or not.
If checked, this report will be available in DoubleClick as any other report in the system.
Report name - Decide on the name of this report in DoubleClick (if left empty a default name will be used).
Time period - Select the time range of the report.
Select either to run for a specific date range or a customized time period (like last 7 days, month to date etc.)
If selected date range - insert a start date and end date.
Last days back - use it in order to tell rivery to run the report for the given number of days back before the given start date.
Interval chunks size - Decides if need to split the API run to multiple requests according to the given interval. For example: for a given time range of month and weekly interval, the API will send 4 requests, one for each week in this time range. This input is useful for cases of large amounts of data. Important notice: In case of pulling a column of “date”, running the API in intervals will return duplicated results.
After running the river for the first time, and ‘keep report’ is turned on, it will be available also in the DoubleClick reporting system, with the exact same configurations. If going to schedule this river to run every hour/day or so, it is important to turn off the ‘keep report’ input.
See the section of Important notice about scheduling DoubleClick rivers for more information.
Standard report
Dimensions - Select which dimensions to include in the report.
Metrics - Select which metrics to include in the report.
Important: There are dimension/metrics/per interaction metrics combinations which are not allowed to select. In case of having this error, it is necessary to change the dimensions/metrics.
Advertisers - Select by which advertisers to filter the results of the report.(Click to have a list of all available values)
Activities - Select by which activities to filter the results of the report.(Click to have a list of all available values. Only after selecting some advertiser)
Activities metrics - If selected activities, it is possible to include activities metrics in the report. Select which activities metrics to include in the report.
Additional filters:
Campaigns - Select by which campaigns to filter the results of the report. (Click to have a list of all available values)
Operating Systems - Select by which operating systems to filter the results of the report. (Click to have a list of all available values)
Platform types - Select by which campaigns to filter the results of the report. (Click to have a list of all available values)
Path to conversion report
Floodlights - Select what floodlights to include in the report. Click on the input to have a list of all available floodlights. If no results came back - click on insert floodlights manually, and insert any floodlight ID (only floodlight IDs are acceptable inputs here)
Dimensions - Select which dimensions to include in the report
Metrics - Select which metrics to include in the report.
Per interaction metrics - Select which metrics to include in the report.
Note
There are dimension/metrics/per interaction metrics combinations which are not allowed to be selected. In case of having this error, it is necessary to change the dimensions/metrics.
Look back window - Select either to run the report for a lookback window from Floodlight or from custom days
- If selected custom - Select how many days per clicks and impressions (1-90 days only)
Activities - Select by which advertisers to filter the results of the report.(Click to have a list of all available values. Only after select any floodlight)
Additional filters :
Max gap between interactions - Select the maximum amount of time that can take place between interactions (clicks or impressions) by the same user. (1-90 days only).
Max number of Click interactions - Select The maximum number of clicks interactions to include in the report.
Max number of Impressions interactions - Select The maximum number of impressions interactions to include in the report.
Include unattributed IP conversions .
Include unattributed cookie conversions.
Pivot on interaction path - Select either to pivot the report on interaction path or not.
Reach report
Dimensions - Select which dimensions to include in the report
Metrics - Select which metrics to include in the report.
Reach by frequency Metrics - Select which metrics to include in the report.
Important : There are dimension/metrics/per interaction metrics combinations which are not allowed to select. In case of having this error, it is necessary to change the dimensions/metrics.
Advertisers - Select by which advertisers to filter the results of the report.(Click to have a list of all available values)
Activities - Select by which advertisers to filter the results of the report.(Click to have a list of all available values. Only after selected any advertiser)
Activities metrics - If selected activities, it is possible to include activities metrics in the report. Select which activities metrics to include in the report.
Additional filters :
Campaigns - Select by which campaigns to filter the results of the report. (Click to have a list of all available values).
Operating Systems - Select by which operating systems to filter the results of the report. (Click to have a list of all available values).
Platform types - Select by which campaigns to filter the results of the report. (Click to have a list of all available values).
Floodlight report
Dimensions - Select which dimensions to include in the report
Metrics - Select which metrics to include in the report.
Important : There are dimension/metrics/per interaction metrics combinations which are not allowed to select. In case of having this error, it is necessary to change the dimensions/metrics.
Floodlights - Select which floodlights to include in the report (mandatory field).
Advertisers - Select by which advertisers to filter the results of the report.(Click to have a list of all available values)
Activities - Select by which advertisers to filter the results of the report.(Click to have a list of all available values. Only after selecting any advertiser or floodlight)
Additional filters :
Campaigns - Select by which campaigns to filter the results of the report. (Click to have a list of all available values).
Operating Systems- Select by which operating systems to filter the results of the report. (Click to have a list of all available values).
Platform types- Select by which campaigns to filter the results of the report. (Click to have a list of all available values)
Include unattributed IP conversions
Include unattributed cookie conversions
Cross dimension reach report
Dimension - Select what will be the dimension of the report.
Advertisers - If selected ‘Campaign’ or ‘Site by advertiser’ dimensions, filter the report by advertisers. Click to have a list of all available values
Campaigns - If selected ‘Site by campaign’ dimension, filter the report by campaigns. Click to have a list of all available values
Pivot dimension - Decide either to pivot the report results by the selected dimension or not.
Breakdowns - Decide either to aggregate the results by date, week or month.
Metrics - Select which metrics to include in the report.
Important :There are dimension/metrics/per interaction metrics combinations which are not allowed to select. In case of having this error, it is necessary to change the dimensions/metrics.
Overlap metrics - Use these metrics to compare data and understand the overlap between two specific advertisers, campaigns, or sites, and determine how many people interacted with your ads on both.
Run an existing report
Rivery support in running existing report in the DoubleClick reporting system.
Make sure that ‘ run existing report ’ is selected.
Profile - Select a profile in the Profile input. After Clicking on the input a list with all available profiles will be shown. A profile is a mandatory input in DoubleClick.
Report - Select the report to run (Click to have a list of all available values)
Click on “Load report Details ” in order to have all the inputs of the selected report. At this moment all the inputs are not editable.
- There might be situations that the values in the inputs all be only ids without names. It is not a problem to run the report with that. It is possible to refresh that list and populate with new values.
Update report - Turn on the checkbox of “Update report” in order to edit the report inputs.
It is possible to update any available input of the report, like its being done when creating a new report.
When this report will be executed, the original report will be updated in the Doubleclick system.
Important notice about scheduling DoubleClick rivers
When scheduling the river, the report will be executed in the given scheduled time periods.
If the river contains a new report in DoubleClick, and the ‘keep report’ input is turned on, a new report will be created in DoubleClick reporting system. For example, if the river is scheduled to be run every hour, it will create 24 new reports in DoubleClick, one per hour.
Therefore, it is important to turn off the input of ‘keep report’ when scheduling a report which runs a “new report” in DoubleClick. That way, only the first report will be available in DoubleClick and every run of the report won’t a new report.
Known Issues
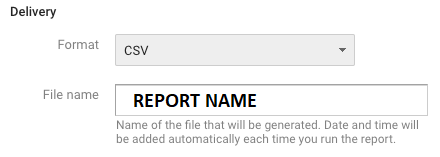
- Rivery handles CSV type reports. Please make sure you select the CSV format and not the XLS format.
- Your DoubleClick Rivers may take longer to run depending on how long it takes for your report to generate on the DoubleClick side. You can refer to DoubleClick's Reporting Best Practices to optimize this.
There are many factors that can account for a long run time including date range and the amount of data processed. According to DoubleClick's docs there is no correlation between report run-time and the number of rows returned in the data.
Was this article helpful?