MariaDB Walkthrough
- 1 Minute to read
- Print
- DarkLight
- PDF
MariaDB Walkthrough
- 1 Minute to read
- Print
- DarkLight
- PDF
Article summary
Did you find this summary helpful?
Thank you for your feedback!
Introduction
This document guides users through the process of integrating data from a MariaDB database into a cloud Target using Rivery, covering configuration steps, data extraction, scheduling, and monitoring. It also provides information on specific configurations for MariaDB versions and explains the different extraction methods available in Rivery.
Please Note:
This connector also supports AWS Aurora with MariaDB compatibility.
How to Work with MariaDB?
Step 1: Establish a Connection
Make sure you possess appropriate credentials for establishing a connection with a MariaDB database server.
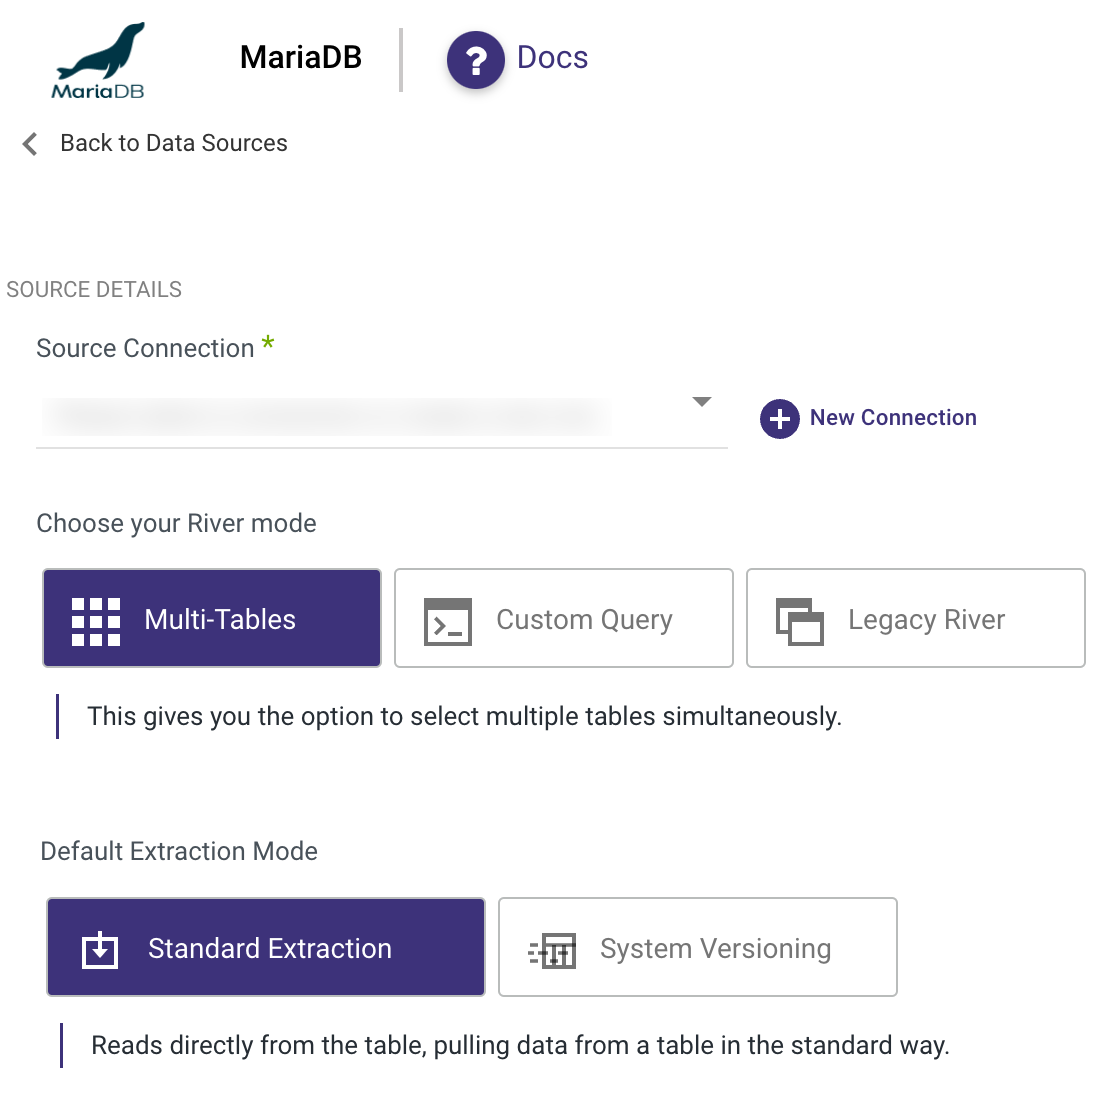
Step 2: Choose the River Mode
Once you have successfully established a connection to MariaDB, select the River mode to load data into a Target. There are 3 available options for you to choose from:
Please Note:
By clicking on the highlighted modes below, you will be taken to a relevant page that offers a comprehensive explanation and presents a Product Tour example showcasing the available features in MariaDB.
Multi-Tables : Simultaneously load multiple tables from MariaDB to your desired Target.
- Standard Extraction - This River mode maps, transforms, and loads data from multiple tables into a unified schema. It uses SQL queries for transformations and can be scheduled or manually triggered.
- System versioning - This mode offers an effective tracking mechanism that records alterations made to rows in your tables, including inserts, deletes, and updates.
Please be aware that to utilize this mode, system versioning must be enabled for each table.
Custom Query : Create a customized query and import it into your designated Target.
Legacy River: Select a sole Source table for loading into a Target.
Step 3: Run the River
Once you have successfully configured the River mode, selected the extraction method, and set up the scheduling, you are now ready to initiate the River and start its operation.
Was this article helpful?