SQL Server Walkthrough
- 7 Minutes to read
- Print
- DarkLight
- PDF
SQL Server Walkthrough
- 7 Minutes to read
- Print
- DarkLight
- PDF
Article summary
Did you find this summary helpful?
Thank you for your feedback!
Introduction
This guide will walk you through the steps needed to integrate data from a SQL Server database (on-prem or managed service) into a cloud target using Rivery.
Prerequisites
The necessary permissions for extracting and reading data in Standard Extraction loading mode must be granted:
- SELECT: Required to read data from tables and views.
- VIEW DEFINITION: Required to access table structures, metadata, and schema definitions.
- EXECUTE: Needed if stored procedures or functions are used during ETL.
Below is an example of how to grant these permissions:
USE [DatabaseName];
GRANT SELECT ON SCHEMA::[SchemaName] TO [Username];
GRANT EXECUTE ON SCHEMA::[SchemaName] TO [Username];
GRANT VIEW DEFINITION ON DATABASE::[DatabaseName] TO [Username];
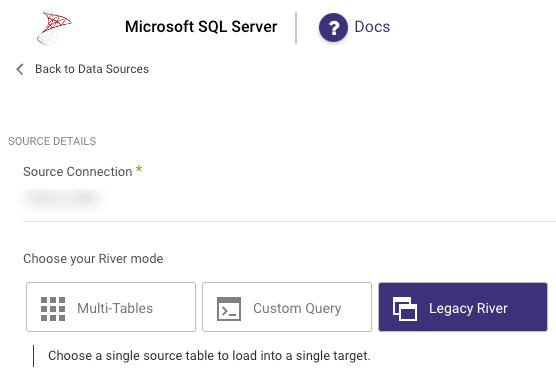
Pull SQL Server Data into a Target
Using Rivery, you can pull data from your SQL Server tables and send that data into your Target database.
Find SQL Server in the list of data sources and select it:

Define a Source Connection (this will be the connection created earlier in the process). If you do not yet have a SQL Server connection in your Rivery account, you can create a new connection here by clicking 'Create New Connection.'
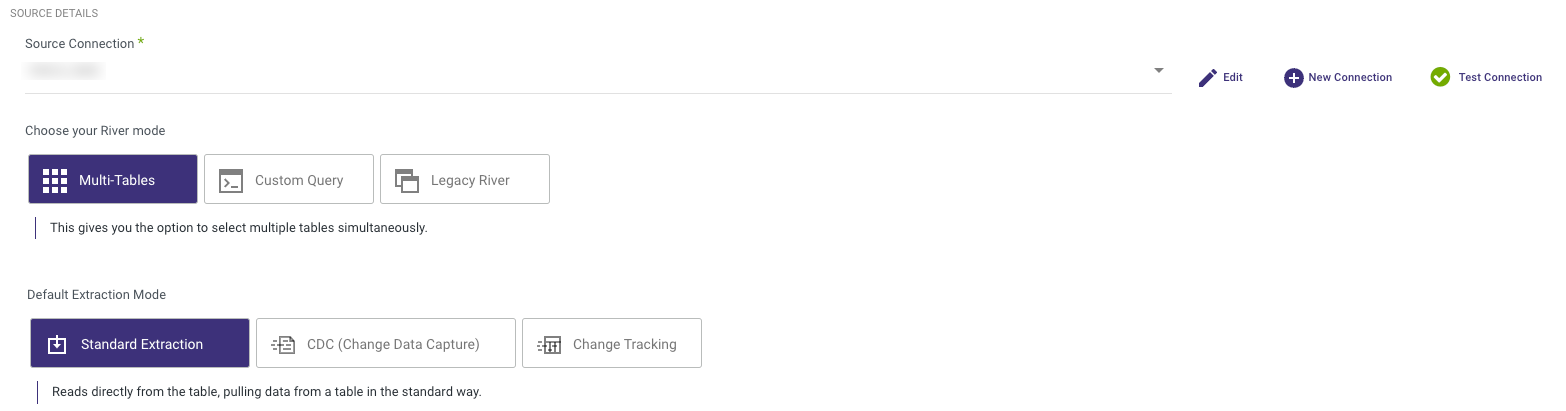
- Multi-Tables : Load multiple tables simultaneously from SQL Server to your target.
- Custom Query : Create a custom query and load it into your target.
- Legacy River : Choose a single source table to load into a single target.
Multi-Table Mode
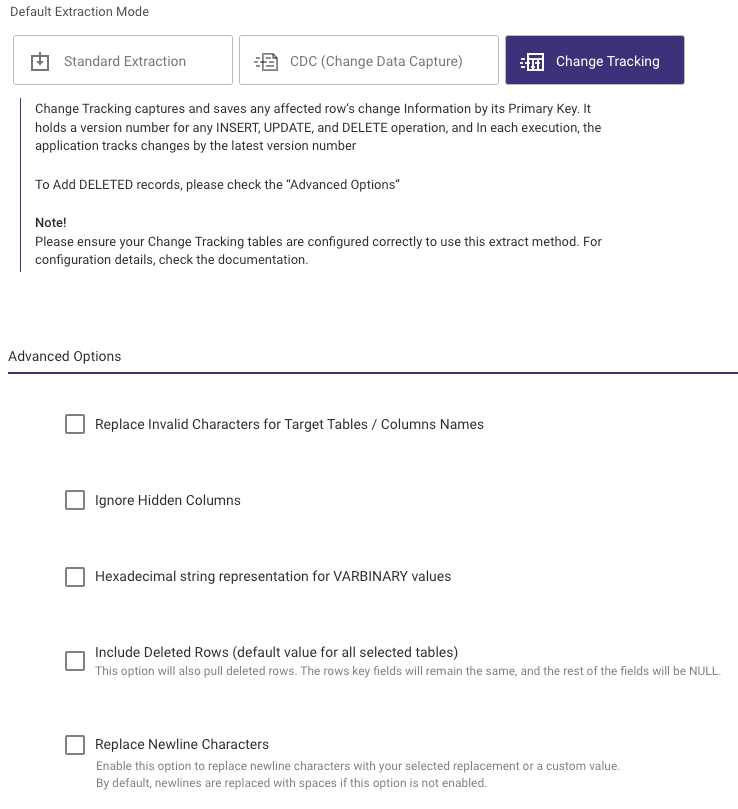
Load multiple tables simultaneously from SQL Server to your target. There are 3 Default Extraction Modes: Standard Extraction, Change Data Capture (CDC) and Change Tracking.
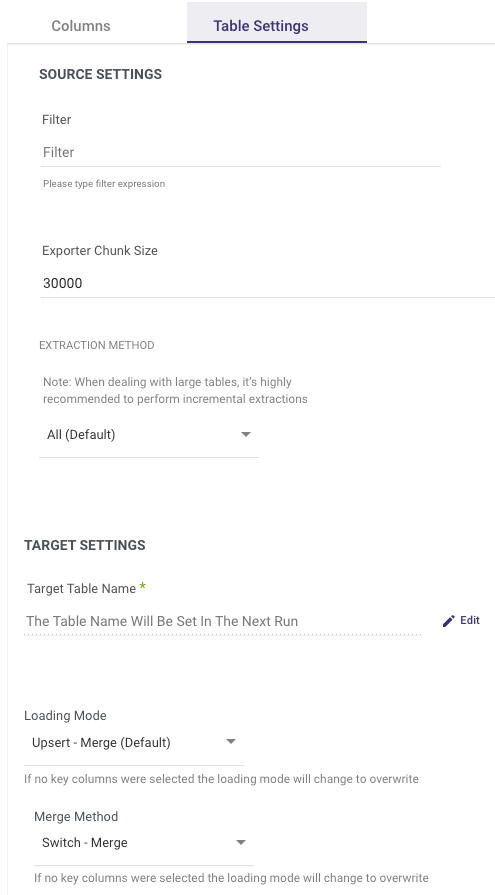
On the 'Table Settings' tab you are able to edit the following:
Change the loading mode
Change the extraction method. If 'Incremental' is selected, you can then define which field will be used to define the increment.
Filter by expresion that will be used as a WHERE clause to fetch the selected data from the table.
Advanced Options
When using Multi-Tables River mode in Standard or Change Tracking extraction mode, the Advanced Options at the bottom contains checkboxes that could enhance the usability of the data inserted into the Target table:
- Invalid Characters
- Hidden columns
- Varbinary Values
Invalid Characters
When this option is ticked, any invalid characters are automatically replaced with underscores.
Hidden Columns
Automatic extraction of hidden columns is enabled; however, you can disable it by clicking the "Ignore Hidden Columns" checkbox.
Varbinary Values
This option allows you to export the column's Varbinary data as a hexadecimal string; the maximum length is 254 characters.
Deleted Rows
This will pull back deleted rows. The row's key fields won't change, and the remaining fields will all be NULL.
Please Note:
This option is available only in the case of using "Change Tracking" as the extraction mode, and when employing "Snowflake" or "Databricks" as the Target.
Replace Newline Characters
This will replace newline characters with a selected replacement value or a custom value of your choice.
Default Behavior: If this option is not enabled, newline characters are replaced with spaces by default.
Data Conversion Considerations
New Lines
In order to reduce any potential errors while loading data into the targets, Rivery removes any CHAR(10) and CHAR(13) (CR/LF) chars during the run for the next data types:
- XML
- VARBINARY
- TEXT
- STRING
Custom Query
You also have the option to employ Rivery's Custom Query River Mode for the precise definition of the data extraction you require. When using this functionality, you can employ any query that aligns with the Source's compatibility.
It's crucial to emphasize that you should exclusively employ a SELECT query without including any other statements. Rivery does not provide support for multi-statements or SQL scripts in the custom query field. This means you should limit your Custom Query to selecting the data you need without incorporating additional SQL commands or complex scripting.
However, it's worth noting that Rivery does offer support for XML in the Custom Query. In such cases, users should ensure that they CAST the XML fields accordingly:

Procedure for Casting XML to String
- Clear Previous Mappings
- In the Source Tab: Clear all previous mappings.
- In the Schema Tab: Clear all previous mappings.
- Write SQL Command
SELECT some_id, CAST([some_xml] AS NVARCHAR(MAX)) AS some_xml_stringified, some_date
FROM testing_schema.testing_table
- Rerun Auto Mapping
In the Source Tab: Rerun auto-mapping and verify xml_field is mapped to STRING.
In the Schema Tab: Rerun auto-mapping and verify xml_field is mapped to STRING.
- Run the River
Please Note:
TIMESTAMP columns might not be returned in the right format as the target table TIMESTAMP type, and will fail to be uploaded into the target table with as TIMESTAMP.
When getting an error of a TIMESTAMP column that failed to be loaded into the target table, try to convert its format in your custom query as follows:
convert(varchar, <DATE_COLUMN_NAME>, 127) as <DATE_COLUMN_NAME>
Please make sure that this colum is a TIMESTAMP type in the source tab mapping.
Extract Method
Using Rivery, you can pull your data incrementally or pull the entirety of the data that exists in the table:
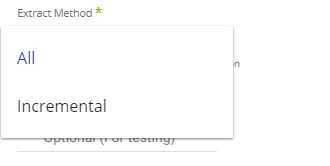
- All: Fetch all data in the table using Chunks.
- Incremental: Gives you the option to run over a column in a table or your custom query top SELECT. You can run over it by filtering Start and End dates or Epoch times
Moreover, you may choose to run over the date using Daily, Monthly, Weekly, or Yearly chunks.
Please define the incremental Field to be used in the Incremental Field section. After choosing the incremental field, choose the Incremental Type and the dates/values you would like to fetch.
Note: Rivery will manage the increments over the runs using the Maximum value in the data. This means you will always get the entire data since the last run, which prevents data holes. You just need to configure your river once.
Recommended : Define your incremental field in Rivery over a field with an Index or Partitions key in the table.
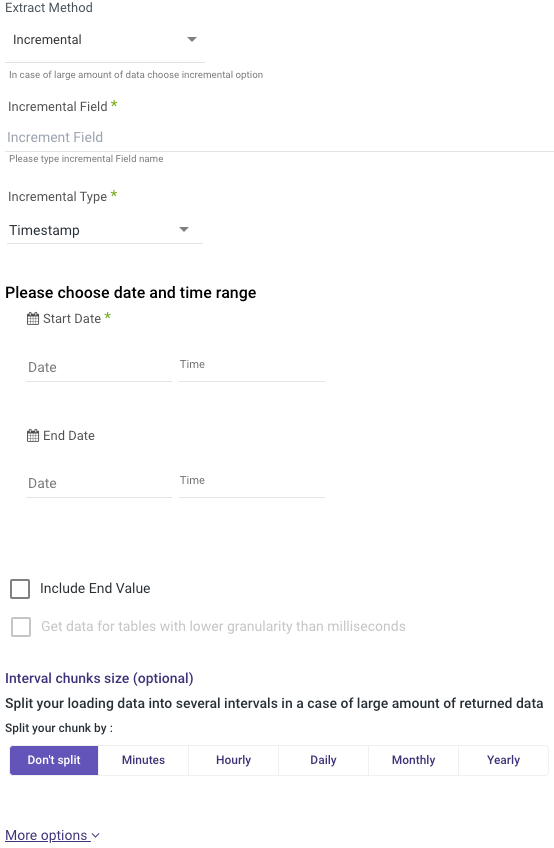
Note:
- Start Date is mandatory.
- Data can be retrieved for the date range specified between the Start and End dates.
- If you leave the end date blank, the data will be pulled at the current time of the River's run.
- Dates timezone: UTC time.
- The Start Date won't be advanced if a River run is unsuccessful.
If you don't want this default setting, click More Options and check the box to advance the start date even if the River run is unsuccessful (Not recommended).

- Use the 'Last Days Back For Each Run' option to gather data from a specified number of days prior to the selected start date.
Limit and Auto Mapping
After defining the extract method, you may choose a limit of top N rows to fetch. Rivery will set your Schema using the Auto Mapping feature. You can also choose fields you want to fetch in the Mapping table and add fields on your own.

Row Version
Row Version is commonly used to version-stamp table rows. The storage size is 8 bytes.
The row version data type is an incrementing integer that does not store a date or time.
Row Version can be used in two River modes:
- Legacy River
- Multi-Tables
To use Row Version, complete these steps:
We will use Legacy River for this process, but the technique is the same for Multi-Tables.
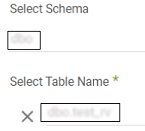
- Choose your Source Connection.
- Select Schema and Table Name.
- Click on Extract Method and select Incremental.
- Type in Incremental Field Name.
- Choose Row Version in Incremental Type.
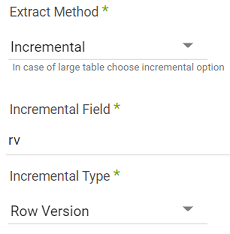
- Enter a zero as the Start Value.
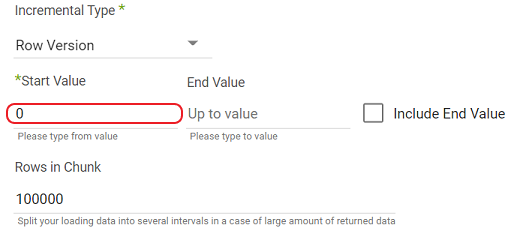
Note:
The default value for 'Rows in Chunk' is 100,000.
7.Click Run river.
8. Connect to your Target

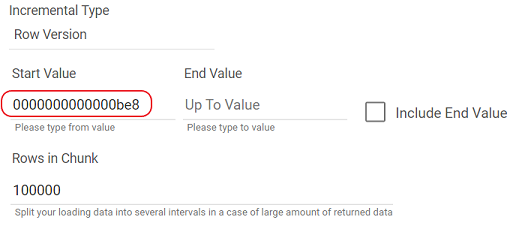
Note:
The Row Version is indicated in Hexadecimal values.
When you run a River with Row Version again, the Start Value will be updated to the last row's end value.
Legacy River Mode
This river mode allows for the load of a single source table into a single target table.
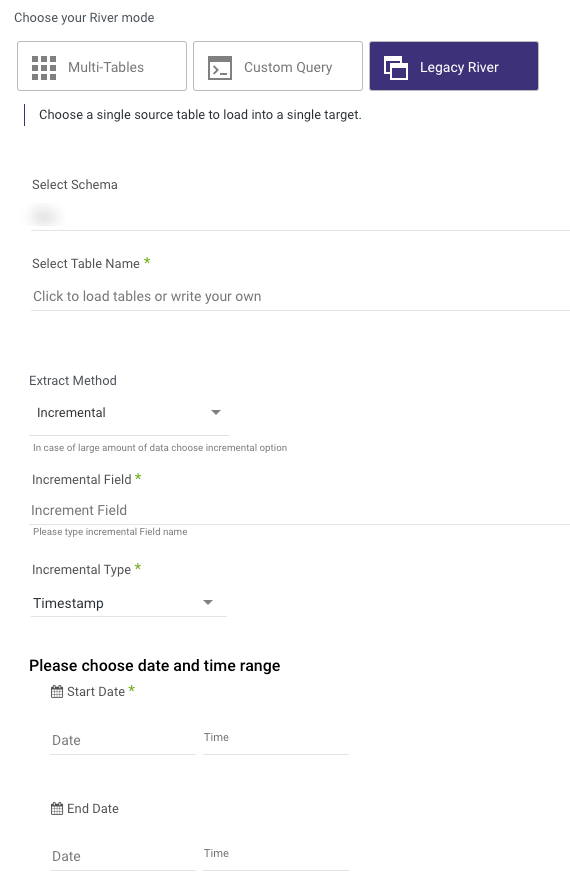
In the above screenshot, there are steps to define the source table to pull (Rivery will auto-detect available schemas and tables), the extraction method to use, and options for filters or row limits on the data pull.
Exporter Chunk Size Option
The "Exporter Chunk Size Option" can be located within all River modes.
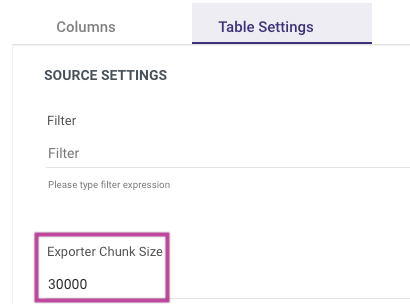
The " Exporter Chunk Size" refers to the size of data fetched and stored in files.
Our default value is 30000, which is suitable for most situations.
When Should You Consider Modifying The Chunk Size?
The best practice for setting the Exporter Chunk Size in Rivery typically involves balancing memory usage with query performance, which can vary based on workload, network latency, and database type.
When dealing with wide tables with a relatively large number of columns or tables that have extremely large text fields (i.e. JSON/XML/TEXT types), it is crucial to set the chunk size carefully, as these fields can lead to high memory usage and potentially slower performance or even out-of-memory (OOM) failures.
In such cases, the best practice is to lower the chunk size. This reduces the amount of data loaded into memory in each batch, minimizing the risk of OOM failures, especially for very large fields.
For narrow tables, increasing the chunk size can potentially yield higher throughput and improve read performance.
Since multiple factors are involved (e.g., network latency, database type), there is no magic formula here and the best practice for finding the optimal value for a specific table is to start with the default setting and then adjust incrementally, either up or down, until you find the setting that provides the best performance.
Was this article helpful?