Pendo Walkthrough
- 3 Minutes to read
- Print
- DarkLight
- PDF
Pendo Walkthrough
- 3 Minutes to read
- Print
- DarkLight
- PDF
Article summary
Did you find this summary helpful?
Thank you for your feedback!
Pendo API version 1 is currently supported
This page provides a general description of Pendo and its capabilities.
Introduction
Pendo is a data analytics tool designed to assist software companies in creating products that are appealing to customers.
Connection
An Integration Key is used to authenticate requests. After the subscription is activated, admins can create and manage those keys.
Reports
Customization
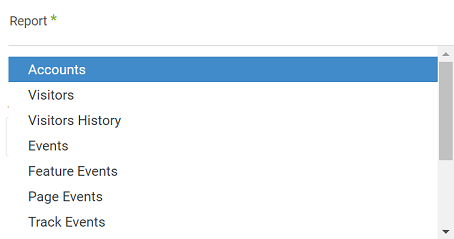
You can create a custom report and select a specific report to pull from the Pendo API after you've established a connection.
The following figure provides an overview of the various custom reports:
Filters
Different parameters can be used to filter some of the reports (although only one parameter can be selected at a time):

After selecting a filter, press on Click To Select and wait for the necessary data to be fetched, in a drop-down box. Choose all of the IDs for which you require data from:

Note
Leaving this field empty has the same effect as choosing All
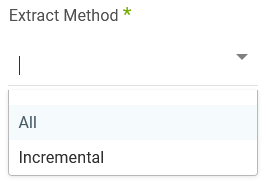
Incremental Function
Some of the reports are incremental (pulled by time spans), hence one of the following extract methods may be used:
If the incremental option is selected, the following date rage options will be available (as seen in the next figure):
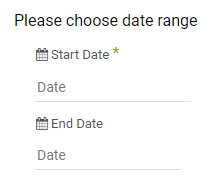
Note
- Start date is mandatory.
- Data can be retrieved for the date range specified between the start and finish dates.
- If you leave the end date blank, the data will be pulled at the current time of the river's run.
- Dates timezone : UTC time.
- Use the Last Days Back For Each Run option to gather data from a specified number of days prior to the selected start date.retrete
Now You may divide the calls into separate chunks to make the request process easier:
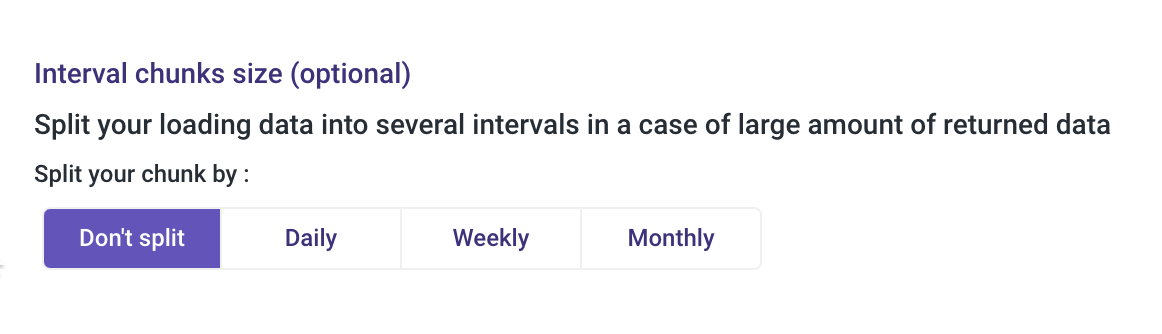
When Should You Use It?
Use divide by chunks when the data you're pulling is large, especially if you're hitting sizing or timeout limits.
Visitors History
This report may only be requested for a single ID, making it impractical to obtain statistics for a large number of visitors. This implies that IDs must be chosen because collecting all visitors would take a long time.
Furthermore, the requests are limited to the last 180 days and are made for a single 24-hour period beginning on a specific day. To obtain a period of time, select a beginning and ending date, and a separate request will be sent automatically for each day in between.
Details
The API requests are performed by either a POST method using the endpoint https://app.pendo.io/api/v1/aggregation and a specific MongoDB-like query JSON body, or a GET method using a specific URI for https://app.pendo.io.
| Report | Filters | Incremental |
|---|---|---|
| Accounts | Account ID | No |
| Visitors | Account ID, Visitor ID | No |
| Visitors History | Visitor ID | Yes |
| Events | Account ID, Visitor ID | Yes |
| Feature Events | Account ID, Feature ID, Visitor ID | Yes |
| Page Events | Account ID, Page ID, Visitor ID | Yes |
| Track Events | Account ID, Track Type, Visitor ID | Yes |
| Features | - | No |
| Guides | - | No |
| Pages | - | No |
| Resports | - | No |
| Track Types | - | No |
Links to Pendo's official documentation
Hard Delete Feature
Microsoft-SQL Change Tracking with Snowflake target rivers now features the new 'Include Deleted Rows' functionality!
To activate "Include Deleted Rows", follow these steps:
In Microsoft SQL Server river, click on Schema.
Choose a dedicated Source Table.
Select Table settings.
Check Initiate Migration, and then Overwrite Table Migration to match the existing database in SQL Server with the Snowflake table (optional).
NOTE:
Skip this step if you want to keep working with the data in Snowflake that has been marked as deleted.
After the first Initiate Migration is completed, The checkbox is de-checked.
- Click Include Deleted Rows.
NOTE:
If 'Include Deleted Rows' is selected, the river will retrieve all changes from the Change Tracking table, including deleted rows.
It also adds a '__DELETED' column to indicate if the row was deleted or not from the source table.
- Enable Remove Deleted Rows (optional).
NOTE:
This option is permitted only by selecting 'Upsert - Merge' in Loading Mode, as seen here:
WARNING:
By enabling 'Remove Deleted Rows', all rows having the status 'True' (Delete) will be eliminated and removed from Snowflake target table.
Click Run.
Connect to Snowflake.
Was this article helpful?