PostgreSQL Walkthrough
- 1 Minute to read
- Print
- DarkLight
- PDF
PostgreSQL Walkthrough
- 1 Minute to read
- Print
- DarkLight
- PDF
Article summary
Did you find this summary helpful?
Thank you for your feedback!
Introduction
This document aims to guide users through the process of creating a PostgreSQL instance, and performing basic database operations.
How to Work with PostgreSQL?
Step 1: Establish a Connection
Make sure you possess appropriate credentials for establishing a connection with a PostgreSQL database server.
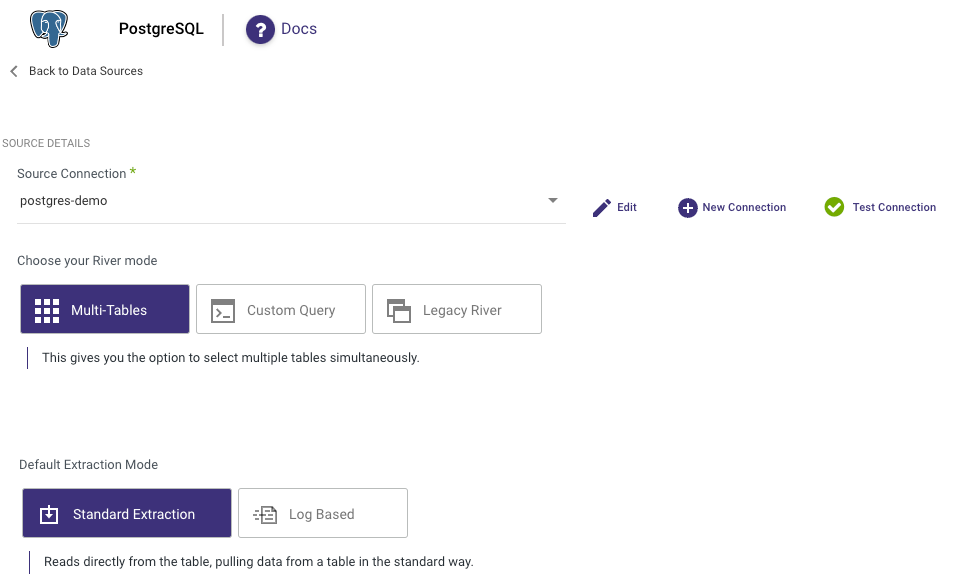
Step 2: Choose the River Mode
Once you have successfully established a connection to PostgreSQL, select the River mode to load data into a Target. There are 3 available options for you to choose from:
Please Note:
By clicking on the highlighted modes below, you will be taken to a relevant page that offers a comprehensive explanation and presents a Product Tour example showcasing the available features in PostgreSQL.
- Multi-Tables : Simultaneously load multiple tables from PostgreSQL to your desired Target.
Standard Extraction - This River mode maps, transforms, and loads data from multiple tables into a unified schema. It uses SQL queries for transformations and can be scheduled or manually triggered.
Change Data Capture (CDC) - This mode monitors Source database logs, capturing and transforming changes in real-time. This ensures minimal data loss and low latency transfer when loading the transformed data into the target database, keeping it in sync with the Source.
Please Note:
- TimescaleDB is an open-source database specifically crafted to enhance the scalability of SQL for time-series data.
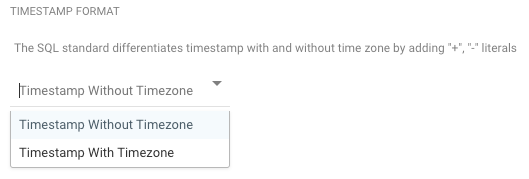
It's important to note that, at this moment, Rivery does not provide support for Timescale. - For both Standard extraction and CDC, the default TIMESTAMP format is TIMESTAMP without a Timezone. Depending on your requirements, you have the flexibility to opt for TIMESTAMP with a Timezone offset in UTC.
This option can be found in the Table Settings tab under "TIMESTAMP Format".
- Custom Query : Create a customized query and import it into your designated Target.
- Legacy River: Select a sole Source table for loading into a Target.
Step 3: Run the River
Once you have successfully configured the River mode, selected the extraction method, and set up the scheduling, you are now ready to initiate the River and start its operation.
Partitioned Tables in PostgreSQL
Rivery supports PostgreSQL partitioned tables in both Standard Extraction and Change Data Capture (CDC).
Was this article helpful?