- 1 Minute to read
- Print
- DarkLight
- PDF
Snowflake as a Source Walkthrough
- 1 Minute to read
- Print
- DarkLight
- PDF
Introduction
This document provides a comprehensive walkthrough in Snowflake as a Source, starting with establishing a new River within Rivery, then proceeding to the selection of extraction modes and the administration of your data storage.
By the end of this guide, you will have a clear understanding of how to effectively harness Rivery's capabilities to extract data from Snowflake and seamlessly merge it into your data ecosystem.
Prerequisite
Please ensure the creation of a correct Connection for Snowflake Source within Rivery.
River Modes
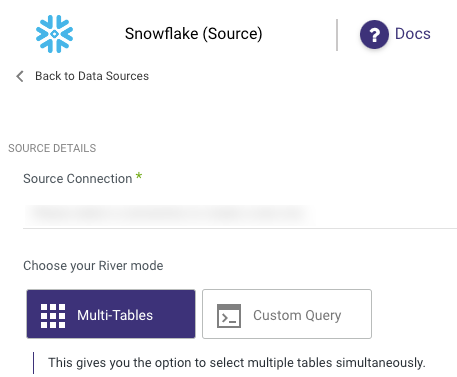
When using Snowflake as a Source, you have the choice to select between two River modes:
- Multi-Tables (Standard Extraction)
- Custom Query.

Multi-Tables (Standard Extraction)
This mode in Rivery combines data from various tables into a single schema before transferring it to the destination. It establishes table relationships to ensure consistent linking and loading. Rivery's Multi-Tables River mode mainly employs SQL queries for transformations, with scheduling or manual triggering options.
Custom Incremental Load for Snowflake Source
You can run incremental loads on any column with incremental values in Snowflake.
Note: This feature is available in multi-table mode only.
Step-by-Step:
- Go to your table settings in schema tab.
- In the incremental load section, enter the column name you want to use.
- Select your incremental method (Running Number, Timestamp, or Float).
- Set your start and end values.
- Save and run your river.
To obtain further details about using Multi-Tables (Standard Extraction), kindly refer to our documentation on Databases River Modes.
Custom Query
Rivery's Custom Query River mode empowers users to input data into the platform via personalized SQL queries, offering utmost control over data loading and transformations. Users can specify data and transformations precisely, using SQL, pulling from databases or data warehouses like Snowflake. Data is then scheduled for automatic or on-demand loading into Rivery, ensuring real-time data access.
Please Note:
When opting for the Incremental Extract mode, it's crucial to recognize that you have a choice of only 2 options: Datetime and Running number.
To obtain further details about using Custom Query, kindly refer to our documentation on Databases River Modes.

