X (Twitter) Walkthrough
- 3 Minutes to read
- Print
- DarkLight
- PDF
X (Twitter) Walkthrough
- 3 Minutes to read
- Print
- DarkLight
- PDF
Article summary
Did you find this summary helpful?
Thank you for your feedback!
Introduction
In this document, we will focus on the procedure for pulling data from X, offering detailed instructions for configuring two distinct reports: the Statistics Report and the Entity Report.
Connection
To connect X with your destination, follow our step-by-step tutorial.
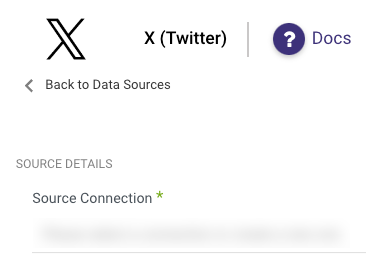
Choose a Source connection after you've created a connection, as seen here:
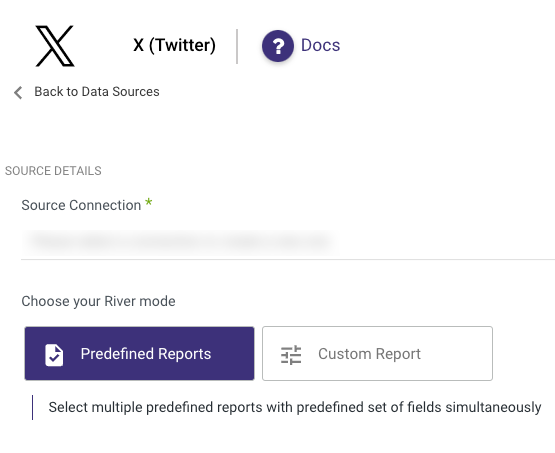
Predefined Reports
Rivery provides a convenient entry point and recommended approach for accessing a range of predefined reports for your use. Each report includes a concise data description, a list of customizable fields (if applicable), and the schema mapping.
Since these reports follow a standardized format, specific fields are restricted and can only be accessed through Custom Reports.
Custom Reports
Begin building your X River by choosing your preferred report type, either "Statistics" or "Entity."
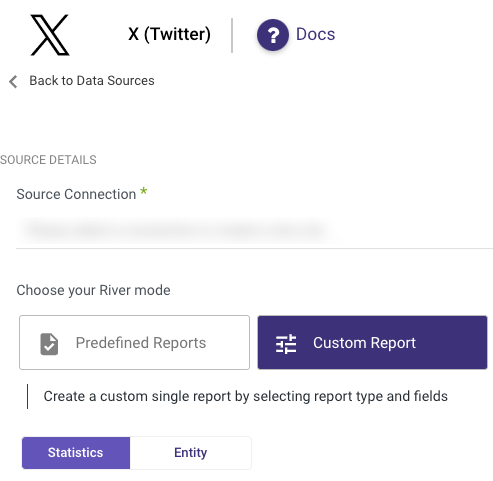
Statistics Report
Select the Accounts for the report.
Choose the Entity to pull, metric group, and placements. The available entities are:
Define report filters based on the selected entity.
Specify the time period of the report.
Please Note:
The End date can be left empty to pull data until the current time.
The Start and End dates will be automatically updated after each run, facilitating continuous data extraction.
The Start Date won't be advanced if a River run is unsuccessful.
Optionally, click 'More Options' to advance the start date even if the River run is unsuccessful (Not recommended).Set the time zone offset if the end date is empty.
Use 'Days back' to pull data from a specified number of days before the start date.
Choose the breakdown granularity to group data either by Hour or Day.
If dealing with a substantial amount of data, consider dividing the loading process into intervals using Interval chunks size (optional).
Optionally, enable a column to identify deleted results by checking the "Include deleted results" checkbox.
To bypass errors for specific accounts, check the "Ignore errors for accounts" checkbox and list the relevant accounts.
Save your River configuration.
Execute the River to fetch data from X based on the specified parameters.
Additional Notes:
Maximum time range for non-segmented queries is 90 days, and for segmented queries, it is 45 days.
Statistics and Campaigns rows do not appear if there is no data on the chosen day.
Entity Report
- Choose the Entity for retrieval. Available entities are:
Select the accounts associated with the chosen entity.
Indicate whether to trim users:
- When set to 'True,' each Tweet returned will include only the author's numerical ID in the user object.
- When set to 'False,' the complete user object is returned.
Enable the Normalize option to standardize result structures for easy table import.
Pick the Extract Method.
For Incremental Extraction, define the time period.
Please Note:
The End date can be left empty to pull data until the current time.
The Start and End dates will be automatically updated after each run, facilitating continuous data extraction.
The Start Date won't be advanced if a River run is unsuccessful.
Optionally, click 'More Options' to advance the start date even if the River run is unsuccessful (Not recommended).Set the time zone offset if the end date is empty.
- Use 'Days back' to pull data from a specified number of days before the start date.
Optionally, include a column to flag deleted results by checking the "Include deleted results" checkbox.
If you want to bypass errors for specific accounts, check the "Ignore errors for accounts" checkbox and specify the relevant accounts.
Save your River configuration.
Execute the River to retrieve data from X based on the specified parameters.
Rate Limitation
If an endpoint enforces a rate limit of 900 requests per 15 minutes, you can make up to 900 requests within any 15-minute window.
The rate limits depend on the authentication method you're using. For instance, OAuth 1.0a User Context grants one limit per time frame for each set of users' Access Tokens, whereas OAuth 2.0 Bearer Token assigns a distinct limit per time frame for your app's requests. Going beyond these limits triggers an error response. Continue reading for further insights and strategies to prevent hitting rate limits.
Was this article helpful?